Anakron Miniatures: Cartomancer – Review

Anakron Miniatures is a small French miniatures company. Why small? The’ve got only ten products in their range, but it is the quality that matters. You can easily find them on the Internet under: www.anakron.fr .

The subject of today’s review is their latest release – The Cartomancer.

Anakron Miniatures Review (12)

I got his one since I am a great fan of Confrontation game and especially Cadwallon. Before going bankrupt, Rackahm didn’t manage to sculpt all the miniatures for created characters. I am planning use this one for the Guild of Cartomancers, as a Cartomancer Mage (card with statistics).

Although the miniature is in Rackham style and suits perfectly Cadallon’s world – the concept is original and was done by Nico Kopf.

anakron-miniatures-cartomancer-review-2

Package

I have chosen the cheapest option for shipping and the miniature came in an envelope with bubble foam inside.

Anakron Miniatures Review (10)

I was amazed that such a big envelop came, since I have just ordered one miniature. But as I have opened it , there were many different extras sent (post cards, visit cards).

Anakron Miniatures Review (9)

Of course there also came the miniature with a numbered lithography.

Anakron Miniatures Review (8)

That’s right, at first you might think that it is a limited miniature, but it is not. The description on Anakron’s web page clears it:

A numbered lithography of the concept, drawn by Nico KOPF, offered for the first 100 copies!!

Good that I bought the miniature for it’s coolness and not for being limited 🙂

Unboxing

The Cartomacer is a 30mm tall, resin casted miniature.  It came in a plastic blister without any foam inside. It might be a bit risky, but later you will see that the miniature came in good shape.

Anakron Miniatures Review (7)

It came in 5 parts – body, cloak, sword, right hand with a stick or mace and top of the hood. There also came a typical rounded base and a reference card with the illustration.

Anakron Miniatures Review (6)

Closer look

Here you have detailed pictures of all the parts. From my point of view there really isn’t much to write since this is almost a perfect miniature cast! It has no mold lines, no bubbles, no holes. Of course there are resin sticks especially on the weapons, but those very easy to remove. There is also no problem with fitting the parts together.

All the details from the concept art were very well visible and casted, even small chain on his left leg.

Anakron Miniatures Review (4)

Anakron Miniatures Review (3)

Anakron Miniatures Review (2)

Anakron Miniatures Review (1)

Conclusion

I can really recommend The Cartomancer from Anakron Miniatures. Not only for Cadwallon fans, but also other gamers or painters. Casting quality is just great. Sculpt is original but suits known system well. Price isn’t high and it costs just 10,00€.

If I could make any more wishes, then it would be the base – a fragment of Cadawallon’s streets  would be a nice addition.

score: 8,5 / 10

sea.man

Unboxing Sedition Wars: Battle for Alabaster – review

Mike McVey, (well-known game designer and miniatures sculptor (he was hired as a professional miniatures painter for Games Workshop Ltd. in 1987 and then joined Privateer Press in around 1995. He left Privateer Press in 2007 and launched his own company: Studio McVey with his wife), joined by Cool Mini or Not, launched last year a Kickstarter Campaign to produce a brand new board game, Sedition Wars: Battle for Alabaster, that would use minis sculpted by himself.

Sedition Wars: Battle for Alabaster - review

The campaign was successfully founded on June 30, 2012 and packages started to be shipped all around the world few times ago.

As you have already guessed I took part to this Kickstarter Campaign and I received my package on Friday and you’ll find my unboxing following.

Sedition Wars: Battle for Alabaster unboxed

Once I open the box, here is how it was packed. Game and accessories were just slipped inside the box and there were a bit of foam around to avoid hit being moved to much inside the box. I must admit that even though nothing was damaged inside the box (my game and the accessories were in perfect shape), the protection was definitely was too little.

Sedition Wars: Battle for Alabaster - review
Unboxing Sedition Wars: Battle for Alabaster

Sedition Wars: Battle for Alabaster - review

Once I had removed all the items from the box, here is how much foam was inside to protect everything:

Sedition Wars: Battle for Alabaster - review
Enough foam to protect everything?

 Once all is set, here is exactly what was in the box: the game, a nice signed litho, the extra map pack and some extra minis.

Sedition Wars: Battle for Alabaster - review
Contents of the box

Sedition Wars – game box contents

I’ll start by opening the main game box. I must admit that the quality of the packaging is pretty impressive.

Once the top cover is removed you can have a look at the tiles (tokens is the first one) and then you got access to the minis.

Sedition Wars: Battle for Alabaster - review
Game box opened
Sedition Wars: Battle for Alabaster - review
Under the tokens and tiles sheet

Since I wasn’t sure that everything was there, I checked the whole box

As I guessed, nothing was hidden. 🙂

Sedition Wars: Battle for Alabaster - review
No hidden surprises 😉

 Bottom cover gives you details of what’s inside the box.

Sedition Wars: Battle for Alabaster - review
Bottom of the game box

 Back to the tiles. They’re just top notch regarding the print. Very detailed, the grid are clearly visible but not overwhelming the details.

Sedition Wars: Battle for Alabaster - review
Great printing quality
Sedition Wars: Battle for Alabaster - review
Clearly visible but not overwhelming grid

There are 5 double-sided tiles. The extra pack that was available contains the exact same number of tiles/tokens and they are exactly the same.

Sedition Wars: Battle for Alabaster - review
5 double-sided tiles
Sedition Wars: Battle for Alabaster - review
Reverse sides

Rulebook was slipped in the middle of the tiles. A4 format, full colour, glossy paper. Like the tiles, printing quality is just impressive. Rules are very detailed, with schematics and everything. Paragraphs are not compressed on the pages which doesn’t make the reading impossible.

Sedition Wars: Battle for Alabaster - review
Sedition Wars rulebook

Sedition Wars: Battle for Alabaster - review

Sedition Wars: Battle for Alabaster - review

Sedition Wars: Battle for Alabaster - review

Sedition Wars: Battle for Alabaster - review

Going with the rulebook, come the characters cards. They’re like the rest made in nice quality paper and printing is very good. Format is standard one so they can be protected with usual card sleeves, which will be required as the characters wounds counter are on the cards, so unless you want to mark for life your cards, go for the sleeves. 🙂 Also, cards are double-sided so you might consider getting see-through sleeves 🙂

Sedition Wars: Battle for Alabaster - review
Character cards

Sedition Wars: Battle for Alabaster miniatures, bases, tokens

As noticed above, minis were packed in little bags with bases and some more tokens. You’ll find complete “assembly” tutorials on the blog of the game so I won’t talk about that.

Sedition Wars: Battle for Alabaster - review
Miniatures, bases, tokens…

Tokens

 Tokens bagged with the minis are tokens for the Strains. Nothing special

Sedition Wars: Battle for Alabaster - review

Bases

Bases are full plastic, they’re 25mm round with straight edges, though, when you flip those, there are 2 little holes.

Sedition Wars: Battle for Alabaster - review
Holes used for attaching markers under bases

Those holes are used to fix markers (shield (blue) and contamination (red)).

Sedition Wars: Battle for Alabaster - review
Markers attached

Sedition Wars: Battle for Alabaster - review

As you can see, you can fix lots of markers under a base. Though, when not a lot are under the base, it will probably be hard to notice them during game play.

Sedition Wars: Battle for Alabaster - review
Stacked markers
Sedition Wars: Battle for Alabaster - review
Will they hold?

I was afraid that after a bit of use time, the markers might fall when the minis were lifted, and I didn’t have to wait a lot to prove the theory. I awkwardly dropped the bases after I took the photo and the markers that were fixed under the base spread apart.

Sedition Wars: Battle for Alabaster - review
Oops, I dropped it!

It’s not that important as they split as the base fell down (and there were lots of markers under it which might explains why the split as well), but it might happen once the markers will have been used a lot.

As for the bases themselves, they come in two sizes: 25mm and 50mm. Enough are provided to base all the minis.

Sedition Wars: Battle for Alabaster - review
Bases

As for the choice, all 50 mm are the same, and the 25 mm comes in 6 different versions.

Sedition Wars: Battle for Alabaster - review
6 designs of 25mm bases

And now, onto the minis. As I already said earlier, I won’t talk nor show about the assembly of those. You’ll find the tutorials on the blog of the game. I’ll just show you what’s inside the box and talk about the quality of those minis.

Miniatures

Minis are scattered in multiple bags, though even if some parts for the Vanguards are placed into the Strains (and vice versa), faction mostly come into separate bags.

Sedition Wars: Battle for Alabaster - review
Sedition Wars Vanguards
Sedition Wars: Battle for Alabaster - review
Sedition Wars Strains

As you can see, there are lots of minis for the Strains and less for the Vanguards.

Once I had them separated on the table, I could have a better look at them:

Sedition Wars: Battle for Alabaster - review
Better look at the miniatures

Woua! I wasn’t expecting that at all. I had seen greens and previews of the minis, but I couldn’t honestly think that the minis delivered inside the games would be of that impressive quality. They’re made in hard plastic (not cheap one that you usually find in board games that comes with that amount of minis), the details are impressively crisps and there were simply no bubbles or miscasts at all. It’s just breathtaking…

…but, cause of course there is a but, otherwise it wouldn’t be funny, perfect cast comes at a price. All of the minis (even the ones from the lightout campaign) come with insane amount of insanely placed mold lines and flash (sprue residues).

Sedition Wars: Battle for Alabaster - review
Mold lines
Sedition Wars: Battle for Alabaster - review
Mold lines and flash
Sedition Wars: Battle for Alabaster - review
Flash
Sedition Wars: Battle for Alabaster - review
Mold lines and flash

Sadly, the amount of time that’ll be required to prepare all the minis (cleaning, assembling) might result into a motivation killer before game will be properly playable.

Extras

When I took part of the Kickstarter Campaign, I chose to pledge enough to get some more additions to the board game like the terrains, the lightout campaign and some extra crews and armored suits. Right now, only the lightout campaign minis were dispatched, rest of Biohazard pack (what peeps where getting when they were pledging at least 100 US Dollars) and the extras should arrive later during March/April, and I must admit that I’m really impatient about it.

For those who wonder, lightout campaign minis, they do glow in the dark:

Sedition Wars: Battle for Alabaster - review
They glow in the dark!

Conclusion

As a conclusion what can I say about this Kickstarter Campaign and about the Sedition Wars: Battle for Alabaster package? One word: Insane!

The amount of stuff of such an impressive quality inside a box is just insane. Tiles are just superb, minis are well sculpted and details are crisps, rulebook is clear and easy to understand.

Though, I must admit that even though the contents of the package was insane, there are a few things that were missing and that could have been easily fixed:

First of all, the initial package. Protection wasn’t good enough, contents could have been easily damaged. Then, beside a global listing, there were nothing clearly detailing what was inside the additional box. Yes, mails were sent as updates during the Kickstarter Campaign, but not everyone has the possibility to unpack in front of a screen, so a little list wouldn’t have harmed. Then a little numeration of the bags would have been appreciated. Like the listing, they’ve been showed on the blog, but would have been helpful to spread the minis together.

Final warning

And at last, something that might be important.

Sedition Wars: Battle for Alabaster is sold as a board game with lots of minis, which it is, but considering the huge amount of time that is required to assemble the minis, it might be a demotivation thing. For instance, Space Hulk from Games Workshop had a lot of minis too, though, assembly was pretty easy once all minis were separated from the sprues and glues wasn’t necessary while here, not only you’ll need to clean the minis because some part won’t fit with others, but you’ll also need glue to assemble them. So unless you’re a miniature collector that doesn’t mind spending a lot of time preparing minis to play with, then either stay away from the game or go play with someone that already built the minis. 🙂

Hangar 18 Miniatures photo backgrounds – review

Many of you surely wondered what kind of photographic backdrops we’ve been using recently. Searching the internet might have provided you the answer already, but now we’ve got more than that. This Hangar 18 Miniatures photo backgrounds review sheds some more light on this subject, so in case you are wondering if these backgrounds would be of any use to you – read on.

Search for the perfect photo backdrop

We’ve been using quite a wide selection of photo backgrounds, ranging from digitally painted grunge through traditional blue-to-white gradients to plain white, black, gray or blue paper. Some of them did their job better, some did worse. But as some of you may know, I took many of the pictures presented in our galleries, and photography is also one of the aspects I enjoy in this hobby. So these experiments were a part of the hobby to me, and I must say I enjoyed them.

Still I was not sure that I got it all right, that we’ve been doing it the right way and not missing something.
The pains or doubts I had usually could be classified as:

  • backgrounds too distracting attention from the models,
  • backgrounds too plain and uninteresting,
  • texture too rough and thus creating “noise” in perception,
  • backgrounds getting damaged and worn too quickly,
  • backgrounds being too glossy or looking too faded,
  • color of the background unsuitable or even clashing with the model,
  • size of backgrounds being insufficient.

Of course, one can always print a new backdrop and not worry too much about damage to a printed sheet of paper. But having a tested and tried backdrop that is durable to at least some reasonable degree is always a nice touch that makes taking photos easier and more comfortable.

Then I was offered a chance to review Hangar 18 Miniatures‘ photo backgrounds. What a treat!

Hangar 18 Miniatures photo backgrounds

Honestly speaking for a long time I was not aware that Hangar 18 Miniatures existed at all, and later I didn’t realize they made any photo backgrounds. So when I got the chance to test their products it was like waiting to play with a new and unexpected toy.

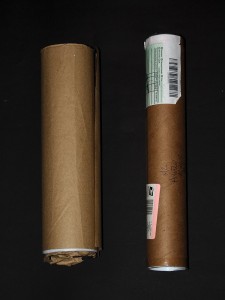
I had completely no idea about the kind of material they were made of, the quality of printing, texture of the material, durability and such. So when the tube with photo backgrounds arrived, I impatiently unpacked it.

Hangar 18 Miniatures photo backgrounds review

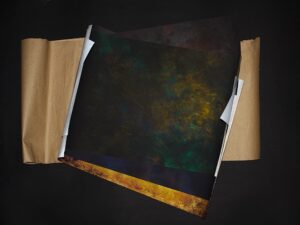
The backgrounds were rolled together and protected with a sheet of paper:

Hangar 18 Miniatures photo backgrounds review

So what was inside?

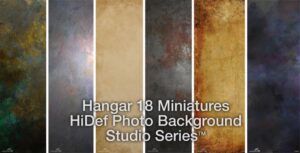
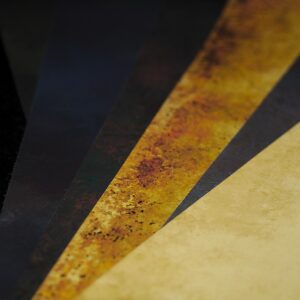
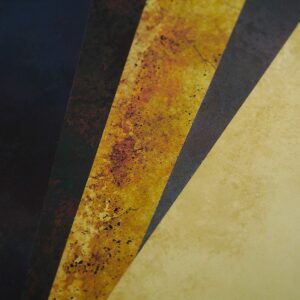
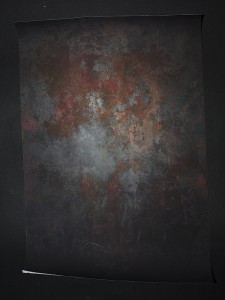
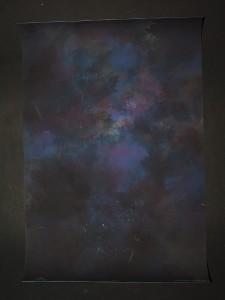
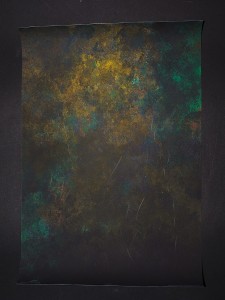
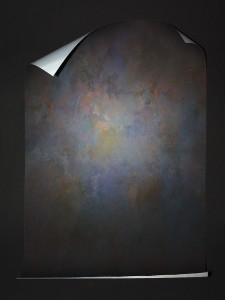
What I received was a HiDef Background Studio Series – 6 Prints Set. It included six photo backgrounds in A3 size (11″ x 17″). Each of them comes with a different print:

  • Green Gold
  • Soft Lavender
  • Grunge
  • Antique Leather
  • Antique Parchment
  • Midnight

That’s what they look like on the official photos (taken from the Hangar 18 Miniatures website):

Hangar 18 Miniatures photo backgrounds review
HiDef Background Studio Series – 6 Prints Set
Hangar 18 Miniatures photo backgrounds review
Green Gold
Hangar 18 Miniatures photo backgrounds review
Soft Lavender
Hangar 18 Miniatures photo backgrounds review
Grunge
Hangar 18 Miniatures photo backgrounds review
Antique Leather
Hangar 18 Miniatures photo backgrounds review
Antique Parchment
Hangar 18 Miniatures photo backgrounds review
Midnight

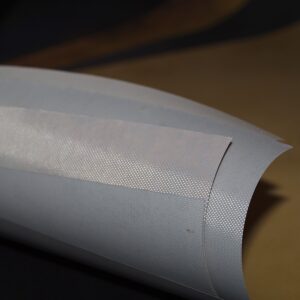
These backgrounds are printed on flexible fabric, which allows to shape them, easily adjust them to your photo setup, and makes them very resistant to wrinkling. They’re nearly no-glare, so even in direct light conditions they look good on photos.

Hangar 18 Miniatures photo backgrounds review
No glare!

This also has another effect though. The texture of the fabric is still visible on macro photos (that photos of miniatures usually are). Some people may like it, yet I would prefer the texture of fabric to be less defined.

Hangar 18 Miniatures photo backgrounds review
The material those backgrounds are made of
Hangar 18 Miniatures photo backgrounds review
Click on the photo until it zooms to full size to see the texture

Of course with macrophotography you usually get pretty small depth of field, so it’s very easy to get the texture nicely blurred and unnoticeable in the background behind the model, but the part directly around the model’s base will usually be sharp and in focus, so the texture will be very sharp there, too. It will show on the photos later in the review, so read on…

How I used them

There are many ways to use the backgrounds and most photographers will find their own ways to do it, so I will not go into too much detail here. After all the article is not about the way I work but about the backgrounds. One can easily attach them to a vertical surface with some sticky tape, paper clips or – what I usually do – with some blutack/patafix.

Thanks to the matte surface these backgrounds can be easily used in natural daylight and in artificial light coming from lamps. And even if the light is not diffused, there is no glare on the backgrounds. Well done!

Just take a look at these photos to see how we used these backgrounds:

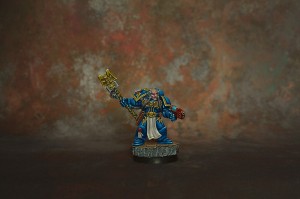
Hangar 18 Miniatures photo backgrounds review
Wazdakka Gutsmek by Rzymek
Hangar 18 Miniatures photo backgrounds review
Ethernia by Ańa
Hangar 18 Miniatures photo backgrounds review
Marneus Calgar by JerzyK
Hangar 18 Miniatures photo backgrounds review
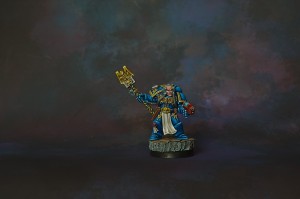
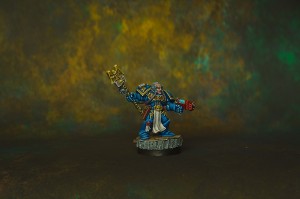
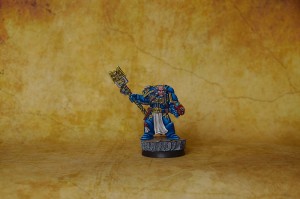
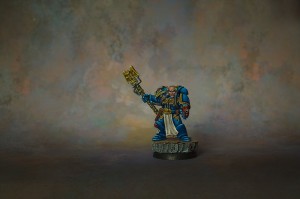
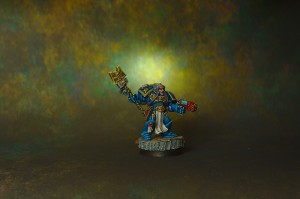
Librarian by JerzyK
Hangar 18 Miniatures photo backgrounds review
Necron Barge photographed for a friend

The size is pretty versatile. It allows to take photos not only of small miniatures but even of large models and whole units of smaller miniatures. Of course the size is not sufficient for whole armies or forces consisting of multiple units, but I read that larger versions of these backdrops were already released (A2 size), so maybe we will be able to take photos of whole forces on these backgrounds soon?

Hangar 18 Miniatures photo backgrounds review
Whole unit on the background…
Hangar 18 Miniatures photo backgrounds review
.. and yet another unit.
Hangar 18 Miniatures photo backgrounds review
And some Necrons, too!

While the size allows to take photos even of larger subjects, it is still compact enough to fit into many light tents or on photo tables and booths. So if you want a versatile and universal size of a background the regular A3 size may be the way to go anyway.

Durability

Now this was one of the points which are pretty important to me. I don’t want to buy new backgrounds again any day soon, so knowing that my backgrounds will not be scratched, bent or wrinked after a few weeks or months of use may be a tipping point for me. This was always a problem for me with my paper backgrounds, and I had pretty high hopes here.

Let me add that I can give my backgrounds pretty tough time when I get to start a photo session. I take pretty many photos of our miniatures even if only a few of them are published. This often includes some exposure variations, additional takes to be sure that I have everything sharp, plus some additional angles, etc. So when you take like 50-100 photos per photo session, you may expect that your background will be put to a test.

Hangar 18 Miniatures photo backgrounds review
Rasputina by Ańa
Hangar 18 Miniatures photo backgrounds review
Ghazkull Thraka by Benathai
Hangar 18 Miniatures photo backgrounds review
Odila by Ańa
Hangar 18 Miniatures photo backgrounds review
Genestealer photographed for a friend
Hangar 18 Miniatures photo backgrounds review
Miss Ticklenott by Slawol

So how did Hangar 18 Miniatures photo backgrounds do in this test? Well, very well and not so well.

There was no wrinkling, no permanent bending. The flexible fabric is really good material for a photo background. But bear in mind that the miniatures will be placed on the surface for most of the time, they will be pushed around, moved, rotated, and so on. So won’t this scratch the surface? Unfortunately it will…

These are photos of my Hangar 18 Miniatures photo backgrounds after like two months of use. Some were used more frequently, some not so often, but you can see some wear marks on the surfaces.

I think you can easily recognize the backgrounds that I use most frequently… 😉

Hangar 18 Miniatures photo backgrounds review
See the scratches?
Hangar 18 Miniatures photo backgrounds review
Some scratches again…
Hangar 18 Miniatures photo backgrounds review
See where I placed my minis?
Hangar 18 Miniatures photo backgrounds review
This one still looks OK

Now these two will be the least frequently used backdrops, so they’re the least scratched ones. But they’re also the lightest-colored of them all, so those scratches wouldn’t be as visible as on darker backgrounds.

Hangar 18 Miniatures photo backgrounds review
Any scratches here?
Hangar 18 Miniatures photo backgrounds review
Looks like brand new!

So what do I think? Well, I won’t pretend they’re completely scratch resistant. They managed to avoid any other kind of damage, except for those scratches. Now let’s make one point clear: these scratches don’t mean the paint rubbed off from the backgrounds! No, they are only the spots where bases of my miniatures rubbed against the fabric and the backgrounds lost some of their dullness and became slightly more shiny.

So what you saw on the photos and what looked as if the color wore off, is only more light reflected from the backgrounds which became a kind of “polished” there. Still I consider it some problem, as I prefer my backgrounds to keep their no-glare finish, but I understand that with my “heavy duty” approach every background will be put to a hard test!

I still haven’t found a way to remove the scratches. I tried rubbing the backgrounds with a damp cloth, washing them, and a few other tricks, but none of them worked. Maybe giving them a spray coat of flat varnish will do the trick? 😉

One miniature, many backgrounds!

Having a choice of these Hangar 18 Miniatures photo backgrounds allows me to choose a suitable background for most miniatures quite easily and fast. By taking a look at these photos you can see results of my little experiment: how the same model may look on different backgrounds.

I took photos of most of them with and without a miniature, so you can see what the background looks like when the background is in focus (so you can see the details of texture and print more precisely) and when it is intentionally out of focus (with focus being on the miniature, so the background is slightly blurred in a way that doesn’t distract from the model).

Hangar 18 Miniatures photo backgrounds review
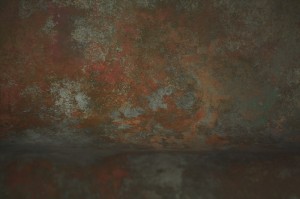
Grunge

Hangar 18 Miniatures photo backgrounds review

Hangar 18 Miniatures photo backgrounds review
Midnight

Hangar 18 Miniatures photo backgrounds review

Hangar 18 Miniatures photo backgrounds review
Green Gold

Hangar 18 Miniatures photo backgrounds review

Hangar 18 Miniatures photo backgrounds review
Antique Leather

Hangar 18 Miniatures photo backgrounds review

Hangar 18 Miniatures photo backgrounds review
Soft Lavender

Hangar 18 Miniatures photo backgrounds review

Why there are no photos of the Antique Parchment background here? Wait, and you will see them in a moment…

We’re going to show you another cool thing that can be pulled off with these backgrounds!

The backlighting trick

You might want to create a special focal point to attract attention to your miniature. Now you can do it without any photoshopping, just get yourself a little lamp and put it behind the background.

This is what the background looks like in normal lighting conditions – pretty much evenly lit:

Hangar 18 Miniatures photo backgrounds review
Backlight off

But when you turn that backlight on, you may create the additional focus!

Hangar 18 Miniatures photo backgrounds review
Backlight on!

With some adjustments to the position, distance, power and difussion of that backlight, you may achieve excellent results with no additional photo manipulation other than simple cropping!

Of course you may try it with every Hangar 18 Miniatures photo background, but you will notice that with the lightest ones…

Hangar 18 Miniatures photo backgrounds review
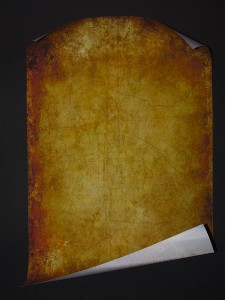
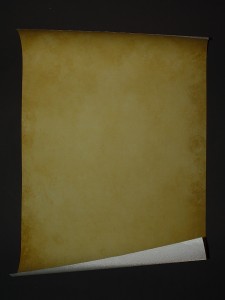
Antique Parchment

… effects are much less spectacular.

Hangar 18 Miniatures photo backgrounds review
Backlight on?

Nothing should discourage you from experimenting a bit with various lighting setups, including backlights. My suggestion is to diffuse the backlight a bit so the shape of your light (lamp/light bulb) is not so obviously and intrusively visible. If you don’t have a special diffuser, you may use a piece of milky plastic or even tissue.

Verdict?

Would you like to see more examples before the final judgement? Sure, we have quite a few of them. Just take a peek at the galleries of our works. There should be many photos taken with these backgrounds. Check Ana’s, JerzyK’s, Rzymek’s, Slawol’s, Benathai’s and Rentall’s galleries in particular. They should have the most examples of such photos. I told you I wasn’t all that easy on these backgrounds. 😛

Hangar 18 Miniatures photo backgrounds review
Typhus by Slawol
Hangar 18 Miniatures photo backgrounds review
Nokjagerin by Ańa
Hangar 18 Miniatures photo backgrounds review
Librarian by JerzyK

And what do I think?

Well, these are some of the best (if not the best) photo backgrounds I have used so far. There was only one problem for me – these shiny scratches, but as you can see on the photos of miniatures taken with these backgrounds – it’s nothing terrible, but I would still want my perfect product to be free of this problem. Maybe I can find a solution for this issue and in this case I will update the review, but if you know how to deal with it – tell me in the comments, please.

Now that even A2-sized backgrounds are available (no, I didn’t manage to get them yet) these seem to be a good choice for any hobbyist. Even those of us who need to take photographs of warbands or smaller armies will find these backgrounds useful.

And what do you think about these backgrounds? Let us know, please, share your own tips and show us how you use these Hangar 18 Miniatures photo backgrounds for your hobby purposes. 🙂

Tabletop World Review

As most of you know, I’m working on my Salamanders Army but some times ago, I decided to go back working on my Vampire Counts army, so I took a little break from marines. Not because I was bored of the Space Marines, but I think it’s always nice to have a change in what you paint to avoid breakdowns in the motivation.

Anyway, like on many forums, we have in ours a little section used for presenting all new releases from various manufacturers and one of our members posted a nice scenery from Tabletop World that was perfect for my Vampire Counts, ie, the Graveyard. Though, Games Workshop released their a few times before and since it was definitely cheaper than Tabletop World one (but not of the same quality of course), I got myself three models of it. But later, Tabletop World proposed to buy only the mausoleum and the tombstones, so this was perfects additions for the Games Workshop graveyard.

What you get for your money?

This shop proposes a few models in their catalogue, all sceneries or accessories for your sceneries.

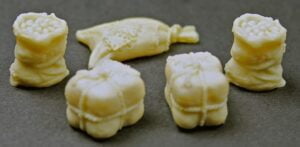
Since I already had a bunch of Games Workshop graveyard, I chose to go for a simple mausoleum and a complete set of tombstones and since I really like Mordheim, I went for a pack of Supplies as well that would have gone perfectly on the table. Each set respectively costs 23 EUR, 20 EUR and 10 EUR. The mausoleum is a single building but the tombstones and the supplies set contain 37 and 13 items.

So basically for 53 EUR, you’re getting a nice amount of items. Shipping cost isn’t that expensive. For everything delivered to France, it cost me 13 EUR.

Tabletop World Review (1)

Tabletop World Review (2)

Tabletop World Review (3)

Casting quality

This shop wasn’t unknown to me and I already knew they were proposing buildings of a really good quality.

As you’ll see on the pictures, those are really nicely detailed and I was pretty amazed by the precision of the details on every items. Regarding the cleaning, I had nothing to do, didn’t noticed a single mold line or a bubble. The casting is really excellent.

Tabletop World Review (4)

Tabletop World Review (5)

Tabletop World Review (6)

Tabletop World Review (7)

Tabletop World Review (8)

Tabletop World Review (9)

Tabletop World Review (10)

Tabletop World Review (11)

Tabletop World Review (12)

Tabletop World Review (13)

Tabletop World Review (14)

Tabletop World Review (15)

Tabletop World Review (16)

Tabletop World Review (17)

Tabletop World Review (18)

Even though I didn’t have any casting issue (bubbles or mold lines), and that resin is of an excellent quality (similar to the one Spartan is using for their minis (you’ll find a review of Dystopian War product on our pages soon enough), it’s a pretty hard resin and most items are packed altogether in small bags so one of the wheel fixation of the cart was broken (though, easily fixed by gluing it back).

Tabletop World Review (19)

The only downside I found (cause I had to find one) was that like on the issue I had on my Dystopian Wars miniatures, the bottom of one item wasn’t perfect and thus, it wasn’t completely flat (again, since resin is hard, it’ll easily be fixed by sanding the bottom of the item).

Tabletop World Review (20)

Summary

Tabletop World is clearly providing an excellent quality of sceneries that’ll for sure fit on most of your table. They’re well cast, super detailed and are still not that expensive for the quality and quantity you’re getting.

I was really surprised when I ordered, cause there is no registering option on the website, you’re adding stuff to your cart, proceed to checkout, check for the shipping cost. Then, once you got everything, you’re redirected to PayPal (if you chose to pay with this solution) and you get a confirmation page saying your order has been processed and that you’re going to be redirected on the main page. Since I was a little worried, I poked them by email, because I wasn’t sure that my order had ended properly.

They answered the next day (which is pretty fast in my opinion) and they said that it was their process and that I shouldn’t be worried and a few minutes later, I received a confirmation email with my order. Around 10 days later, I received my order which was nicely wrapped and protected. All items were wrapped in cardboard and were nicely placed in the middle of the box surrounded by newspaper.

In my opinion, Tabletop World aren’t perhaps providing the largest catalogue like other companies who sells sceneries for tabletop gaming like Ziterdes, though, they do provide, a nice customer service (which is pretty hard to get these days), and really good products with nice casting quality considering the price ratio. I just wish they could change their checkout process because it’s a bit weird, but beside that, I do hope they continue like this while proposing some more models to their catalogue.

Infamy Miniatures: Sherlock Holmes and Henrietta Jekyll review

My first contact with Infamy Miniatures took place at our miniature painting forum, where I saw the model of Henrietta Jekyll. Although the paintjob was impressive (oh, those flasks!), the model didn’t impress me that much. Not that I didn’t like it, not at all. I was just less than impressed.

Imagine how surprised I was when I noticed that Infamy Miniatures decided to send us two of their models for review, so we could see if our opinion remains unchanged after seeing them in person.

Infamy Miniatures is a company, whose flagship product is a range of steampunk models in 32mm scale. The company is actually an one-man-show, but James who runs it managed to get some “big names” to collaborate with him on the project. Thumbs up and respect for managing to achieve it!

Infamy Miniatures

Now that we know about the company, we can take a look at the models we received for review.

Infamy Miniatures – first impression

The miniatures are packed in plain white boxes. Nothing fancy or impressive, especially if you compare them to packaging of some more elaborately decorated products like Smart Max‘s Smog miniatures.

The positive thing is that the packaging does its job perfectly. The models are very safe, despite their fragility.

Infamy Miniatures review (1)

As you can see there are a few layers of foam inside…

Infamy Miniatures review (2)

 … and models, reference cards and bases are separated and protected by those sheets of foam. Not a single part was damaged in shipping, and I say it again – many elements are pretty thin and fine, and because they’re made of resin, they might be fragile. Despite this fact, everything arrived in perfect condition.

Infamy Miniatures: Sherlock Holmes review (3)

Infamy Miniatures: Henrietta Jekyll review (11)

So what do these miniatures look like? How good or how bad are they after a closer inspection? Let us see…

Infamy Miniatures: Sherlock Holmes – review

The first model that immediately caught my attention was Sherlock Holmes. I think everybody is familiar with the character of this famous detective created by Sir Arthur Conan Doyle. I must admit I always liked these stories, and have a pretty soft spot for all things Sherlock Holmes. 😉

What we get is Sherlock Holmes with a steampunk twist, and we must say the “twist” is easily visible. Just take a look at this concept  art. Cool, isn’t it? Sherlock has some kind of an engine or mechanism on his back providing power for various tools and mechanical arms attached to it. Some say the model looks a bit like Inspector Gadget, but to me it was closer to Fabius Bile from the Warhammer 40K universe.

infamy-miniatures-sherlock-holmes-review-14

 Now compare the concept art to the actual model. Pretty close, isn’t it?

It is not a very common thing that the miniature manages to capture such likeness to the original concept art, and in case of Infamy Miniatures‘ Sherlock Holmes the miniature is very close to the concept. Yeah, the arms used on this picture are not the same as used on the concept art, but you have a choice which arms to use and which to leave unused. But we’ll talk about it later.

infamy-miniatures-sherlock-holmes-review-13

 The official paintjob was done by Arsies, and when you see how finely detailed the model is, you will appreciate the quality of this paintjob.

Now take a look at the detail of the original sculpt (not a casting yet). See how many elements were used to build the mechanical engine on his back?

infamy-miniatures-sherlock-holmes-review-12

 And here’s a shot of the sculpt of the character. It shows how much care was taken to represent all the subtle details without resorting to exaggerating and oversizing them too much. But how does it all transfer to a resin copy of this sculpt?

infamy-miniatures-sherlock-holmes-review-11

Let’s see…

Infamy Miniatures: Sherlock Holmes unboxed

Here’s what you get in your box. The model consists of many parts: the main body, the engine, the hand, and 6 mechanical arms/tools. This adds up to 9 parts. There’s also a round 30mm round “lipped” base and a reference card with the illustration that I already presented and number of the miniature. You can judge the size of all elements by referring to the grid on the cutting map I used for my photos.

Infamy Miniatures: Sherlock Holmes review (4)

Assembling the model will require some work but you should enjoy it if you like working with multi-part models. The positive thing is that all parts fit together very well. Also you won’t need all 6 arms, as the model is prepared for 4 attachments to the backpack, which allows to customize the model a bit.

You should see it on the close-up pictures that the quality of this casting was very good. The resin used for the model was of excellent quality. I could spot no air bubbles, no casting problems here.

Sherlock Holmes review – a closer look

Take a look at the photos below to see how each part looks from different angles:

Infamy Miniatures: Sherlock Holmes review (5)

Infamy Miniatures: Sherlock Holmes review (6)

Infamy Miniatures: Sherlock Holmes review (7)

To summarize my impressions, let me say that I liked the concept, liked the sculpt and its faithfulness to the original concept, and loved the way it was turned into a miniature. I don’t mind assembling my models, so its multipart character was not a problem for me.

I will also show and write more about the quality below.

Infamy Miniatures: Henrietta Jekyll – review

Henrietta Jekyll was not a “canonical” character to me, but it was this miniature which was my first contact  with Infamy Miniatures, so I was really curious if it looks better or worse than I expected from the internet photos.

The photo I mentioned earlier presented the official paintjob by Derwish. You can see that the attention focus is on the bottles. They look so nice, that they steal the show from the rest of the miniature.

And here’s a photo of an unpainted sculpt by Automaton (Seb Archer). I never pretended I was not a fan of his works, and having seen some miniatures he sculpted for Guild of Harmony, I only expected high quality sculpting. Of course I was not disappointed with the sculpt.

Just like it was with Sherlock, the sculpt is very true to the concept art. I always appreciate seeing that the sculptor managed to capture the personality and character that the concept art presented. Unfortunately many companies tend to release miniatures which are not even remotely resembling respective original concepts. This is not the case with Infamy Miniatures!

Infamy Miniatures: Henrietta Jekyll unboxed

This time we receive a simpler model, which doesn’t make her worse than Sherlock. What I mean by “simpler” is that the model doesn’t require as much work as Sherlock, being only a two-part miniature. The two parts are: the main body and an arm holding the weapon, which is some kind of a flame thrower. There is also a card and a round 30mm “lipped” base (which somehow didn’t make it to the photo).

Infamy Miniatures: Sherlock Holmes review (12)

Again I used the cutting mat to allow you to see the size of this model. The photo doesn’t say too much about the quality and details of the copy I received, so let’s take a closer look from several angles.

Henrietta Jekyll review – a closer look

After seeing the model in person I had to admit that the photos, despite a very good official paintjob, don’t really do the model justice. The model is very good and characterful. Somehow she brings Marie Skłodowska-Curie to my mind. Of course I don’t think the real scientist ever ran around in London with bottles of explosives strapped to her belt and a flamer in her hand, and I can’t even say that she was the inspiration for this model. I only mention the impression I had about the character.

Infamy Miniatures: Henrietta Jekyll review (13)

Infamy Miniatures: Henrietta Jekyll review (14)

Infamy Miniatures: Henrietta Jekyll review (15)

Infamy Miniatures: Henrietta Jekyll review (16)

I hope the photos show that the model, while very detailed and finely sculpted, still leaves enough room for the painter’s imagination and skill. The model will surely be enjoyable to paint.

I must also say that the resin used here was of very high quality again, no air bubbles. I even thought the models may be the most flawless models I have ever held in my hands!

Flawless?

But wait, can the picture be all that perfect?
Can it be that these miniatures were the closest to perfection of all the miniatures I had a chance to see?

The answer is… YES and NO.

How?
Let me try to explain:

Take a look at the Sherlock Holmes miniature. The photos here are strong close-ups, so you can see the quality of the sculpt and of the casting I received. They also show the face of Sherlock from several angles, the buttons of his coat (which are pretty subtle, so some attention will be needed to paint them well) and other details.

When you compare the detailing of this resin copy to the original sculpt you will see how well resin captured and copied all the details. The only softness of details occurs only when the original sculpt was also soft in these places.

Infamy Miniatures: Sherlock Holmes review (8)

Infamy Miniatures: Sherlock Holmes review (9)

I could not find a single flaw of this casting. No bubbles, no flash, no mold lines. Of course there are some “sticks” marking the places where resin was injected into the mold, but these are technologically obvious and couldn’t be considered flaws by me.

Infamy Miniatures: Sherlock Holmes review (10)

The model was very good. Probably the cleanest casting I can recall, and I think I’ve seen quite a few already. Just a few days ago I saw another resin model which is at least comparable or maybe better, but it is in a completely different scale and will be described in a separate review.

Was Henrietta cast as well as Sherlock?
Unfortunately not…

Take a look at this photo:

Infamy Miniatures: Henrietta Jekyll review (17)

I marked two ends of a mold line. Not that it is very bad, it would be very simple to remove – several straight moves with sand paper or a soft file and you’re done with cleaning it, but there was nothing like that on Sherlock.

Moving on to another angle we also see a problem on the other side:

Infamy Miniatures: Henrietta Jekyll review (18)

See what I mean? Another slight roughness.

Of course I would be absolutely happy to receive all my miniatures in this quality and requiring only so much preparation before painting. I am accustomed to miniatures which require some preparations: cleaning flash and mold lines with a scalpel, then moving on to sanding and finally polishing with steel wool or polishing sticks. Here you need to do so much more that the miniatures don’t deserve to be called anything but very good.

But wanting to remain objective and honest, I tried to find ANY flaws. And I hope this makes the review even more valuable.

Infamy Miniatures: Henrietta Jekyll review (19)

And here’s the same thing you already saw, but this time from another angle. It also reveals a mold line on her leg, too.

Infamy Miniatures: Henrietta Jekyll review (20)

So no, I cannot call the copy of Henrietta Jekyll flawless, but it still is one of the best miniatures, which can be considered perfect after a few moves of a file or scalpel.

Infamy Miniatures provided some of the best quality castings I had pleasure of seeing!

Infamy Miniatures review – final verdict

Now you may wonder what is my final opinion about these models. Well, I must say I was very impressed – both with the concepts, good representation of concepts in 3d miniatures, great detailing, and nearly perfect casting quality.

Now there’s one thing that may discourage you a bit: money.
These models are not cheap. Sherlock Holmes costs 13.99 GBP, and Henrietta Jekyll is priced only 1 GBP lower (ie. at 12.99 GBP). These are not the cheap plastic models some of us may be used to working with. These are high quality models that will be enjoyable for many painters and will surely look nice in display cabinets. Of course they may be used for gaming, but then you need to bear in mind that you’re paying for quality toys.

Now that you know the positive and negative things about the models from Infamy Miniatures I had a chance to review, I would like to recommend these models to you. Manufacturers of good and interesting miniatures need support, so let’s help them!

Thanks to James of Infamy Miniatures for providing the models for this review and good luck with your future releases!

— Mahoń