Hangar 18 Miniatures photo backgrounds – review

Many of you surely wondered what kind of photographic backdrops we’ve been using recently. Searching the internet might have provided you the answer already, but now we’ve got more than that. This Hangar 18 Miniatures photo backgrounds review sheds some more light on this subject, so in case you are wondering if these backgrounds would be of any use to you – read on.

Search for the perfect photo backdrop

We’ve been using quite a wide selection of photo backgrounds, ranging from digitally painted grunge through traditional blue-to-white gradients to plain white, black, gray or blue paper. Some of them did their job better, some did worse. But as some of you may know, I took many of the pictures presented in our galleries, and photography is also one of the aspects I enjoy in this hobby. So these experiments were a part of the hobby to me, and I must say I enjoyed them.

Still I was not sure that I got it all right, that we’ve been doing it the right way and not missing something.
The pains or doubts I had usually could be classified as:

  • backgrounds too distracting attention from the models,
  • backgrounds too plain and uninteresting,
  • texture too rough and thus creating “noise” in perception,
  • backgrounds getting damaged and worn too quickly,
  • backgrounds being too glossy or looking too faded,
  • color of the background unsuitable or even clashing with the model,
  • size of backgrounds being insufficient.

Of course, one can always print a new backdrop and not worry too much about damage to a printed sheet of paper. But having a tested and tried backdrop that is durable to at least some reasonable degree is always a nice touch that makes taking photos easier and more comfortable.

Then I was offered a chance to review Hangar 18 Miniatures‘ photo backgrounds. What a treat!

Hangar 18 Miniatures photo backgrounds

Honestly speaking for a long time I was not aware that Hangar 18 Miniatures existed at all, and later I didn’t realize they made any photo backgrounds. So when I got the chance to test their products it was like waiting to play with a new and unexpected toy.

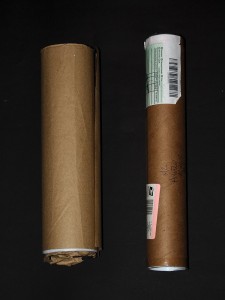
I had completely no idea about the kind of material they were made of, the quality of printing, texture of the material, durability and such. So when the tube with photo backgrounds arrived, I impatiently unpacked it.

Hangar 18 Miniatures photo backgrounds review

The backgrounds were rolled together and protected with a sheet of paper:

Hangar 18 Miniatures photo backgrounds review

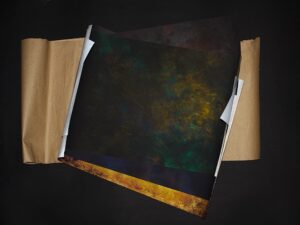
So what was inside?

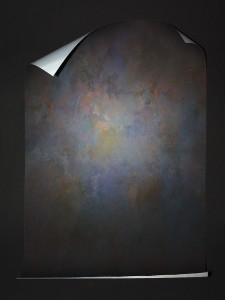
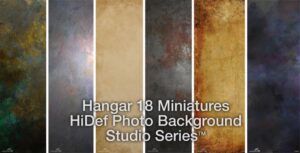
What I received was a HiDef Background Studio Series – 6 Prints Set. It included six photo backgrounds in A3 size (11″ x 17″). Each of them comes with a different print:

  • Green Gold
  • Soft Lavender
  • Grunge
  • Antique Leather
  • Antique Parchment
  • Midnight

That’s what they look like on the official photos (taken from the Hangar 18 Miniatures website):
Hangar 18 Miniatures photo backgrounds review
HiDef Background Studio Series – 6 Prints Set
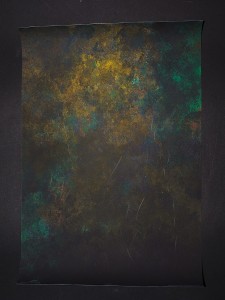
Hangar 18 Miniatures photo backgrounds review
Green Gold
Hangar 18 Miniatures photo backgrounds review
Soft Lavender
Hangar 18 Miniatures photo backgrounds review
Grunge
Hangar 18 Miniatures photo backgrounds review
Antique Leather
Hangar 18 Miniatures photo backgrounds review
Antique Parchment
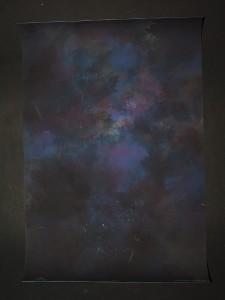
Hangar 18 Miniatures photo backgrounds review
Midnight

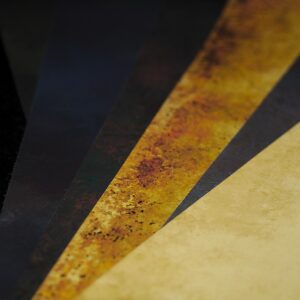
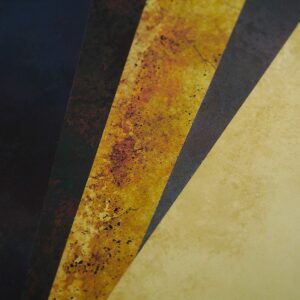
These backgrounds are printed on flexible fabric, which allows to shape them, easily adjust them to your photo setup, and makes them very resistant to wrinkling. They’re nearly no-glare, so even in direct light conditions they look good on photos.
Hangar 18 Miniatures photo backgrounds review
No glare!

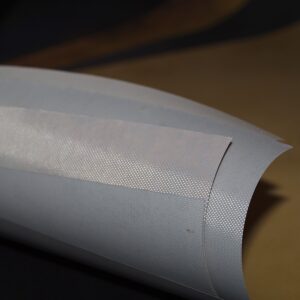
This also has another effect though. The texture of the fabric is still visible on macro photos (that photos of miniatures usually are). Some people may like it, yet I would prefer the texture of fabric to be less defined.
Hangar 18 Miniatures photo backgrounds review
The material those backgrounds are made of
Hangar 18 Miniatures photo backgrounds review
Click on the photo until it zooms to full size to see the texture

Of course with macrophotography you usually get pretty small depth of field, so it’s very easy to get the texture nicely blurred and unnoticeable in the background behind the model, but the part directly around the model’s base will usually be sharp and in focus, so the texture will be very sharp there, too. It will show on the photos later in the review, so read on…

How I used them

There are many ways to use the backgrounds and most photographers will find their own ways to do it, so I will not go into too much detail here. After all the article is not about the way I work but about the backgrounds. One can easily attach them to a vertical surface with some sticky tape, paper clips or – what I usually do – with some blutack/patafix.

Thanks to the matte surface these backgrounds can be easily used in natural daylight and in artificial light coming from lamps. And even if the light is not diffused, there is no glare on the backgrounds. Well done!

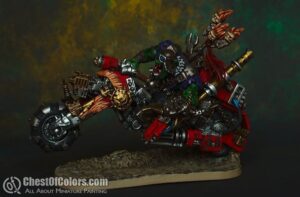
Just take a look at these photos to see how we used these backgrounds:
Hangar 18 Miniatures photo backgrounds review
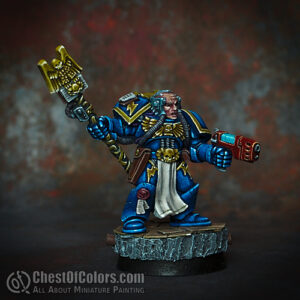
Wazdakka Gutsmek by Rzymek
Hangar 18 Miniatures photo backgrounds review
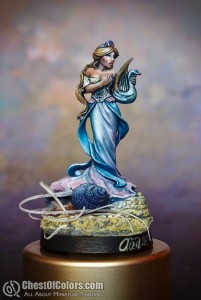
Ethernia by Ańa
Hangar 18 Miniatures photo backgrounds review
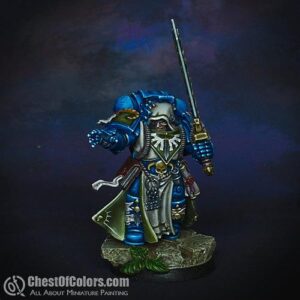
Marneus Calgar by JerzyK
Hangar 18 Miniatures photo backgrounds review
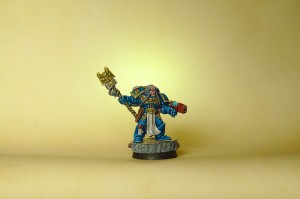
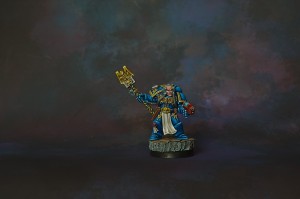
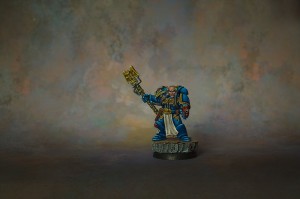
Librarian by JerzyK
Hangar 18 Miniatures photo backgrounds review
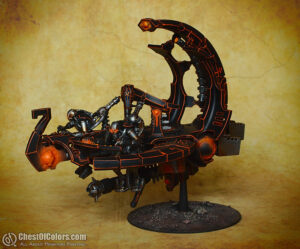
Necron Barge photographed for a friend

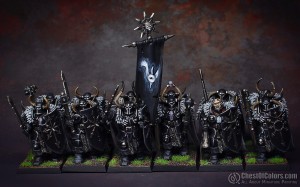
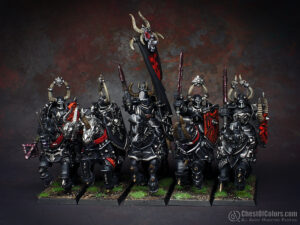
The size is pretty versatile. It allows to take photos not only of small miniatures but even of large models and whole units of smaller miniatures. Of course the size is not sufficient for whole armies or forces consisting of multiple units, but I read that larger versions of these backdrops were already released (A2 size), so maybe we will be able to take photos of whole forces on these backgrounds soon?
Hangar 18 Miniatures photo backgrounds review
Whole unit on the background…
Hangar 18 Miniatures photo backgrounds review
.. and yet another unit.
Hangar 18 Miniatures photo backgrounds review
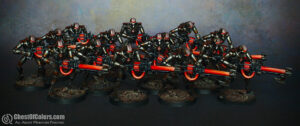
And some Necrons, too!

While the size allows to take photos even of larger subjects, it is still compact enough to fit into many light tents or on photo tables and booths. So if you want a versatile and universal size of a background the regular A3 size may be the way to go anyway.

Durability

Now this was one of the points which are pretty important to me. I don’t want to buy new backgrounds again any day soon, so knowing that my backgrounds will not be scratched, bent or wrinked after a few weeks or months of use may be a tipping point for me. This was always a problem for me with my paper backgrounds, and I had pretty high hopes here.

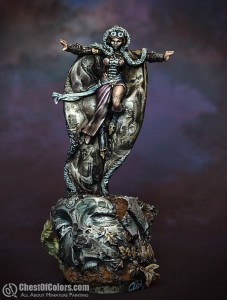
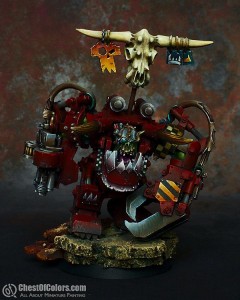
Let me add that I can give my backgrounds pretty tough time when I get to start a photo session. I take pretty many photos of our miniatures even if only a few of them are published. This often includes some exposure variations, additional takes to be sure that I have everything sharp, plus some additional angles, etc. So when you take like 50-100 photos per photo session, you may expect that your background will be put to a test.
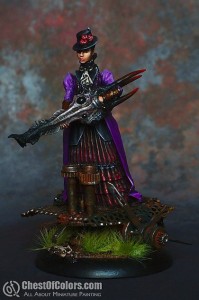
Hangar 18 Miniatures photo backgrounds review
Rasputina by Ańa
Hangar 18 Miniatures photo backgrounds review
Ghazkull Thraka by Benathai
Hangar 18 Miniatures photo backgrounds review
Odila by Ańa
Hangar 18 Miniatures photo backgrounds review
Genestealer photographed for a friend
Hangar 18 Miniatures photo backgrounds review
Miss Ticklenott by Slawol

So how did Hangar 18 Miniatures photo backgrounds do in this test? Well, very well and not so well.

There was no wrinkling, no permanent bending. The flexible fabric is really good material for a photo background. But bear in mind that the miniatures will be placed on the surface for most of the time, they will be pushed around, moved, rotated, and so on. So won’t this scratch the surface? Unfortunately it will…

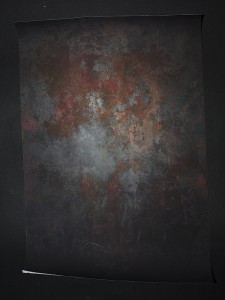
These are photos of my Hangar 18 Miniatures photo backgrounds after like two months of use. Some were used more frequently, some not so often, but you can see some wear marks on the surfaces.

I think you can easily recognize the backgrounds that I use most frequently… 😉
Hangar 18 Miniatures photo backgrounds review
See the scratches?
Hangar 18 Miniatures photo backgrounds review
Some scratches again…
Hangar 18 Miniatures photo backgrounds review
See where I placed my minis?
Hangar 18 Miniatures photo backgrounds review
This one still looks OK

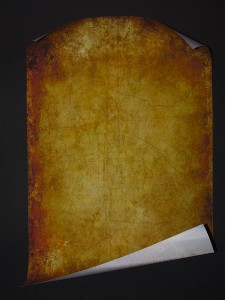
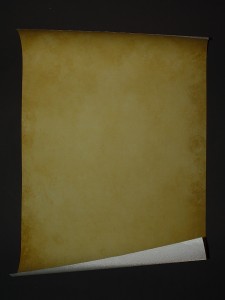
Now these two will be the least frequently used backdrops, so they’re the least scratched ones. But they’re also the lightest-colored of them all, so those scratches wouldn’t be as visible as on darker backgrounds.
Hangar 18 Miniatures photo backgrounds review
Any scratches here?
Hangar 18 Miniatures photo backgrounds review
Looks like brand new!

So what do I think? Well, I won’t pretend they’re completely scratch resistant. They managed to avoid any other kind of damage, except for those scratches. Now let’s make one point clear: these scratches don’t mean the paint rubbed off from the backgrounds! No, they are only the spots where bases of my miniatures rubbed against the fabric and the backgrounds lost some of their dullness and became slightly more shiny.

So what you saw on the photos and what looked as if the color wore off, is only more light reflected from the backgrounds which became a kind of “polished” there. Still I consider it some problem, as I prefer my backgrounds to keep their no-glare finish, but I understand that with my “heavy duty” approach every background will be put to a hard test!

I still haven’t found a way to remove the scratches. I tried rubbing the backgrounds with a damp cloth, washing them, and a few other tricks, but none of them worked. Maybe giving them a spray coat of flat varnish will do the trick? 😉

One miniature, many backgrounds!

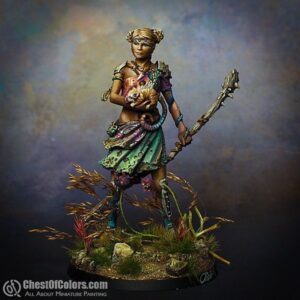
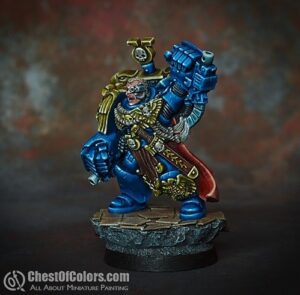
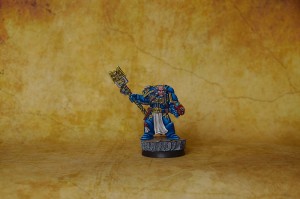
Having a choice of these Hangar 18 Miniatures photo backgrounds allows me to choose a suitable background for most miniatures quite easily and fast. By taking a look at these photos you can see results of my little experiment: how the same model may look on different backgrounds.

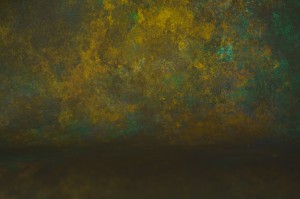
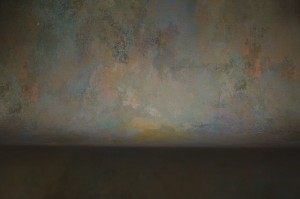
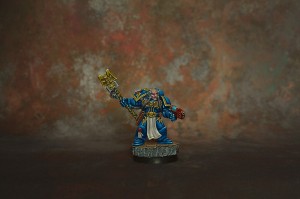
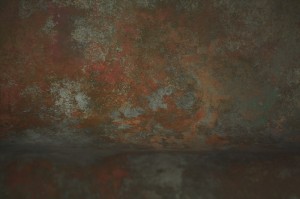
I took photos of most of them with and without a miniature, so you can see what the background looks like when the background is in focus (so you can see the details of texture and print more precisely) and when it is intentionally out of focus (with focus being on the miniature, so the background is slightly blurred in a way that doesn’t distract from the model).

Hangar 18 Miniatures photo backgrounds review
Grunge

Hangar 18 Miniatures photo backgrounds review

Hangar 18 Miniatures photo backgrounds review
Midnight

Hangar 18 Miniatures photo backgrounds review

Hangar 18 Miniatures photo backgrounds review
Green Gold

Hangar 18 Miniatures photo backgrounds review

Hangar 18 Miniatures photo backgrounds review
Antique Leather

Hangar 18 Miniatures photo backgrounds review

Hangar 18 Miniatures photo backgrounds review
Soft Lavender

Hangar 18 Miniatures photo backgrounds review

Why there are no photos of the Antique Parchment background here? Wait, and you will see them in a moment…

We’re going to show you another cool thing that can be pulled off with these backgrounds!

The backlighting trick

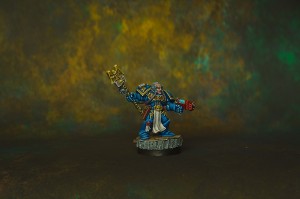
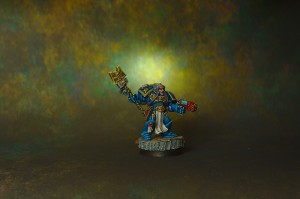
You might want to create a special focal point to attract attention to your miniature. Now you can do it without any photoshopping, just get yourself a little lamp and put it behind the background.

This is what the background looks like in normal lighting conditions – pretty much evenly lit:
Hangar 18 Miniatures photo backgrounds review
Backlight off

But when you turn that backlight on, you may create the additional focus!
Hangar 18 Miniatures photo backgrounds review
Backlight on!

With some adjustments to the position, distance, power and difussion of that backlight, you may achieve excellent results with no additional photo manipulation other than simple cropping!

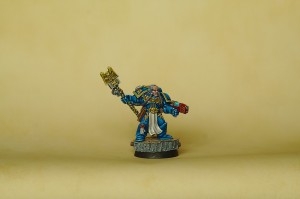
Of course you may try it with every Hangar 18 Miniatures photo background, but you will notice that with the lightest ones…
Hangar 18 Miniatures photo backgrounds review
Antique Parchment

… effects are much less spectacular.

Hangar 18 Miniatures photo backgrounds review
Backlight on?

Nothing should discourage you from experimenting a bit with various lighting setups, including backlights. My suggestion is to diffuse the backlight a bit so the shape of your light (lamp/light bulb) is not so obviously and intrusively visible. If you don’t have a special diffuser, you may use a piece of milky plastic or even tissue.

Verdict?

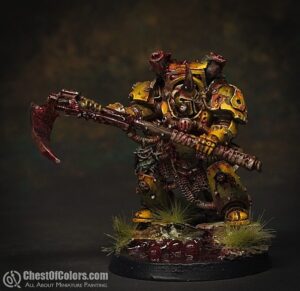
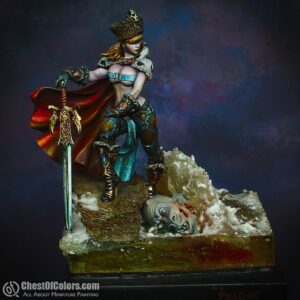
Would you like to see more examples before the final judgement? Sure, we have quite a few of them. Just take a peek at the galleries of our works. There should be many photos taken with these backgrounds. Check Ana’s, JerzyK’s, Rzymek’s, Slawol’s, Benathai’s and Rentall’s galleries in particular. They should have the most examples of such photos. I told you I wasn’t all that easy on these backgrounds. 😛
Hangar 18 Miniatures photo backgrounds review
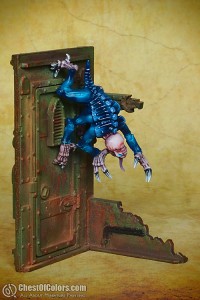
Typhus by Slawol
Hangar 18 Miniatures photo backgrounds review
Nokjagerin by Ańa
Hangar 18 Miniatures photo backgrounds review
Librarian by JerzyK

And what do I think?

Well, these are some of the best (if not the best) photo backgrounds I have used so far. There was only one problem for me – these shiny scratches, but as you can see on the photos of miniatures taken with these backgrounds – it’s nothing terrible, but I would still want my perfect product to be free of this problem. Maybe I can find a solution for this issue and in this case I will update the review, but if you know how to deal with it – tell me in the comments, please.

Now that even A2-sized backgrounds are available (no, I didn’t manage to get them yet) these seem to be a good choice for any hobbyist. Even those of us who need to take photographs of warbands or smaller armies will find these backgrounds useful.

And what do you think about these backgrounds? Let us know, please, share your own tips and show us how you use these Hangar 18 Miniatures photo backgrounds for your hobby purposes. 🙂

How to make a ‘Scavvy bunker’ photography background

Hello all!
It’s been a while since I managed to prepare something worthy publishing but sadly when life issues strike – there’s no other way than face them. Fortunately I had a short break from the life recently during which I managed to slap paint over some minis, play some Necromunda matches and of course: write this short walkthrough explaining how to build a Scavvy bunker which I use as my photography background.

Crucial question: What for?

The first question about the project should be: what for?
After ~15 years in the miniature wargaming I realised that although fancy studio pictures of miniatures are very nice what REALLY makes me want to get some new toys is watching the precious models in the action. Nicely painted models placed on nicely prepared battlefield is something just stunning. I still can see beautiful Warhammer Fantasy armies from the battle book and Warzone corporations from Mutant Chronicles zine.

Therefore last year I started building modular gaming board worthy of our miniatures (and Necromunda campaign of course) but because my hobby time is limited and the table is rather big (work in progress aerial pic below) the decision was made to prepare small piece of terrain and paint it the way I want to see the battlefield one day. I was bored using printed backgrounds for taking photos so this small display piece should fix my problem.

How to make Scavvy bunker - photography background (21)

How to make Scavvy bunker - photography background (22)

How to make Scavvy bunker - photography background (23)

Preparations

The base was planned big enough for about dozen miniatures. I grabbed thick PVC sheet and cut ~5″ x 11″ sheet. As for the back wall – it’s height was determined by size of the gate (about 4″) and spare space in my glass case.

The gate

It was cast using Hirst Arts molds – instead of recommended clay I used resin with solid amount of filler. This stuff makes casts “crunchy” and much more fragile (bad idea for mass production) but also easier to work with when it comes do sandpapering or drilling. Of course using clay will also work – just there’ll be a bit more mess on the hobby station.

How to make Scavvy bunker - photography background (1)

And here’s the assembled gate. All the edges were treated with sandpaper so it’s easier to install into the frame.

How to make Scavvy bunker - photography background (2)

Once again I used molds to cast the frame – not much more to write about here.
The green slime is test of colors I was going to use for tox bombs – never let Scavvy boss out into the combat zone without supply of this nastiness!

How to make Scavvy bunker - photography background (3)

And here’s the gate confronted with the back wall. As you can see there’s another frame around the gate. If I remember correctly all these cool parts can be found in the single sci – fi mold.

How to make Scavvy bunker - photography background (4)

The entrance is done and inserted into the hole cut in the wall. The excessive bottom will be cut off and smoothed so it can be pinned and attached to the base.

How to make Scavvy bunker - photography background (5)

And here’s the general idea of some bits to be added: some floor tiles and some vents (made of headphones broken by one of my cats – thanks a lot Cruiser, you bastard…)

How to make Scavvy bunker - photography background (6)

More bits!

The tiles have been placed into the prepared holes (don’t worry: wallpaper knife deals very easy with PCV sheet, almost as easy as blessed chainsword with heretic’s throat) and also some windows were added. To make the job as easy as possible I simply cut long rectangle shaped hole, covered it with thin PVC frame simulating windows (2mm PVC can be cut with scissors) and added some nails so I can paint rust around them in later stage. Bright rust should work as nice eye catcher especially on dark metallics.

How to make Scavvy bunker - photography background (7)

Another step was adding mesh into the windows – I really like such additions especially it looks really decent even if only slightly drybrushed and hit with some brown washes. The mesh was pain in the ass to work with and I had to use special shears to get desired shape. Hobby clippers definitely weren’t enough.

How to make Scavvy bunker - photography background (8)

Some more bits added to the junkyard.
Also I attached another sheet of PVC to the back so you cannot see through the windows. Some metallics were painted as well (boltgun + black) – do it as fast and easy as you can, it’s just terrain piece so doesn’t need as much attention as models.

How to make Scavvy bunker - photography background (9)

And more bits – this time it’s the final re-arranging.

How to make Scavvy bunker - photography background (10)

Rusting!!! I meant painting…

Like I wrote the piece was made to fit the battlefield concept: the gaming board is desert area (something inspired by Necromunda Ash Wastes) with some ruins and abandoned, corroded installations. This brings my fav way of painting (easy and effective that is): painting sand is almost pure drybrush while with a bit of practice you can paint huge chunks of rust really fast.

The natural decision was to start with the rust because I didn’t want to see the mess on the sand. After whole metallics were painted I simply glazed them with different colors: browns, sepia, orange. Once the paints dried some chipped paint was added and also some shading. Details will be added later.

How to make Scavvy bunker - photography background (11)

The desert

Base was covered with white glue (the stuff you use for wood or static grass) and sprinkled with sand and some gravel. I use the same sand and gravel on bases of my gangers so everything fits nicely. As for the colors – once again I decided to make my life as easy as possible. Sand was glazed with some heavily diluted brown / sepia just to give it some hue and enhance shadows. After that there was a bleached bone / white drybrush and some chalks for the final. I sprayed varnish over the base to attach chalk to the base. Turps also works fine but it’s pretty stinky and flammable so be careful with that stuff!

How to make Scavvy bunker - photography background (12)

The material I used to cover the back wall was the filler which I used for casting. It’s something like very fine sand. I didn’t use the same sand as for the base because I wanted to achieve different texture: more like concrete than sand or rock. Again: layer of white glue, layer of filler and voila!

How to make Scavvy bunker - photography background (13)

Painting the Scavvy bunker

Painting wall was similar to painting base: glaze, drybrush and pigments. Also color choice was similar to keep whole thing coherent.

How to make Scavvy bunker - photography background (14)

Some scale shot – still work in progress…

How to make Scavvy bunker - photography background (15)

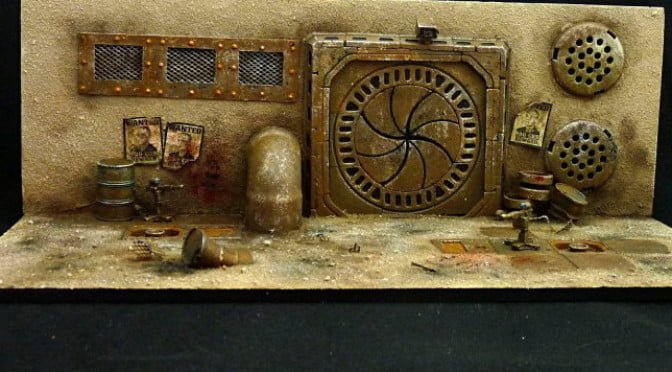
And the final: PVC edges were painted black, some more details added: turrets lenses, rust here and there, arch-villain posters, oil leaking from the barrels, blood splats. It’s a piece of battlefield, not some sort of Xmas tree so try not to get carried away.

Finished photography background

I must say I am really satisfied how the thing came out – I used similar colors on the Scavvies so these nasty bastards fit the base just fine. And if I ever get bored but this scenery I will just paint some oldie sci fi models (like Cartel agents from good ol’ Warzone), pin them into the base and put in the proper shelf in the display case.

How to make Scavvy bunker - photography background (17)

How to make Scavvy bunker - photography background (18)

Hope you like it. For more of my stuff – just visit my blog or wait pariently for another text to be spawned.

How to make Scavvy bunker - photography background (19)

How to make Scavvy bunker - photography background (20)

Cheers!
— Demi_morgana