Painting Malifaux Seamus the Mad Hatter – Tutorial

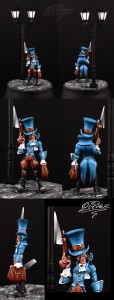
This will be a little walkthrough / tutorial on how I painted my Malifaux Seamus the Mad Hatter from Wyrd Miniatures. This Mad Hatter tutorial is also the first one I ever wrote. 😉

Seamus the Mad Hatter – tutorial

For priming I used a combination of black and white primer.

Malifaux: Seamus the Mad Hatter - tutorial (1)

Generally I use a basecoat color, 3-4 shadows and 3-4 highlights for one part/detail. So I end up with a total of 7-9 colors which I use to create the transition from the deepest shadow to the brightest highlight.

Paint mixing ratios

All my paint ratios in this Mad Hatter tutorial represent my drop count (I have all my GW paints refilled in empty Vallejo-like dropper bottles which makes it easier for me when mixing colors) – for example:

GW Tallarn Flesh : VMC Dark Flesh #019 (3:1)
3 drops GW Tallarn Flesh : 1 drop VMC Dark Flesh #019
GW = Games Workshop / Citadel
VMC = Vallejo Model Colour

Dilution

Dilution of my paints is about 50% paint to 50% water for glazing (highlights and shadows) and my basecoat is a little bit thicker so about 70% paint to 30% water.

Ok, let’s get started with painting the Malifaux Seamus the Mad Hatter miniature. 🙂

1. Face, eyes and skin:

It’s good for all the readers of my Seamus the Mad Hatter tutorial to know that I always start with the head/face of a mini and then move to the next part. I only paint one part at a time and pretty much finish it before I move to the next one. For the skin I used GW Tallarn Flesh as a basecoat color and applied 2-3 thin layers until I had nice even coverage.

  • Basecoat: GW Tallarn Flesh

[inset side=right]I always start with the head/face of a mini and then move to the next part. I only paint one part at a time and pretty much finish it before I move to the next one.[/inset]

After the skin was basecoated I painted the eyes:

  1. First I painted the eye-socket white.
  2. Next I thinned down some VMC Black #169 (about 20% paint : 80% water) and used it to outline the eye-socket by letting the paint flow into the recesses by itself.
  3. Usually I mess up the white eye-socket a bit or my outline will end up being to intense/thick. Therefore I carefully repaint the eye-socket white and correct the black outline a bit.
  4. Next I painted black dots for the pupils with a less diluted paint (70-80% paint : 30-20% water).

Once the eyes were done I switched back to his skin and started with the shadows.

I applied the first shadow always moving the brush towards the deepest parts which will later receive the darkest color and using many layers always leaving a bit of the previous brush stroke untouched to build up the first shadow. Then I applied the second and third shadow also leaving a bit of the previous shadow untouched to build a transition towards the darkest shadow. Colors I used for the shadows:

  • Shadow I: GW Tallarn Flesh : GW Scorched Brown (6:1)
  • Shadow II: GW Tallarn Flesh : GW Scorched Brown (3:1)
  • Shadow III: GW Tallarn Flesh : GW Scorched Brown (1:1)

The last shadow color (Shadow IV) was used for the deepest recesses like his mouth and facial wrinkles.

  • Shadow IV: GW Scorched Brown

Then I started painting highlights. It’s pretty much the same as with shadows – moving the brush towards the highest parts which will receive most of the light, always leaving a bit of the previous highlight untouched to build a transition from the basecoat to my last highlight. The method presented here, in this Mad Hatter tutorial, is the one I usually use. Colors used for the highlights:

  • Highlight I: GW Tallarn Flesh : VMC Dark Flesh #019 (3:1)
  • Highlight II: GW Tallarn Flesh : VMC Dark Flesh #019 (1:1)
  • Highlight III: GW Tallarn Flesh : VMC Dark Flesh #019 : GW Skull White (1:1:2)

I used the last highlight (Highlight IV) only for a few bright-spots.

  • Highlight IV: GW Tallarn Flesh : VMC Dark Flesh #019 : GW Skull White (1:1:4)

Malifaux: Seamus the Mad Hatter - tutorial (2)

2. Hair:

I basecoated his hair with the following mix:

  • Basecoat: GW Shadow Grey : VMC Black #169 (2:1)

Then highlighted it getting brighter towards the outside with the following colors:

  • Highlight I: GW Codex Grey (1:1 water)
  • Highlight II: GW Codex Grey : GW Skull White (2:1:3 water)

3. Coat, tuxedo and hat

I did some preshading and highlighting here that’s not something I usually do it sometimes just happens. 😉

Malifaux: Seamus the Mad Hatter - tutorial (3)

After this was done I messed around with mix-ratios until I was satisfied with the colors and came out with the following mixes:

  • Highlight IV: GW Enchanted Blue : GW Hawk Turquoise : GW Space Wolves Grey (2:1:9) + some GW Skull White
  • Highlight III: GW Enchanted Blue : GW Hawk Turquoise : GW Space Wolves Grey (2:1:9)
  • Highlight II: GW Enchanted Blue : GW Hawk Turquoise : GW Space Wolves Grey (2:1:6)
  • Highlight I: GW Enchanted Blue : GW Hawk Turquoise : GW Space Wolves Grey (2:1:3)
  • Basecoat: GW Enchanted Blue : GW Hawk Turquoise (2:1)
  • Shadow I: GW Enchanted Blue : GW Hawk Turquoise : VMC Black #169 (2:1:1)
  • Shadow II: GW Enchanted Blue : GW Hawk Turquoise : VMC Black #169 (2:1:2)
  • Shadow III: GW Enchanted Blue : GW Hawk Turquoise : VMC Black #169 (2:1:3)

I painted highlights and shadows like described in the face part always moving the brush towards the deepest shadows and brightest highlights, using many thin layers and slowly building up the color.

The last highlight (Highlight IV) was only used on the upper parts as a last “popping” highlight like on the folds on his arm or his collar.

Malifaux: Seamus the Mad Hatter - tutorial (4)

4. Belt-thing on his hat

  • Highlight III: GW Bestial Brown : GW Bleached Bone (2:3)
  • Highlight II: GW Bestial Brown : GW Bleached Bone (2:2)
  • Highlight I: GW Bestial Brown : GW Bleached Bone (2:1)
  • Basecoat: GW Bestial Brown
  • Shadow I: GW Bestial Brown : VMC Black #169 (3:1)
  • Shadow II: GW Bestial Brown : VMC Black #169 (3:2)

5. Pants

I paint every part as described above (first I apply the basecoat with 2-3 layers and then paint the shadows and highlights) so for the next few parts of my Mad Hatter tutorial I will only post the colors I used. 🙂

  • Highlight III: GW Bestial Brown : GW Graveyard Earth : VMC Yellow Ochre #121 (2:1:3)
  • Highlight II: GW Bestial Brown : GW Graveyard Earth : VMC Yellow Ochre #121 (2:1:2)
  • Highlight I: GW Bestial Brown : GW Graveyard Earth : VMC Yellow Ochre #121 (2:1:1)
  • Basecoat: GW Bestial Brown : GW Graveyard Earth (2:1)
  • Shadow I: GW Bestial Brown : GW Graveyard Earth : GW Scorched Brown (2:1:1)
  • Shadow II: GW Bestial Brown : GW Graveyard Earth : GW Scorched Brown (2:1:2)
  • Shadow III: GW Bestial Brown : GW Graveyard Earth : GW Scorched Brown (2:1:3)

6. Weapon – wood

  • Basecoat: GW Bestial Brown : VMC Dark Flesh (2:1)
  • Shadow I: GW Bestial Brown : VMC Dark Flesh : GW Scorched Brown (2:1:1)
  • Shadow II: GW Bestial Brown : VMC Dark Flesh : GW Scorched Brown (2:1:2)
  • Shadow III: GW Bestial Brown : VMC Dark Flesh : GW Scorched Brown (2:1:3)

Malifaux: Seamus the Mad Hatter - tutorial (5)

7. NMM

Some of you may be checking this Mad Hatter tutorial in search for my NMM recipe. When I painted the NMM parts like his blade I tried to to push the highlights up to pure white and the shadows to a dark almost black tone. The colors I used for the silver NMM parts were:

Silver NMM

  • Highlight IV: GW Skull White (pure)
  • Highlight III: GW Codex Grey : GW Skull White (1:3)
  • Highlight II: GW Codex Grey : GW Skull White (1:2)
  • Highlight I: GW Codex Grey : GW Skull White (1:1)
  • Basecoat: GW Codex Grey
  • Shadow I: GW Codex Grey + VMC Black #169 (3:1)
  • Shadow II: GW Codex Grey + VMC Black #169 (2:1)
  • Shadow III: GW Codex Grey + VMC Black #169 (2:2)
  • Shadow IV: GW Codex Grey + VMC Black #169 (2:3)

To increase the last shadow a bit on the silver NMM parts I used some very diluted black (like a wash it was mostly “black water”) and carefully glazed this mix at the very end (bottom) of the last shadow.

Gold NMM

All Gold NMM parts were painted with the following colors:

  • Highlight III: GW Skull White (pure)
  • Highlight II: GW Snakebite Leather : GW Bubonic Brown : GW Skull White (1:1:3)
  • Highlight I: GW Snakebite Leather : GW Bubonic Brown : GW Skull White (1:1:1)
  • Basecoat: GW Snakebite Leather : GW Bubonic Brown (1:1)
  • Shadow I: GW Snakebite Leather : GW Bubonic Brown : GW Scorched Brown (1:1:1)
  • Shadow II: GW Snakebite Leather : GW Bubonic Brown : GW Scorched Brown (1:1:2)
  • Shadow III: GW Scorched Brown (pure)
  • Shadow IV: GW Scorched Brown : VMC Black #169 (2:1)

When painting small details like the gold NMM stuff on his bag or the belt buckle on his hat I usually don’t use the complete range of mixes. I basecoat the area as usual, use the first shadow/highlight but then I leave the second mix out and jump to the third shadow/highlight.

For large surfaces it’s the same procedure as with the other parts.

Malifaux: Seamus the Mad Hatter - tutorial (6)

8. Bag & accessories

The NMM parts were painted with the colors described above in an earlier part of this Mad Hatter tutorial and for the bag I used the following mixes:

  • Glaze: VMC Yellow Ochre #121 (80% water) — only glazed over the highlights to get a bit of a yellow in there
  • Highlight III: GW Bestial Brown : GW Bleached Bone (2:3)
  • Highlight II: GW Bestial Brown : GW Bleached Bone (2:2)
  • Highlight I: GW Bestial Brown : GW Bleached Bone (2:1)
  • Basecoat: GW Bestial Brown
  • Shadow I: GW Bestial Brown : GW Scorched Brown (2:1)
  • Shadow II: GW Bestial Brown : GW Scorched Brown (2:2)
  • Shadow III: GW Bestial Brown : GW Scorched Brown (2:3)

Ok that’s pretty much it. I hope you enjoyed reading this little walkthrough and found something interesting.

Done!

And here are some final pictures of the miniature. If you recreated the steps presented in my Seamus the Mad Hatter tutorial, you should achieve similar results:

Malifaux: Seamus the Mad Hatter - tutorial (7)

— P1per

How to paint NMM chrome – SENMM Wolf Priest tutorial

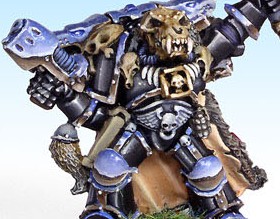
Maybe the huge hype for SE-NMM and NMM chrome has already passed, but this tutorial is surely still worth publishing. In 2005 I painted a Space Wolves wolf priest and people asked how to paint NMM chrome like the one on that model.

As I was receiving questions about my Wolf Priest and the way I painted him, I spent some time and typed this description for you. Maybe it’s not a typical step-by-step, but it’s the best I could do with the mini already painted and even not having it at home anymore. Enjoy 🙂

Photo: NMM chrome - Tutorial

First steps

After spraying the whole mini black, I applied a layer of white over the kneepads and other elements which were supposed to be chrome.

Fur cloak

I painted the internal side of the fur with Vallejo GC41 “DWARF SKIN”. Then I highlighted its protruding parts and the lower parts where more light falls. I did it by adding more and more Vallejo MC918 “IVORY” to GC41.

I painted the fur to imitate the real wolf skin’s colors and patterns, using Vallejo MC992 “NEUTRAL GREY” near the outer parts (the edges), and Vallejo GC40 “COBRA LEATHER” nearer the center of the surface. When the paints were dry, I washed the cape with very thinned black paint.

Before the wash was dry, I applied another layer of white basecoat onto the parts which I wanted to be painted like chrome.

When the paint dried, I decided to add highlights: I used Vallejo MC907 “PALE GREYBLUE” for that, and with the side of the brush with tiny amount of paint on it I brushed along the whole fur’s surface.

Skulls

I started with basecoating with Vallejo GC40 “COBRA LEATHER” – except for the eyes and deep crevices. For highlighting I kept adding more and more Vallejo MC819 “IRAQUI SAND”. The last color applied was pure MC819.

NMM steel

I painted the steel (or silver) elements with the NMM method. For my basecoat I chose (like I always do) Vallejo MC903 “INTERMEDIATE BLUE”. The shading is done with black paint there, where you don’t need to go overboard with detailing and color transitions. There where I need smooth blending of colors I shade by adding more and more black to the black color. I clean and correct the parts which got messy, and highlight by adding more and more white to the base color. The final highlights are placed with pure white.

NMM gold

I used the same method to paint gold using Vallejo GC40 “COBRA LEATHER” as my basecolor, washing it with Vallejo MC939 “SMOKE”, and then – when the wash was dry – I highlighted with Vallejo MC877 “GOLDBROWN”. Where I wanted sharp highlights I placed dots of white paint.
I think I can omit the part about the grenade? 😉

NMM chrome

I started painting with drawing the horizon on all the chrome elements with Vallejo MC822 “GERMAN BLACK BROWN”. The color of the ‘ground’ reflected in chrome depends on the color of the potential terrain. I decided to mix this basecolor with Vallejo GC40 “COBRA LEATHER” and highlight it by adding Vallejo MC819 “IRAQUI SAND” to the mix. So I painted the reflection of the ground going from the darkest to the lightest color 🙂 and I paint the reflection of the sky in the same way. The upper part was painted with Vallejo GC22 “ULTRA MARINE” (with a slight addition of Vallejo MC807 “OXFORD BLUE” in the darkest part), and then I only highlighted adding more and more white. The sky just over the horizon must be white, just like the edges of the painted part.

The more the surface is leaning toward the ground, the more ground you see in the reflection. On the other hand – if the surface is rather pointing upwards, then you will see more sky than ground in the reflection. The same applies to painting the wolfheads. 🙂

There’s one more thing you need to remember while painting chrome – every ‘tube’ or long round element – regardless on its position – will always have the horizon’s reflection along the ‘axis’ of the element. You can see it on my Liralith (in Hassslefree Miniatures gallery).

Black armour

And now I had to clean up the black armour, which was stained and dirty after the whole painting. I covered it with black paint, and applied the first highlight. It covers the biggest part of the surface, and every next highlight is placed on smaller and smaller surfaces. But I think it’s obvious, isn’t it? 😀

I highlighted by adding white, but now I know that it looks good if for the first highlight you add a bit of Vallejo MC807 “OXFORD BLUE” to the black paint, and later you add white not to pur white but to this mix. It’s hard for me to describe where I painted the reflections of light, but for sure they were placed on the edges, and protruding parts, but I treated this subject pretty loosely and didn’t care too much for the realism and caring more for the overall effect and composition.

I hope this description contains some of the information you wanted to get, but if something was hard to understand – don’t hesitate and ask me 🙂

Artemis – how I painted the miniature

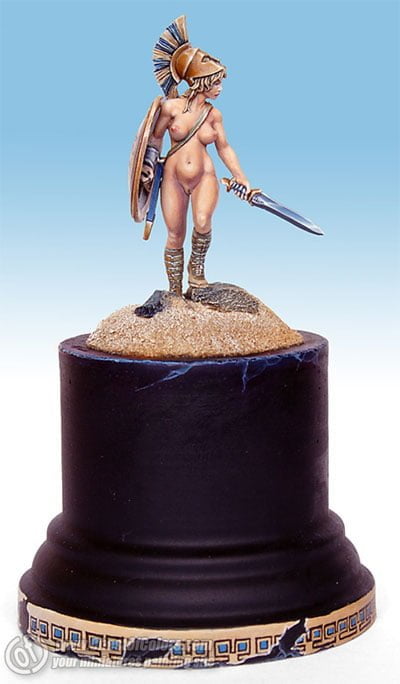
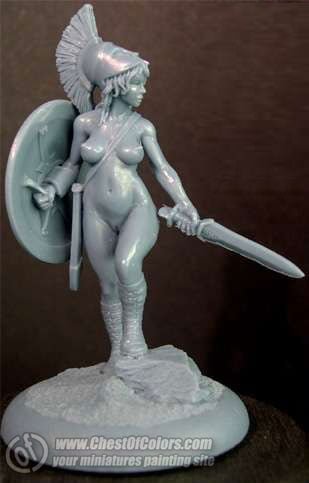
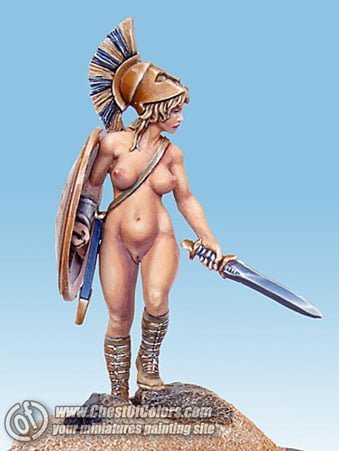
Artemis was the model which won me the Femme Fatale II contest. Painting it was a big challenge for me – because of the scale and several problems I encountered. You can read about my Artemis – how I painted the miniature and what I learned from my problems. Maybe it saves you some trouble?

Introduction

Painting of Artemis was done in the same period when I painted the girl in the eggshell – just one step earlier, but also one step after the
sexy female dwarf from Hasslefree Miniatures. I may be repeating myself, but it all was a lucky coincidence at that time, or maybe I just think it was? Anyway the curtain was removed and I saw a lot of new options.

Photo: Artemis - how I painted the miniature - Tutorial

In addition to this we received some secret knowledge ;-))) acquired during a painting workshop with Jeremie “Bragon” Bonamant by our friend from Poland: Illusionrip. In the same time our website – Chest of Colors – was updated with a tutorial (by Morsi) about painting skin, which made my knowledge (acquired from Mahon and Illusionrip more complete. I learned how to “sculpt” and model shapes with colors, and even how to choose colors suitable for certain effects.

But theory is just theory, and what about practice? The dwarf was easy to improve with glazing, so I wanted to test my abilities even more. And the best model to learn painting skin is a nude model 🙂

Photo: Artemis - how I painted the miniature - Tutorial

My perfect Artermis

Artemis was still a new release, but her potential was already noticed by many painters and in a few days new versions kept popping up. I don’t think anybody will feel surprised or will mind me saying that when I visited CoolMiniOrNot in search of inspiration, I found that my perfect Artemis was already painted. Sometimes you just see a paintjob and already knoiw that it’s the perfect version and nothing better will be done with this miniature, because this is THE right paintjob. This harmony and synthesis of the paintjob and the sculpt – looking as if it was made just for that paintjob.

Of course you should know that I am talking about Fluffy’s (Ali McVey’s) paintjob. And not wanting to create a poor copy of her work, which would be too easy, I treated it as a challenge. The new goal was to find the new image for her, to put some new atmosphere into her. And it was a very difficult thing to do is fighting when you feel you already lost… As if it wasn’t enough that my painting quality was inferior, also the choice of the right mood and image for the miniature…. I hope I at least managed to create the opposite of Fluffy’s version – hers is full of power and strength, it is a real threat for the enemies, and the weapon in Artemis’ hand leaves no doubt. So I created a delicate, gentle version…. I wanted people to think “what this mite is doing here?” after seeing her.

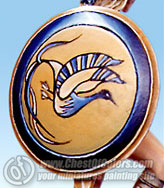
The color scheme also had to be different, so the opposite would be a blonde, and I decided to go into yellows. This also matched the sandy base. And if Fluffy’s work was in warm colors, mine would be colder. And the blue color was added to the palette only when I was looking for a pattern for the shield and I found a painting of a plate decorated with a painting, which I later used as my source of inspiration. I recreated its colors and this decided about the colors of the whole miniature.

Photo: Artemis - how I painted the miniature - Tutorial

Different method

I have to admit it was the first time I wanted to create a general vision of my project before painting. Usually I approach painting pretty spontaneously, and I assume that nothing good was created with thinking alone. So when I have an idea for a part of a miniature – I just start with it, and the rest is created as I go on with painting. This work was an exception. Maybe it was like this because I had to create a totally new idea? When I start painting I usually know what mood I want to achieve and what I want to focus on. Here I was off my usual tracks, so I had to force myself to a different vision, and direct my mind to a new direction, new imagination.

NMM

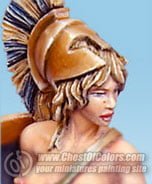
Having painted the shield I still had no courage to make an attempt of painting the skin, so I started with the helmet. On the female dwarf I tried painting gold NMM without using yellow, and I wanted to change my tried method because my imagination wanted me to take another step forward and try new things. I won’t go into details, because I am to write about Artemis, not the dwarf. The helmet was a continuation of my struggle with the new method. I often read about other people’s methods and after reading I don’t follow their descriptions step-by-step, but am working my own way – only incorporating some ideas into my method. That’s what I did with the gold NMM without using yellow. I still missed the tint of yellow in my transitions, and I felt they are bland and boring.

Photo: Artemis - how I painted the miniature - Tutorial

You may know that Vallejo “Cobra Leather” isn’t as yellow as Citadel Color “Snakebite Leather”. I noticed it and found my own way of achieving the effect: when I paint starting from white to Cobra Leather, I don’t blend the colors, but just apply glazes of Cobra Leather. If it’s too difficult for you, you can try painting the transition with any method of blending but leaving more highlighted space than necessary and then glazing a part of the highlight with Cobra Leather. This way gold is still yellowish and you don’t need any extra color for this. That’s how I painted the helmet and only now I am bold enough to paint a part of a miniature with glazing alone.

Photo: Artemis - How I painted the miniature - Tutorial

Problems with the skin

While painting the skin I noticed that paints were behaving in an odd way.
Overcoming this cost me much effort and stress, and you can still see traces of this fight when you compare the front and the back of the miniature. I started with the front, and I was unable to understand why I keep peeling the previous layers off when applying next layers of paint. 🙁 I was deperate and the effect was like the sediment on the surface of tea which is left for too long. Just as if the brush cracked the surface of previous layers of paint. And it really was what was going on, because I didn’t find out that my usual mix I used for thinning paints does more bad than good this time. I never experienced anything like that before, but I never used paints thinned so much before.

Photo: Artemis - how I painted the miniature - Tutorial

Generally I use a mix of distilled water and floor wax (the mix called “magic wash”) for thinning my paints, and it breaks the surface tension, improves the flow of paints, and makes painting easier. Somewhere halfway during my painting I realized what the problem was and I started using water alone. When you’re painting with glazes you don’t want them to create additional “layers” but to change the color of previous layers. It’s like painting with watercolors, so when you add pure water there’s nothing to crack.

Now it went faster and much neater! I didn’t have any bigger problems with placement of lights and shadows. First I checked their placement by keeping the miniature under a lamp, and then I stubbornly refused to add more contrast. Now I think that it’s this way when somebody doesn’t feel too sure about their abilities in something, that they don’t want to pay too much attention to it. And I am still learning to achieve this strong effect of a model emerging from darkness. It’s another challenge for me, and I am preparing for it.

The Base

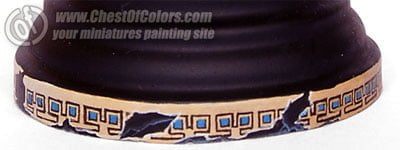
But let’s return to Artemis – I think there’s still something I should put in words, something which usually is very controversial and I would like to explain in this article. What I am talking about is the base. I heard many different opinions on this subject. I must confess I didn’t think about it too much because in my imagination it was immediately tied with the whole concept and I couldn’t imagine that Artemis and the base might not create a feeling of integrity. The shape of the column was more important to me than its size, because it just belonged to the subject. Initially I wanted to paint it in a marble pattern, but Mahon told me that the column shouldn’t attract too much attention, as this would distract from the miniature. Probably he was right, so I chose to leave the column almost totally black. I just added a partial pattern and some cracks on the surface, because I couldn’t resist painting such an inspiring block.

Photo: Artemis - how I painted the miniature - Tutorial

Photo: Artemis - how I painted the miniature - Tutorial

Final words

I hope you don’t mind not finding any suggestions as for the order in which I painted the miniature here. Especially in the case of the skin it was simply impossible, because – just as it often happens with the first and unsure steps – my actions were not fully considered and studied, but more chaotic and uncertain…

I wish you prolific painting with no fear of entering unknown regions of this hobby 😉

How to paint Captain Lysander in terminator armour

Captain Lysander of Imperial Fists Space Marines is still a popular miniature, so although I painted the miniature several years ago already, I still think the tutorial may be interesting to some of you. Especially if you want to see how to paint terminator armour or power armour for your miniatures.

Preparation of the model

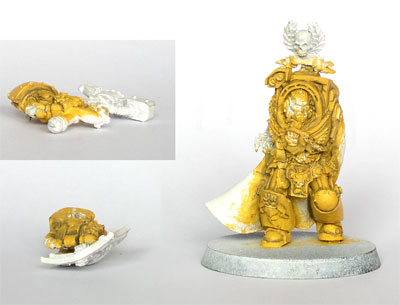
I started by cleaning the model. This time the cast was of pretty good quality so there weren’t many mold-lines to clean. I drilled holes for pins, and glued the pins to the joints. I primed the mini white, as painting yellow over black primer would take too many layers of paint and too much time. I left the arms unattached, because otherwise reaching some parts of th mini would be too difficult.

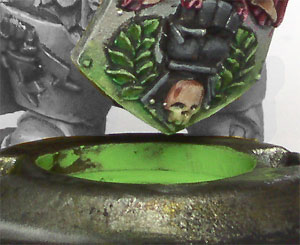
I also created the base. I attached two plastic elements on it, filled one of them with PVA glue (to create the slime inside of the hole) and primed it black.

Painting begins…

I painted the blue parts with Vallejo Game Color Ultramarine Blue, and applied some initial shading with the color which I created by mixing Ultramarine Blue with Black and thinning the paint a lot. I also basecoated the red parts with Vallejo Game Color Red Gore, and the black ones – with Black. I washed the red parts with a thinned mix of Vallejo Smoke and Black. I cleaned the reds with another coat of Gory Red, but left the shading visible.

Photo: How to paint Captain Lysander miniature - tutorial

Photo: How to paint Captain Lysander miniature - tutorial

The base was painted about the same way, just more layers of washes and glazes wera added. I also painted the slime inside of the hole with Vallejo Game Color Scorpy Green, and added several coats of glossy varnish to make the slime look more liquid.

Painting terminator armour

Photo: How to paint Captain Lysander miniature - tutorial

Then I started painting the armour. I had to create smoother blending between the shading and the basecolor. I mixed the colors I used – the base color, and the shading color, as well as two midtones (2 parts of the shading mix plus 1 part of the base color, and 1 part of the shading mix plus 2 parts of the base color). Then I started blending – I used the method I often use: I applied the dark and the light color where they should be, then placed the midtones between them, and then wetblended the transitions.

I did the same with highlighting: I decided to use Vallejo Model Color Ivory for highlighting. Again I put the base color, pure Ivory, and two midtones (2 parts of Ivory plus 1 part of the base color, and 1 part of Ivory plus 2 parts of the base color) on the palette. I applied Ivory on the most highlighted places (edges, etc.), placed the base color, and then the midtones. I wetblended the transitions. This way I had the basecolor cleaned, and the blending pretty smooth.

I started with the part of the armour which would be covered by the shield, because later reaching it might be too difficult – especially the left hand and arm. Then I painted the rest of the armour, and started painting the shield.

The shield

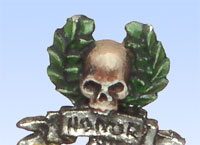
I decided the shield shouldn’t look like the armour, oso I went for metallic paintjob. I applied the alcohol based Vallejo Super Silver, and again washed it with several colors – greens, blues, oranges, browns, smoke, and black. Then I retouched the whole thing by a slight drybrush od Vallejo Game Color Chainmail Silver, and then picked out the edges with Super Silver. The laurels were besecoated with a mix of Vallejo Game Color Dark Green and Vallejo Model Color Olive Grey.

For highlights I kept adding Vallejo Model Color Olive Green, and then some Ivory. The eagle was painted just like the rest of the red elements – Gory Red, a wash of Black+Smoke, re-applying the Gory Red, and highlights with the base color with more and more Vallejo Game Color Pale Flesh added.

The black lines were cleaned then with a fine brush and thinned black paint. The whole eagle was glazed twice with really thinned down Transparent Red to add a bit vibrancy to the color, which got a bit desaturated during highlighting. The fist (on the shield, on the hammer, and on Lysander’s chest) was painted just like all the black parts of the mini – Black basecoat, and highlighting with more and more Ivory adeed. The transitions were smoothed by wetblending.

Photo: How to paint Captain Lysander miniature - tutorial

Blue cape

Then the blue was painted. Again I used Ivory for highlighting, and black for shading. I used exactly the same method as before – several colors next to each other and wetblending. When I had all these colors painted, it was the time for painting the face.

Face

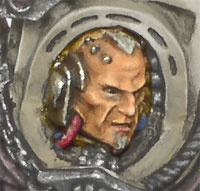
I started with Vallejo Game Color Dwarf Skin, but with a bit of Dark Green added to tone the color down a bit. Then I painted the eyes: first Black + Smoke, then White – leaving a thin line visible around, and finally the pupil was painted with. Then I corrected the skin around the eyes with the basic mix. The first highlight – which was applied over most areas – was thinned Dwarf Skin. Then I kept adding Vallejo Game Color Elf Skintone to successive layers.

Photo: How to paint Captain Lysander miniature - tutorial

Then I added a bit Pale Flesh to one layer, and the last highlights were made with pure Pale Flesh. I made the lines between the head and the other elements (the armour, the implants, etc.) darker by fine application of Vallejo Model Color Smoke. The hair was painted with Cold Grey with a tiny bit of Smoke, then highlighted several timed by adding Ivory.

Skull

All the skulls and parchments were painted the same way: The base color was a mix of Vallejo Model Color Cavalry

Photo: How to paint Captain Lysander miniature - tutorial

Brown and Vallejo Game Color Cobra Leather, and then highlighted several time by adding Vallejo Game Color Bonewhite, and later – Ivory, up to pure Ivory. The outlines and eyesockets here painted with Black (mixed with a small amount of Smoke).

Time to assemble the model…

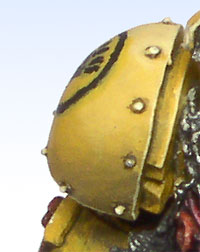
Then mini was assembled. The metallics were taken care of again, and all the rivets were outlined with the Black/Smoke mix, and painted again with Chainmail Silver. The whole mini was given a thin coat of glossy varnish for protection, and I added the few freehand details – the Imperial Fists chapter symbol, the writings on the ribbons, and the purity seals.

Photo: How to paint Captain Lysander miniature - tutorial

Freehand – Chapter symbol

I started painting the chapter symbol by painting a circle. It didn’t look all this even , so I had to correct it in several places with the Sunblast Yellow/Yellow Ochre mix and Black. Then I painted the black fist. The next step was adding the yellow lines to divide the parts of the fist. I finished it by cleaning the freehand with black. I decided to leave the corrections of black to the end, because it covers well, and so the corrections would be pretty easy.

Photo: How to paint Captain Lysander miniature - tutorial

As for the other freehands, they were just painted with some patience and a fine brush. No tricks there…

It’s a kind of… OSL

The mini was then sprayed with several light coats of glossy varnish, and then one heavier layer was applied again. I drilled a hole in the base and attached the mini to it. When the glue dried, I applied several glazes of thinned Scorpy Green to the metallic parts close to the green slime, followed with several thin washes of Transparent Green to run into the recesses. The edges were then picked out by Scorpy Green with a small addition of Ivory again.

Photo: How to paint Captain Lysander miniature - tutorial

I sprayed the mini with flat varnish to remove the sheen. Later I polished the metallic parts a bit, because the flat varnish dulled the metallics too.

Final result

You can see the finished mini here:

Photo: How to Paint Captain Lysander - tutorial

I hope you found this tutorial useful. And if you have any comments or questions – feel free to leave them below. Thanks a lot!