Creality Halot Lite – review of the 3D printer after several months

Some time ago we’ve been offered a chance to test and review a Halot Lite printer from Creality. Having heard good things about the Halot printer, we happily accepted the offer. We have been using the printer for a few months now, which allowed to test the printer in a number of various tasks and to have a fairly broad opinion on its subject.

Basic facts about the Halot Lite 3D printer

Some time ago we’ve been offered a chance to test and review a Halot Lite printer from Creality. Having heard good things about the Halot printer, we happily accepted the offer. We have been using the printer for a few months now, which allowed to test the printer in a number of various tasks and to have a fairly broad opinion on its subject.

Halot Lite is a mid-size resin printer, comparable to Elegoo Saturn or Anycubic Photon Mono X. 

It has an 8.9” LCD screen with a resolution of 3840×2400 and printing volume of 192x120x200 mm. It offers a great compromise between big printing field (allowing to print larger or more items) and high resolution.

The overall design and style is really neat and more modern than that of the other printers I’ve been using. One thing really stands out when you compare it to other printers: it’s big and heavy. On one hand it will need a bit more space, but on the other hand it is stable, which is always good for printing. 

Size comparison of Halot Lite and other printers (Elegoo Saturn and Formlabs Form 2)

See, the small one is a Saturn, pretty much a comparable printer, the one on the right is a Form 2 printer from Formlabs (quite a different kind of a printer, but included here for size comparison), and the big machine in the middle is the Halot Lite. 

Even now you can see that the printing volume is comparable on the first two printers, it’s the bottom part, containing all the electronic parts, that makes the difference. But it also allows to make the color touchscreen as big as 5”, which is really comfortable to work with.

I won’t be going into all the technical details and solutions, which may be interesting for those more scientific- or engineering-minded of you, as you can easily look these things up on the internet. I will give you a user perspective on the Halot Lite 3D printer.

Preparing the printer for use

Let’s start with the basics first – after unpacking you need to level the build plate and fill the vat with resin.

Leveling

Leveling is very straightforward – you loosen the four bolts, lower the build plate on the provided leveling card and tighten the bolts. And I must say it was the only time I had to level the plate. It stayed leveled through all the time we’ve been using the printer.

It isn’t quite flawless though. While it’s a minor issue only, it should be mentioned. You can see the four bolts holding the build plate – if you put more resing in the vat (and I assure you, it will happen), resin tends to collect around them, which is difficult to clean. The same happens when you put the build plate on its side. It’s not a big problem, I learned to ignore it and simply swipe as much resin off as I can without removing the bolts, but for some it may matter.

Resin collecting around the bolts

The resin vat

The vat is large and has a pretty good volume. I’ve never filled it to the brim, but I would say it can hold 1l of resin. It has a few features which I really liked. First – it has “funnels” on two sides, unlike other printers that I have used, which usually only have one. It makes pouring some additional resin easy and convenient because you can access the vat from any side that you prefer. Moreover, you can rotate the vat, putting the funnels on the front or on the back of the vat. The standard position is with them on the back because it allows you to see resin volume markers in the vat (50% and maximum resin volume), but I’ve been using it rotated as well and liked it a lot.

Funnels on both sides of the Halot Lite vat

The shape of the funnels is broad and well designed, and it makes pouring resin into vat easy even during printing. Removing leftover resin from the vat is also easy, so the vat really does its job well. 

Halot Lite – vat funnel closeup

There are short legs on the bottom of the vat, matching four slots in the printer, making aligning the vat easy and effortless. The legs are long enough that you can put the vat on a table without worrying that the FEP will touch anything and get dirty. Well done, Creality! Seems like a small thing, but it’s a big quality-of-life improvement for me!

The two bolts holding the vat in place are long and rotate easily, holding the vat securely in place, but this is the standard I am used to. It’s just that the heads are large and easy to twist.

Preparing the file and slicing the models

The next thing you will need to deal with before you print is preparation of the file for printing. And this is where my initial opinion on the Halot Lite printer changed drastically.

File format and slicer

The printer uses a CXDLP file format, which means you will need a slicer that handles this format. There is a dedicated slicer called HALOT BOX included and it works really well but is not as advanced as some of the other slicers I have been using. Sadly, none of them handled CXDLP files, so I used to do all the supporting in a different slicer, like Lychee, export the supported file to STL and then slice it in Halot Box. Maybe it’s fun for some, but for me it’s just an extra step I have to make, slowing the overall process and making it less efficient. Or, to be true, it used to be.
It has to be mentioned that the slicer is tailored for the Halot printers, so you can be sure that the settings you enter there will be acceptable for the printer. It is a bit basic, but usable. While it allows to turn anti-aliasing on, you cannot tweak its settings, layer thickness can only be adjusted in 10 microns increments, and lift speed is capped at 3 mm/s.

The big change came when Lychee Slicer introduced compability with the CXDLP format. Currently CXDLP files can be sliced in Lychee Slicer, which is excellent, because I no longer need to disrupt and adjust my workflow. And it also comes with an additional interesting quirk!

Print settings on the touchscreen

See, the uncommon thing about Halot printers is that you can set printing settings on the printer itself. Most printers include the settings in sliced files, but Halot Lite has a settings section in its printing menu, which allows you to set the usual parameters, like exposure time, lift speeds, etc. 

Initially it was a bit annoying to me. I was used to the usual workflow of slicing my files with the usual parameters for the particular kind of resin, and then just starting my prints. Now it was no longer the case. every time I changed resins, I had to adjust settings on the printer. Not fun, right? 

Not anymore! Now you can include the settings in your sliced files, and the fact that you can adjust the printing settings on the printer itself is only an additional bonus for me. Let’s say I want to tweak the settings because the included ones don’t quite work, or maybe I want to use a different kind of resin – now I don’t need to re-slice the file. I can use the one I have and only apply the adjustment on the printer. Sounds cool, doesn’t it? And I can assure it’s come handy a few times already!

Remote upload and mobile app

Files can be uploaded remotely, as the printer can connect to WiFi networks, but I rarely use this option. I tend to use the good old USB drive. It’s a habit I developed with some of my other printers, but it’s not really necessary here, as the printer comes with its own memory, so you can print without connecting any external drive or memory device. Definitely a good thing, especially for those who will be sending their files remotely.

While we are at the remote connectivity capability, it’s worth mentioning that there is a dedicated mobile app, called Creality Cloud, which allows you to control the printer, or track your prints remotely. Something I very rarely use, just because I usually run a few printers simultaneously, and most of them cannot be controlled remotely, but it certainly is a nice feature and may be a good addition for many users.

Printing with the Halot Lite 3D printer

Once the file has been uploaded and settings adjusted, we can start our print. And I must say this is where this printer really meets my expectations and proves that Creality really put effort into making a good printer. I can’t tell how much of the official technical writeup is true, all the processors, microchips, and unique lighting solutions. But whatever they did, they managed to create an efficient, reliable, and solid 3D printer. I can’t comment on the technical information, like the strength of the light source, the uniformity of the UV light, etc., but in the several months of testing this machine, it proved to be more reliable and successful than my former favorite and main competitor, Elegoo Saturn, and I had the unclear impression that the printer is pretty fast. Maybe its light source is stronger, but it was not uncommon that it managed to succeed with shorter exposure times than the Saturn.

On the other hand, it has a single Z-rail, while Saturn has a double Z-rail instead. This allows the Elegoo printer to use higher lift speeds (using the “vroom” approach) without sacrificing too much of its stability. Halot Lite allows only slightly lower lift speeds, but even the single rail has been very stable and reliable so far.

I’ve used a number of various resins and settings during my tests, and you can see a selection of results of my printing in the attached pictures. I can tell that for a 4K printer with 8.9” screen, which means pixel size of about 50 microns, the prints were really impressive. Details were sharp, layer shifts were really rare, and prints that used to fail on my other printers succeeded on the Halot Lite. It may be the lighting solution that the printer is boasting, but it’s been even easier and more user-friendly than the Formlabs printers that I’ve been using, and which are known for their user-friendliness. 

Secondary features

Now that we’ve discussed the primary subjects, let’s move to the secondary features and quality-of-life improvements.

Cooling

The printer boasts solid cooling solutions, and I must admit, it never felt like the heat was any problem for the machine. On the other hand though, the cooling fans make it pretty loud. Compared to every single printer I have, this one is certainly the loudest. But I think it’s not a surprise if you remember it keeps the machine with a pretty strong lighting system from overheating.

Tank cleaning

Another feature that may be useful for most users is that the printer has its own tank cleaning function. It’s becoming more and more popular these days, but not all of my printers have it. For those who don’t know what it is, it turns the whole screen on, so that a thin layer of resin can cure on the bottom of the FEP. Any separated parts of prints will stick to the cured film, and you can peel it off without having to scratch the FEP or fish for the cured resin bits in the vat. Easy, fast, and useful. The only improvement I would recommend here is a timer of some sort, which would allow you to turn the exposure on for the predefined amount of time, instead of having to turn it off manually after you think it’s done.

Print removal

The build plate is solid and durable. On one hand, you can remove your prints easily, but on the other one, there is no problem with prints not sticking to the build plate. Good job. And one funny thing that I want to mention is that the tool you get for separating prints from the build plate may be the best I’ve had in all my printing career. Why funny? Because you don’t buy a printer to get a good blade for removing prints. There must be cheaper ways, right? Probably the only improvement may be a flexible magnetic build plate, but we cannot expect it to be included as a standard feature.

Halot Lite build plate with models still on it

Examples of prints from Creality Halot Lite

Now that we’re done with the whole printing process, you may want to see some examples of prints we’ve gotten from the Halot Lite printer:

Examples of models printed on Creality Halot Lite, still with supports
The same models – printed on Halot Lite, supports removed
Larger model printed on the Halot Lite. Darfos Kazarun from Cripta Studios.
Different model, different resin, but the Halot Lite didn’t disappoint.
Several models from One Page Rules printed on Halot Lite
Different kind of a print. The hole on the chest was a bubble in the thick resin that remained trapped there during the print.

Maintenance of Halot Lite

Everything is OK until things are going well. But at some point you may need to replace your FEP or clean the screen. That’s what I had to do. How was it?

Replacing the FEP

At one point I had to replace my printer’s FEP. The printer comes with a replacement, so you don’t even have to worry about purchasing one. And to my surprise, the way it’s done was a bit different from what I was used to. You know, usually you simply have a sheet of FEP, which you press between two frames, or a frame and the vat, and while keeping them all in place, you fix the parts together with a number of bolts, puncturing the FEP where needed. Creality chose a different solution – their FEPs come pre-cut and with holes punched where bolts will go. But that’s not all! The vat has a number of alignment pegs, which match holes in the FEP, so once you place the FEP correctly, the pegs will go into their holes and you won’t have to worry about keeping the FEP in place. You cover it with the frame (removable bottom of the vat) and secure it with bolts. Easy, and basically as fool-proof as it gets. The downside is that you need an FEP with these pre-punched holes, but once you have it, the whole process of replacing the FEP is a walk in the park!

Cleaning the screen

The FEP replacement thing happened once I noticed a tiny hole in my previous FEP, which caused a resin leak onto the screen. The resin cured on the screen, so I soaked a cleaning sheet with IPA and left it for a bit. After some time the resin softened and could easily be removed by gently rubbing it off the screen. The screen was not damaged at all and no leak into the printer occurred. Good job here, Creality, as punctured FEPs are something that can happen, so making sure the screen can survive the process of cleaning is important.

Final opinion

So what would my final opinion be? Definitely a positive one. The Halot Lite printer can be recommended both to experienced users and to inexperienced newcomers to 3d printing. It’s very easy to operate and I can only praise its user-friendliness. The quality of printing, reliability, and sturdiness make it a good device for demanding users, too. It has several solutions that I consider big quality-of-life improvements, like the way of leveling the build plate, the way the vat is constructed, foolproof FEP replacement, remote control, big and sharp touchscreen, and finally the way you can change print settings on the printer’s touchscreen. Let’s not forget the neat design of the machine, so you don’t have to hide it somewhere in a garage or basement.

Is it perfect for everybody? Probably not. It’s a fairly large and loud device, so it may not belong to some hobby rooms, especially if noise is not acceptable. Also the fact that some settings are less granular than other printers offer (layer thickness, lift speed) might be a limitation that some won’t want to accept. 

One more print from Halot Lite, just to show more examples of prints before the end of the review 😉

All in all, comparing it to other printers with comparable characteristics, Halot Lite is a great choice and a printer that can be a reliable workhorse for your 3d printing needs. Especially if you want something more than a 7” printing screen, for higher printing efficiency. Until 8K printers become more popular and take the place of current 4K mid-size printers, this remains a choice that deserves to be recommended.

StudioLevel terrain review

StudioLevel terrain

Some time ago we’ve been contacted by StudioLevel and asked if we could do a review of their products. We hadn’t seen them until the moment we received our samples, so it was a completely new product for us. We knew it from the advertising materials but getting a first-hand opinion was more important as their models looked pretty interesting on the website. Now they even have some promotional video clips, which you can see just below this paragraph, but at the moment of our testing these were not available yet. Long story short, we received one model set and two plants sets from them for testing and reviewing.

The products are quite obviously aimed at wargamers, and many of them will find these items pretty interesting. They can be used to make their tabletop battlefields look much more interesting with just minor effort.

StudioLevel terrain
Balrog, one excited hobbyist…

StudioLevel Terrain wanted to know if their products can be of interest to miniature painters and modelers. If you’re looking for a brief answer, without all the details provided below, the answer is: yes, but only to some degree.

What we received

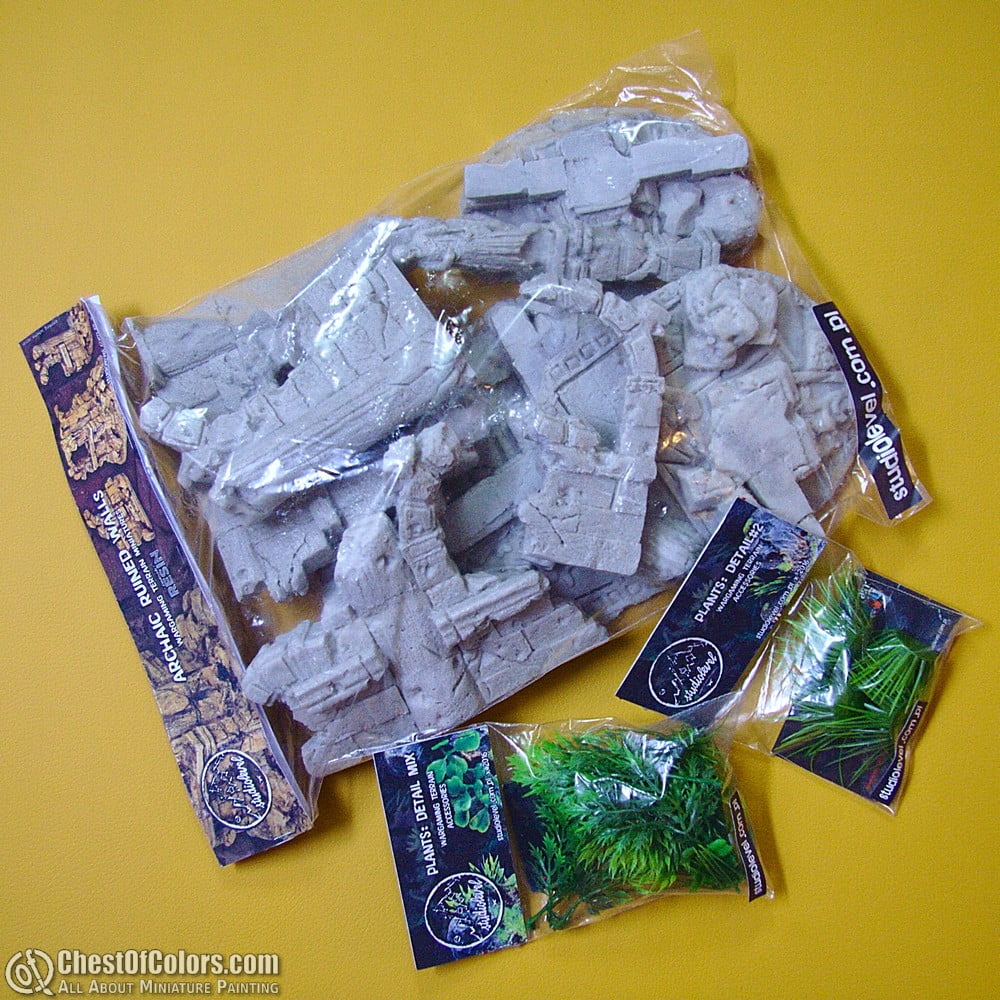
The samples that we received from SLT were: 1 set of “Archaic Ruined Walls”, 1 set of “Plants: Detail Mix” and 1 set of “Plants: Detail #2”. The products were packaged in plastic bags with paper labels. There was enough information on the labels, like addresses, explanations and some basic instructions. Not that these were really necessary.

The walls set was the most interesting to me, while the two plants sets left me pretty indifferent. So as these seem to be of really minor interest to me as a painter or diorama maker, I will address the last two only shortly.

StudioLevel terrain
Simple but nice packaging.

StudioLevel terrain

Plants mixes

I couldn’t find these in StudioLevel’s catalogue, so I was unable to check how much do these cost. Eventually we were informed these are simply free bonus packs, which are not meant to be sold separately. While they are a cool freebie, I doubt they would make good standalone products. Why?

I assume most of you have have found your own ways to deal with the subject of vegetation/plants on your models. These can range from using smaller specimens of real plants, through plants made for train dioramas or toys, to aquarium plants. And aquarium plants are exactly what you find in these sets.

StudioLevel terrain StudioLevel terrain StudioLevel terrain StudioLevel terrain

I don’t know about you, but I have easy access to fishkeeping stores, in which I can easily buy larger plants which can be divided into smaller ones or larger packs of smaller plants. While maybe not dirt cheap, these don’t really cost so much that it would be too expensive to pay like €8 or equivalent to have a nice supply of plants. I myself had bought two larger plants to split them into smaller chunks and have more than enough than I need to cover my tabletop for gaming.

Why should I buy these plants packs from StudioLevel Terrain is  a bit unclear to me. Maybe if I didn’t know the alternative or source of these plants, was really low on storage space, or really low on money? But I cannot ever see myself purchasing any of these sets, especially that they have some more interesting and better detailed plants in their catalogue.

Additionally the quality of these plants and the way they are made makes them insufficient for any more serious modeling tasks beyond tabletop gaming. While they may be a great way to make your battlefield green, I don’t think you would consider them good enough for your miniatures or dioramas, but your mileage may vary. Our packs were enthusiastically received by our very own Balrog, now a miniature gamer (and painter) who happily added them to his own terrain collection!

StudioLevel terrain
You see how anxious he is to put his hands on this stuff? 😉

So are they something with no potential? No, they just need to be slightly adjusted depending on their purpose. If they are to remain promotional/bonus freebies, I would clearly mark them as such. And if they are to be sold,  I think they don’t make a very good standalone product but can be a part of interesting mixed packs, like a small pack of one tree, one bush and a few of these plastic plants, larger pack with several of each and a large pack with enough plants to cover a small tabletop battlefield. Even if not of real interest to painters or modelers, such pack might be cool for gamers who could easily make their battlefields green and full of cover.

The more interesting thing is definitely the Ancient Ruined Walls set, which I am going to review now.

Ancient Ruined Walls

StudioLevel terrain StudioLevel terrain

This set looks is priced at €68 and looks very cool on promo materials and I must admit it can really easily be turned into an interesting (and pretty large) terrain piece even with minimal skills and effort. But what if your skills are much higher and you really want to put some serious effort into turning it into a breathtaking diorama centerpiece terrain? Well, I am not sure if this is the best choice. Why? Let me explain.

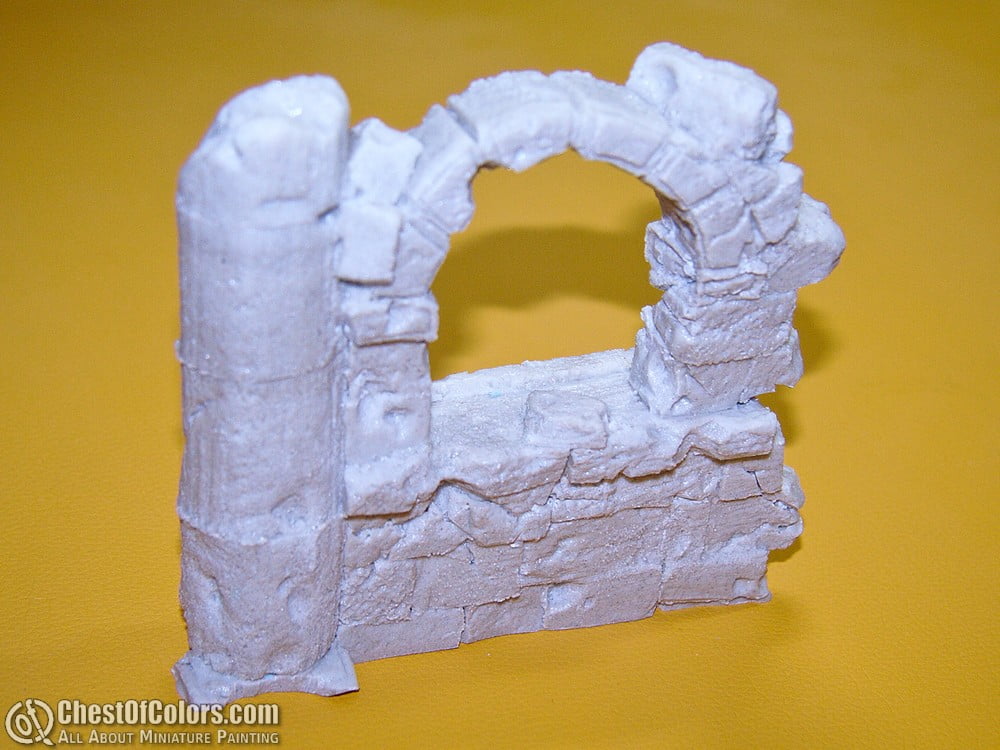
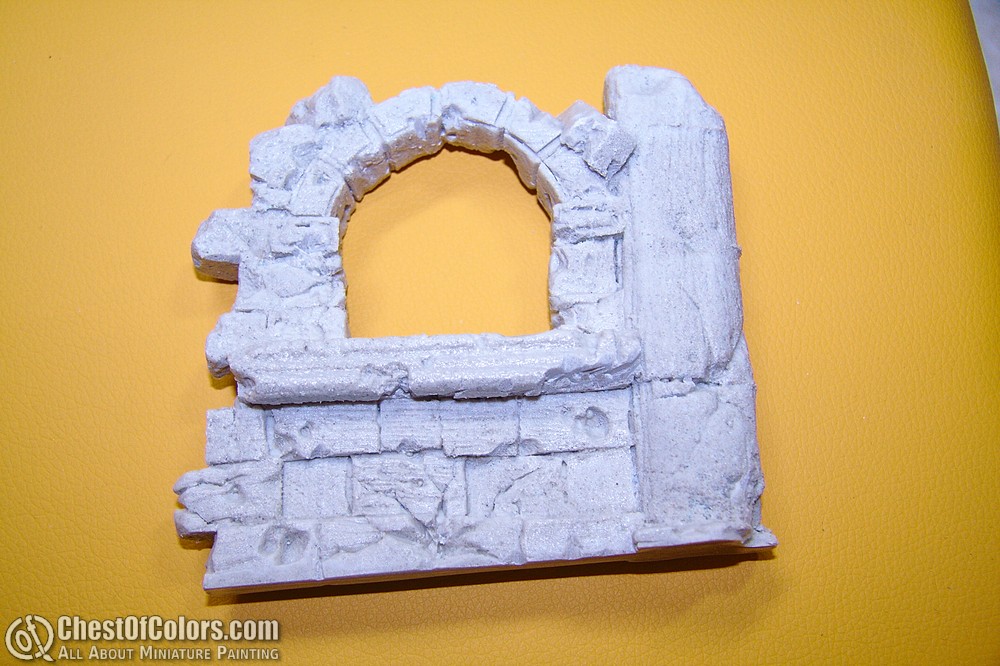
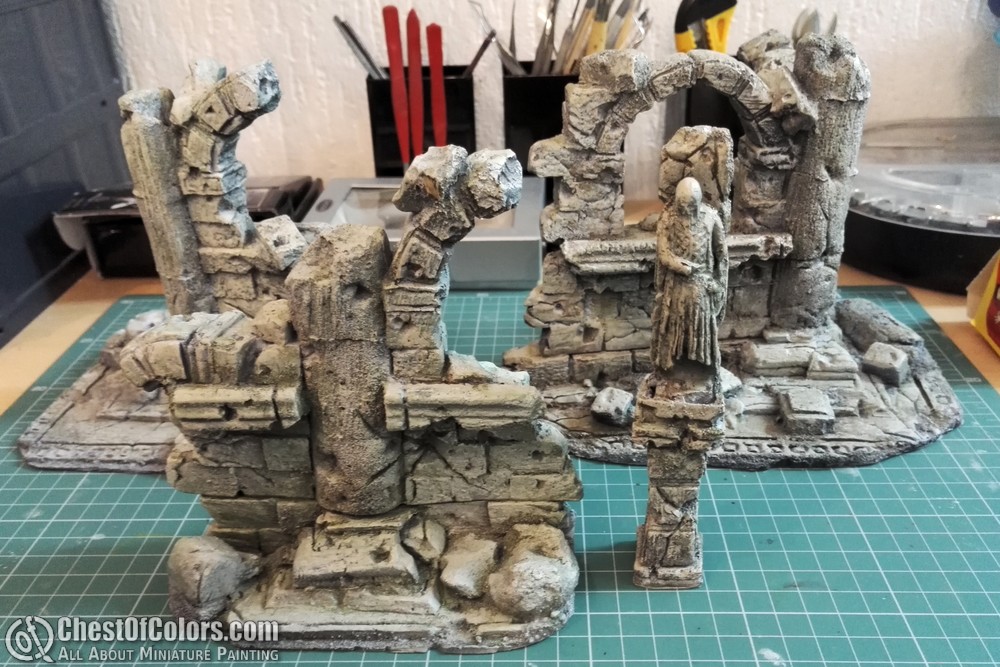
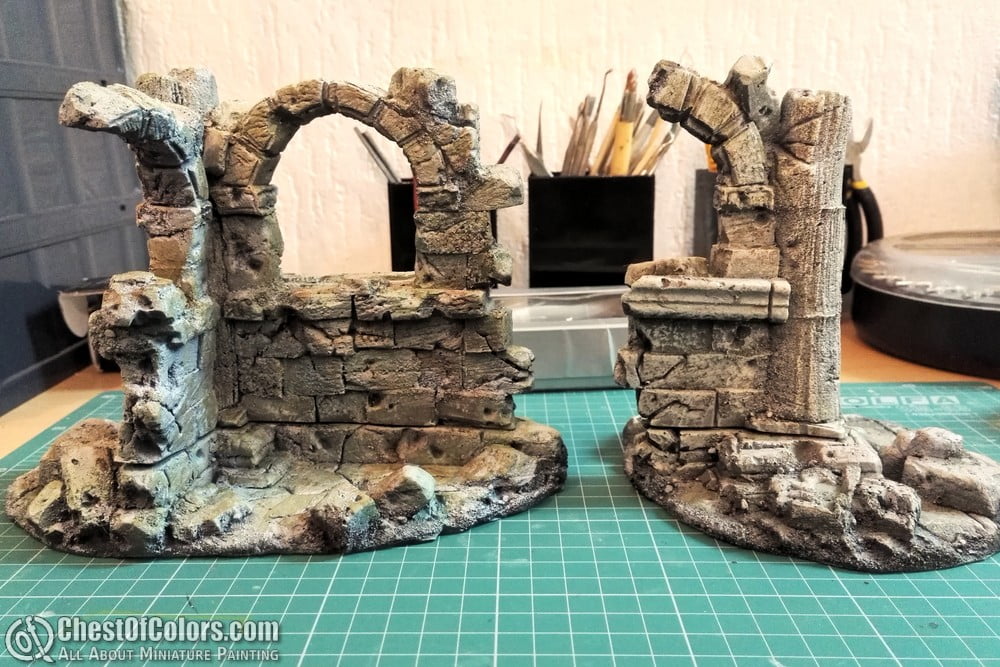
As you can see there are quite a few elements in the pack. Just enough to build three walls and one pillar/column with a statue on top. Yes, they may look good from distance and can surely look good from close up. Unfortunately I think you will have to put some work into concealing some shortcuts taken by the sculptor.

See the photos below for some additional comments.

StudioLevel terrain
Check the column at the connection of the two lowest sections. The connection seems messy to me. As if one of the sections melted.

StudioLevel terrain
The small square decorations, why are they so uneven?

StudioLevel terrain
These cracks don’t make much sense to me…

StudioLevel terrain

I am not any kind of expert in casting and resin, but the kind of resin used here was not the one I was used to working with. It felt rough, like there was a lot of filler in it. I can’t tell if this was the case or was it caused by any different factors, but the result was that working with it was less comfortable than I expected. It was not particularly difficult or annoying, but simply less fun than I expected it to be. It was partially balanced by the nice design and some details of the sculpts, but this first problem bothered me until I was about halfway done with the models.

The details, while quite plentiful, were not always clear and sharp enough (check the closeups to see what I mean). Or maybe I should say: they were soft where I would expect sharp, and sharp where I would expect smooth.

StudioLevel terrain
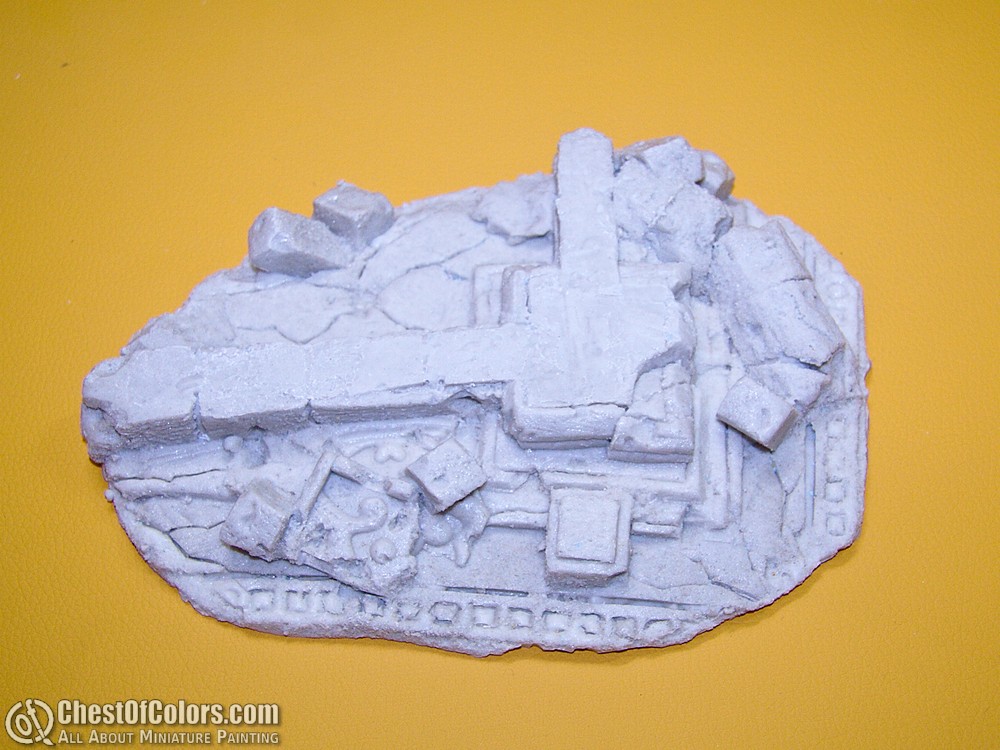
Those small uneven squares again. And these cracks in stone floor seem soft, as if they were pressed in styrofoam with a sculpting tool…

StudioLevel terrain
Those soft cracks again.

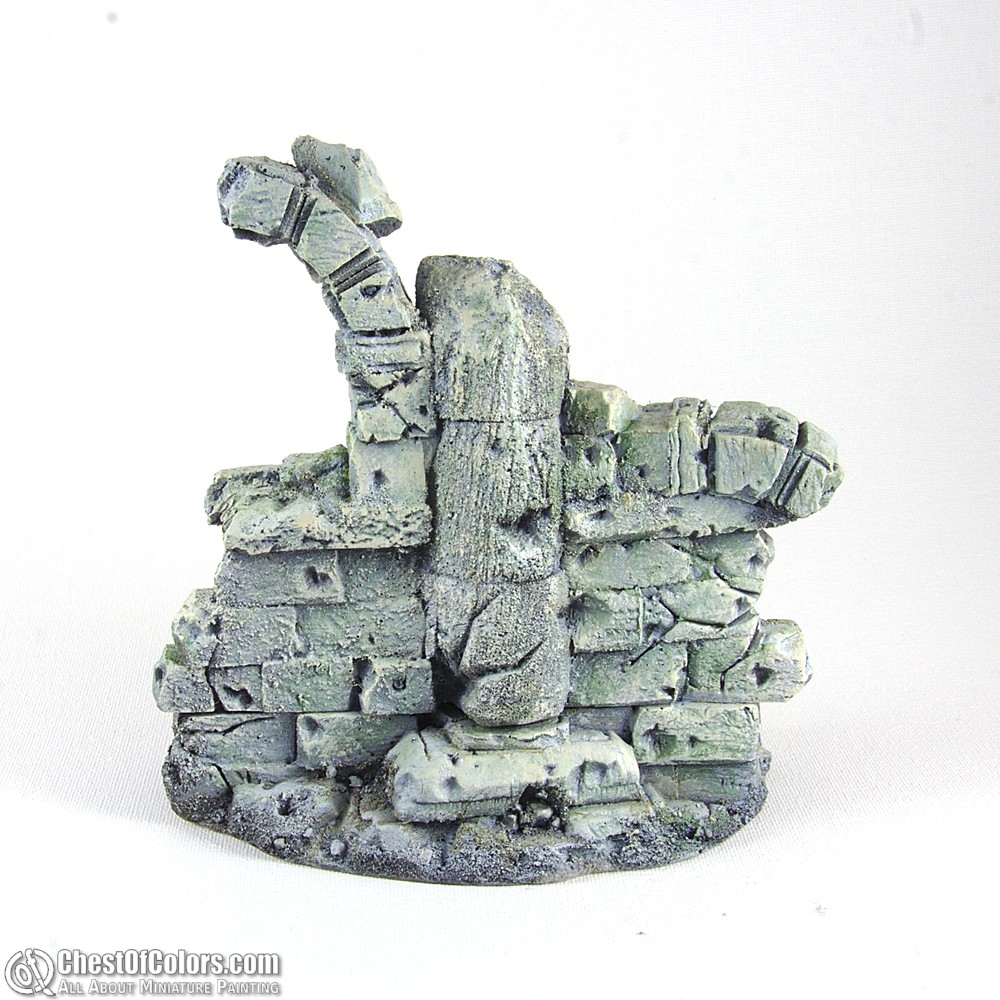
For example check the stone blocks on the photos – most of them have very sharp edges, as if they were precisely cut (with a laser, or maybe a modeling knife through XPS) but basing my expectations on the title of “Ancient Ruined Walls” I thought these should look different. Just check the ancient pyramids and temples – their stones have been already worn by sand, wind, rain, etc. They’re no longer sharp, but more softer-edged. And on the other hand, some damage, cracks and breaks in the stones look much softer than they should in my opinion. They don’t look like broken stone slabs but more like butter, putty or styrofoam pressed by some kind of sculpting tool. Depending on how fresh the damage is, these lines could be sharper to some degree.

StudioLevel terrain
See how sharp these edges are. Shouldn’t they be softer, weathered by years of atmospheric conditions, while some cracks and breaks could be sharper because they’re newer than the building itself?

Now while details like these may be irrelevant for a wargamer, they may be significant for some model builders. When you put multiple hours into your model or diorama (and hundreds of hours are not uncommon) you want to avoid such inconsistencies. And while these are more of ‘internal logic’ shortcomings, there were two things I really disliked.

Maybe they were just my personal preferences, or maybe just traits of my particular copy of the model, but that’s something that bugged me for a serious part of the process. And both of these issues can be collectively addressed as “roughness” or “graininess” of the model. Maybe it’s the casting or maybe it’s the sculpt, but I found many parts of the model rough. Just as if it was covered with glue and then with pretty fine sand. I don’t think that this coarse finish served the model well. To me it just made painting less comfortable, but I am well aware that for many others it can be an advantage, which will make painting easier.

StudioLevel terrain
See the grainy surface?

Let me explain – when you are painting the model with relatively wet brush, such rough details will break your smooth brushstrokes and maybe even damage your precious paintbrushes. On the other hand they may be a blessing for drybrushers. When painting with the drybrushing technique you usually use a harder brush, which will be more durable and also sharper details will be easier to pick by drybrushing. So if you intend to paint the models in this way, consider it well suited for drybrushing. When wetbrushing you may need to be more careful, or take it into account when preparing the model for painting.

StudioLevel terrain
My favorite part! I love how his features and details are faded and unclear, but the surface is grainy and porous again…

This rough detailing also felt out of place on the statue. It seems to depict some human figure, possibly a knight of old. The features and details are not clear and look weathered and faded, which is great and adds a lot fo character to the model. But then some parts of the model feel sharp and rough again. Grainy, almost porous. Wait, are we really talking about something “ancient” and “ruined”? Have you seen old statues? They usually seem to be pretty soft-featured, smooth, and details are often gone already. Surfaces are weathered and almost polished by atmospheric conditions. And this model feels rough, pumice-like. No, it was no fun for me, but definitely much easier for drybrushing.

StudioLevel terrain
These models are best suited for fast and easy painting methods. The quality of detaild doesn’t seem to be encouraging advanced and precise painting, but some drybrushing and washing easily makes the ruins look really cool.

Fortunately I had somebody who would enjoy this kind of painting! Balrog was waiting anxiously for his participation in painting of these models, so as soon as I said “come on, son, let’s continue together” he couldn’t get any happier! 😀

StudioLevel terrain
Good, large surfaces to practise drybrushing and washing.

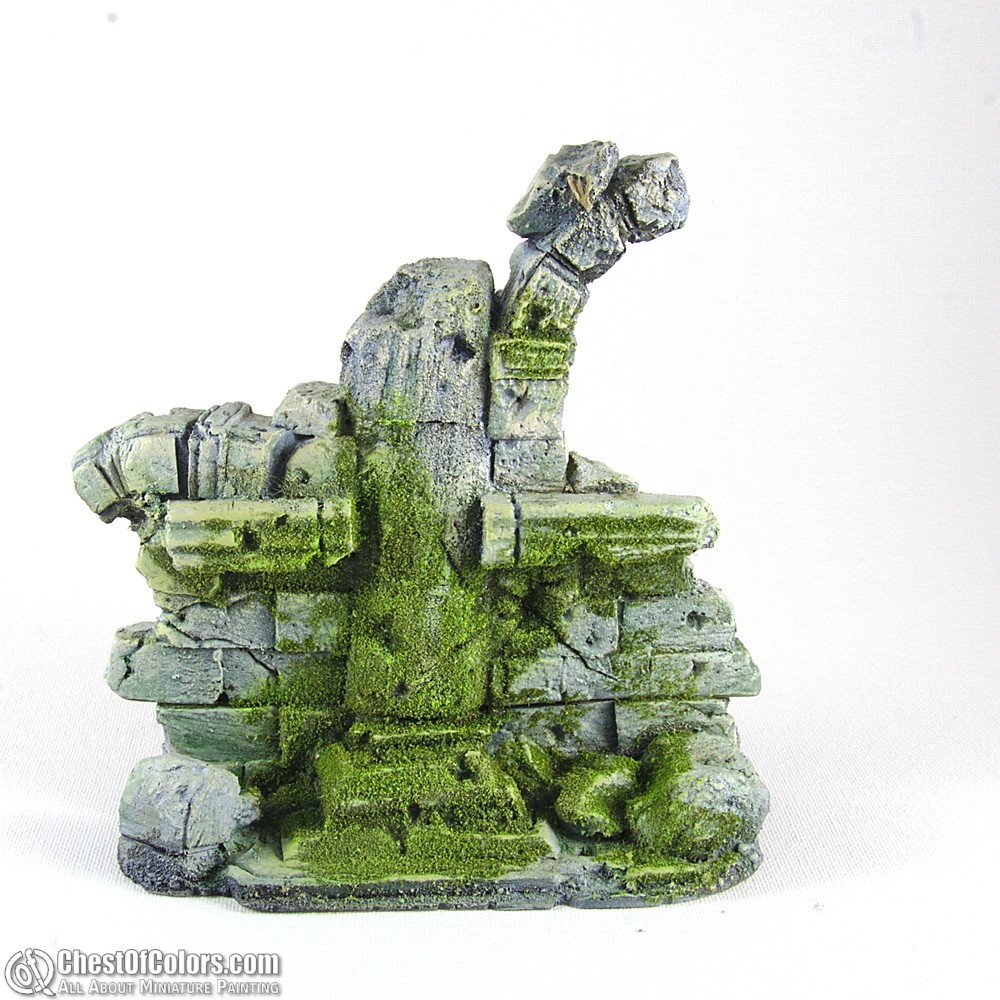
These models were perfect to teach him shading and highlighting on really large models, with washes and drybrushing respectively. Then we even added some moss to make the ruins look even older and I am sure they will be used frequently in our battles, as he was absolutely impressed by these massive castle ruins and the mysterious statue. Also seeing how easily he could achieve relatively good effects on these models made him happy and confident in his skills. So if you want something good for painting with beginners, these sets may be a perfect choice.

StudioLevel terrain StudioLevel terrain StudioLevel terrain StudioLevel terrain StudioLevel terrain

I didn’t allow him to assemble the models, except for dry-fitting, because I don’t think allowing a kid of his age to play with toxic glues is a good idea. But even he managed to notice that the parts don’t fit perfectly together. They fit well enough, so there’s no real problems in assembling them at all, but making this review a honest one requires mentioning that all the connections required several consecutive applications of glue, as there were gaps large enough to need more glue than a clean joint would.

StudioLevel terrain
Gap

StudioLevel terrain
Another gap in the wall 😉

StudioLevel terrain
StudioLevel terrain
StudioLevel terrain
StudioLevel terrain

But there is an easy answer to this problem. You don’t even have to fill the gaps with putty. You can cover them with moss or grass! 🙂

StudioLevel terrain
We applied some moss to make it look even better (and to cover gaps between elements)

My opinion

Now do I think these products are a good pick for a diorama builder or miniature painter? Well, it depends.

They wouldn’t be my first choice for sure, but I can easily find several groups of hobbyists who would be happy to choose them.

First of all they’re good for beginners and slightly more intermediate hobbyists. These will be satisfied with the level of detailing and quality of execution, and should be able to cope with assembling and painting with ease.

See how good these models can look with just some simple work from a boy like Balrog and his dad:

StudioLevel terrain
This is the official way it should be assembled – the column is a part of this ruin now. Unfortunately our placement of moss doesn’t make much sense this way, but when you’re a kid it doesn’t ruin your fun!

StudioLevel terrain
See, the two elements are put together here….

StudioLevel terrain
… but despite it, we decided to keep the statue as a separate part to make it more flexible for gaming purposes.

StudioLevel terrain
Some drybrushing, 2-3 washes, and a little moss.

StudioLevel terrain

StudioLevel terrain StudioLevel terrain
StudioLevel terrain
StudioLevel terrain
StudioLevel terrain

StudioLevel terrain
Yeah, that’s the two of us working on the statue! 😀

On the other hand use of these models by more experienced and demanding hobbyists would require some more involved work from them which might make these models less interesting for them. For example while a beginner might be fine with some gaps in his model, an advanced diorama maker wouldn’t allow it to stay this way, especially in places where it makes little sense. More experienced painters may also be less likely to drybrush their models than beginners, which would call for a smoother finish of surfaces than what I got with my model.

Possible uses

And what uses could there be for such models? Definitely the most obvious one is for wargaming. Wargamers will find these models more than satisfactory, easy to build and paint, and they would be a wonderful addition to any fantasy battlefield! Such models could also be incorporated as parts of dioramas (or large scenic bases), even of showcase quality if you are willing to do some work to overcome their shortcomings. Or maybe even become a more interesting version of photo background for one’s models?

We’ll try to show you how the ruin can be used for gaming or as a part of a photo setup, but that will be covered in a separate post.

Balrog builds HobbyZone miniature transport cases – review

HobbyZone‘s offer includes interesting miniature transport cases. I was lucky to receive them for testing and reviewing, but I realized that there are already such reviews on the internet, describing thoroughly these products. This put me in a difficult situation – should I write yet another review, posting nearly the same photos, similar comments and remarks? Everything must have been said already….

W swojej ofercie HobbyZone posiada ciekawe walizki do transportu figurek. Miałam szczęście otrzymać je do testowania i zrecenzowania, jednak zauważyłam, że w sieci znaleźć można już takie recenzje, które dokładnie i szczegółowo opisują te produkty. Postawiło mnie to w kłopotliwej sytuacji – pisać kolejną recenzję, zamieszczając niemal takie same zdjęcia, podobne komentarze i spostrzeżenia? Chyba wszystko zostało już powiedziane…

Fortunately I was not completely helpless! In such cases I can always count on my men – let us see how they manage to deal with this “difficult” task, that is assembling the cases. Obviously I have delicate fingernails. and I’ve just hurt my little finger 😛 so I hope they are going to help the lady in distress? I believe at least the older one should manage somehow. But let’s see if they stand up to the task. 😉

Let me allow Mahon to continue (unfortunately one cannot count on Balrog as far as writing longer texts goes) – he did the assembly, so may he describe it. 😛

Na szczęście nie byłam całkiem bez wyjścia! W takich sytuacjach zawsze mogę liczyć na moich mężczyzn – zobaczmy jak poradzą sobie z tym “trudnym” zadaniem, jakim jest poskładanie skrzynek. Oczywiste jest, że mam delikatne paznokcie, a do tego właśnie się skaleczyłam w paluszek 😛 więc chyba poratują damę w potrzebie? Teoretycznie przynajmniej ten starszy z nich powinien jakoś sobie dać radę. Ale zobaczmy czy staną na wysokości zadania. 😉

Przekażę głos Mahoniowi (niestety na Balroga nie ma co liczyć, jeśli chodzi o pisanie dłuższych tekstów) – składał, to niech to opisze. 😛

Now these are some packages! / Co za paczki!

The cases arrived well packed in cardboard boxes, which should assure safe delivery. But such a tape-wrapped box is nothing an averagely sharp knife couldn’t deal with! 😀

Skrzynki dotarły szczelnie zapakowane w kartony, co powinno zapewnić bezpieczny transport. Jednak taki oklejony karton to nic, z czym nie poradziłby sobie średnio ostry nóż! 😀

Hobby Zone miniature transport case review
Gimme a knife, we’re off to fight!
Dawać nóż, ruszamy do boju!

After unboxing we spotted the cases. But our task was not to be too easy, as everything was in pieces. No, nothing was broken, the cases simply need to be assembled. Wanting to avoid compromitation in my kid’s eyes, I decided to build the first case by myself, and if I succeed, we’d manage to deal with the other one together. 😉 And so I did, according to my plan.

Po rozpakowaniu naszym oczom ukazały się skrzynki. Ale żeby nasze zadanie nie było zbyt łatwe, wszystko było w kawałkach. Nie, nic nie było połamane – po prostu skrzynki wymagają samodzielnego montażu. Chcąc uniknąć kompromitacji w oczach dziecka, postanowiłem, że pierwszą skrzynkę poskładam sam, a jeśli mi się uda to jakoś przebrniemy przez wspólne składanie drugiej. 😉 Jak postanowiłem, tak zrobiłem.

Hobby Zone miniature transport case review
The sight that freezes even most valiant hearts…
Widok, który zmrozi najmężniejsze serce…

Biiiiiiig case / Duuuuża skrzynka

I started working on the larger case – officially called a Professional Transport Case. The number of elements in the box can look discouraging, but a quick look at the manual allowed me to overcome my reservations. Everything seems to be easy and comprehensible, and I am a smart guy and can deal with pictography. 😉
So all there is to do is take the unbeatable PVA glue and start working!

Na warsztat wziąłem większą ze skrzynek – oficjalnie nazywaną Profesjonalną Walizką Transportową. Liczba elementów w paczce może wyglądać trochę przytłaczająco, ale rzut oka na instrukcję rozwiał moje niepokoje. Wszystko wydaje się proste i czytelne, a ja jestem sprytny i poradzę sobie z pismem obrazkowym. 😉
Pozostaje przygotować niezastąpiony klej Wikol i brać się do pracy!

Hobby Zone miniature transport case review
Looks promising…
Zapowiada się obiecująco…

Hobby Zone miniature transport case review
9 pictures? I should be able to do it…
9 obrazków? Chyba dam radę…

I was happy to see that the elements are connected like jigsaw puzzles – the cut ins and outs fit perfectly and the joints hold well thanks to it. Of course I wouldn’t trust them enough to keep miniatures in a non-glued case, but for dry-fitting it was good enough.

It’s good to check in the manual which elements should be used in the particular moment,  because generally the connections are all of one kind, pretty much standardized, so with a little stubornness one could join wrong parts with each other ( no no no, I didn’t make such mistakes…). The manual clearly explains how and what to connect.

Ucieszył mnie fakt, że elementy łączy się jak puzzle – nacięcia i wypustki pasują doskonale i elementy dobrze się trzymają dzięki takim łączeniom. Oczywiście nie powierzyłbym bezpieczeństwa figurek nie sklejonej skrzynce, ale do celów spasowania elementów to wystarczyło.

Warto sprawdzić w instrukcji jakie elementy powinny być użyte w danym momencie, bo zasadniczo łączenia są jednego rodzaju, w jednym standardzie, więc przy odrobinie uporu można spasować ze sobą złe części (nie, nie, nie, mi taki błąd się nie zdarzył…). Instrukcja zrozumiale wyjaśnia co jak zmontować.

Hobby Zone miniature transport case review
Who played with jigsaw puzzles, he will cope with it
Kto układał puzzle, ten da radę

I started with drawers, which are excellent for transporting small items, like glue, brushes or accessories which will be used by Ana to bring her transported minis to their final state or to remove the last faults (did I say “faults”? how risky of me…). I am sure the box can hold enough materials to suffice for a demo painting session (yes, they need to squeeze in, because we are not going to carry any more boxes with us! :-P).

Zacząłem od szuflad, które świetnie nadają się do transportu drobnych elementów, takich jak kleje, pędzelki czy akcesoria, które będą Ańi służyć doprowadzeniu transportowanych przez nią figurek do stanu finalnego lub usuwaniu ostatnich niedoróbek (napisałem “niedoróbek”? ale ze mnie ryzykant…). Jestem pewien, że w skrzynce uda jej się zmieścić dość materiałów, by spokojnie przeprowadzić pokaz malowania (tak, mają się zmieścić, nie będziemy targać ze sobą więcej pakunków! :-P).

Hobby Zone miniature transport case review
Shortly this will…
To wkrótce…

Hobby Zone miniature transport case review
… become a drawer.
… będzie szufladka.

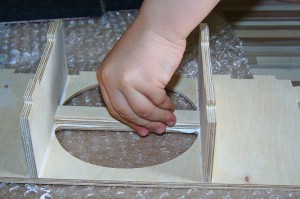
While dry-fitting parts of these drawers I got some help from Balrog, which allowed me to see that even his little hands have no problem with such a “complex” method of building. 😉

W pasowaniu elementów szuflad pomagał mi Balrog, dzięki czemu mogłem zobaczyć, że nawet jego dziecięce łapki nie mają kłopotu z takim “skomplikowanym” sposobem montażu. 😉

Hobby Zone miniature transport case review
Beautiful drawer, perfect for brushes!
Piękna szufladka, w sam raz na pędzelki!

While gluing some parts (especially the corners) I noticed that it’s better to apply glue onto both glued surfaces or at least take care not to glue the parts only partially. Because the elements interlock  with each other, it’s a good idea to assemble them without gluing to see where the glue should be applied and only then move on to gluing.

Przy sklejaniu niektórych elementów (zwłaszcza narożników) zauważyłem, że lepiej nałożyć klej na obie klejone powierzchnie lub w inny sposób dopilnować, by nie skleić elementów jedynie częściowo. Ponieważ elementy zazębiają się ze sobą, warto najpierw sprawdzić “na sucho” które powierzchnie wymagają nałożenia kleju i dopiero wtedy brać się za klejenie.

Hobby Zone miniature transport case review
Now we see where the glue should go
Teraz widać gdzie trzeba nałożyć klej

I liked the way the handle is made – there’s an additional little slat attached on the bottom, and it makes the handle stronger, thicker, and also more comfortable thanks to rounded edges.

Podobał mi się sposób wykonania uchwytu – od spodu przykleja się dodatkową listewkę, która nie tylko wzmacnia uchwyt i wygodnie go pogrubia, ale także dzięki wygładzonym krawędziom zwiększa komfort noszenia.

Hobby Zone miniature transport case review
Oh, thiis handle is from the smaller case, but the larger one is made much like this 🙂
O, to akurat uchwyt mniejszej walizki, ale w dużej rozwiązany jest tak samo 🙂

The upper part is very stable thanks to the additional shelf on which the drawers rest.

Górna część jest bardzo stabilna dzięki dodatkowej półeczce, na której spoczywają szuflady.

Hobby Zone miniature transport case review
So many elements create the upper shelves…
Tyle elementów tworzy górne półki…

Hobby Zone miniature transport case review
… that the construction is strong and stable.
… że konstrukcja jest mocna i stabilna.

While building the case it’s good to fit the back wall pretty quickly. Otherwise the construction may bend to one side and won’t get glued straight. Dry-fitting the back for the time of gluing the rest will prevent such problems.

Jednak przy montażu warto dość szybko dopasować tylną ścianę. W przeciwnym razie może się okazać, że konstrukcja nam się nieco przechyliła i krzywo skleiła. Dołożenie tylnej ściany “na sucho” na czas klejenia zabezpieczy nas przed podobnymi problemami.

Hobby Zone miniature transport case review
The back makes gluing it all straight easier
Z tylną ścianą łatwiej prosto skleić całość

As you can see on the photos, connections are made clean and neatly (I would like to consider it my own achievement, but it’s more thanks to the good craftmanship from HobbyZone). For additional security and reinforcement I applied some glue over all the connections, so the glue could reach into any possible holes and crevices.

Gluing the inner wals in was pure joy, but it’s good to press them well or at least hold them with the removable shelves, which hold in their slots well and there’s no problem with inserting or removing them,

Jak widać na zdjęciach łączenia są wykonane bardzo starannie i czysto (chciałbym przypisać sobie tę zasługę, ale to akurat dzięki dobremu wykonaniu elementów przez HobbyZone). Dla dodatkowego zabezpieczenia i wzmocnienia przesmarowałem łączenia klejem, dzięki czemu klej mógł dotrzeć w ewentualne szczeliny łączeń.

Wklejanie bocznych wewnętrznych ścianek to już czysta przyjemność, choć warto je dobrze docisnąć lub chociaż przytrzymać półeczkami. Półki trzymają się stabilnie, ale nie ma problemu z ich zakładaniem i wysuwaniem.

Hobby Zone miniature transport case review
Did I do it? I told you I would! 😀
Udało mi się? Mówiłem, że się uda! 😀

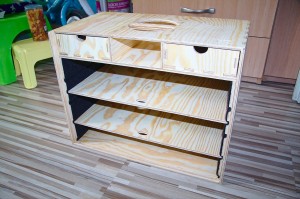
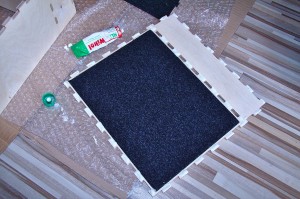
As you can see, the side walls are covered with soft felt fabric, while the shelves arfe made of wood, which allows to attach miniatures easily with likes of patafix or blutack (or at least this is how we attach our miniatures for transportation). The shelves can be inserted on several levels, which allows to transport even very large model – which is very important in our case, as Ana often paints large models (if not large, then at least on large bases, and if even the bases are not large at all, then they are surely very fragile :-P).

The case measures 45cm x 35cm x 25cm and is really capacious! We tested it with Ana’s renaissance knight in 54mm scale with a large banner and there were no problems with finding him a comfortable and secure place.

Jak widać, boczne ścianki są zabezpieczone miękkim filcowatym materiałem, a półki pozostają drewniane, co pozwala na łatwe mocowanie figurek za pomocą mas takich jak patafix lub blutack (przynajmniej my w ten sposób montujemy figurki na czas transportu). Półki można zakładać na kilku przewidzianych poziomach, co umożliwia transportowanie nawet dużych modeli – w naszym przypadku to bardzo ważne, bo Ańa często maluje duże figurki (jeśli nie duże – to na dużych podstawkach, a jeśli nawet podstawki nie są duże – to na pewno bardzo delikatne :-P).

Skrzynka ma wymiary 45cm x 35cm x 25cm i jest naprawdę pojemna! Sprawdzaliśmy ją na Ańi renesansowym rycerzu w skali 54mm z dużym sztandarem i nie było żadnych problemów ze znalezieniem mu komfortowego i bezpiecznego miejsca.

Hobby Zone miniature transport case review
You can insert or remove the shelves as you please
Półeczki można wsuwać i wysuwać wedle życzenia

The front door slides in guides carved in the sides – simple and safe. Just like the sides it is secured with fabric, so even if a model touches it during transport, it shouldn’t get damaged.

Frontowe drzwi wsuwa się w prowadnice w ściankach – prosto i bezpiecznie. Podobnie jak boczne ścianki są one zabezpieczone materiałem, więc nawet jeśli model w transporcie ich dotyka, nie powinien się uszkodzić.

Hobby Zone miniature transport case review
The work is officially finished, we’re closed!
Oficjalny koniec prac, zamknięte!

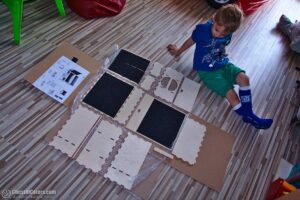
Since I knew the larger case is assembled, I summoned our Balrog to see if a four-years-old can cope with such a serious carpenter’s challenge as assembling the case by himself. 😛

Skoro wiedziałem, że większa ze skrzynek jest już złożona, zawołałem naszego Balroga, aby sprawdzić czy czterolatek jest w stanie uporać się z tak poważnym stolarskim wyzwaniem jak samodzielny montaż skrzynki. 😛

The smaller case / Mniejsza skrzynka

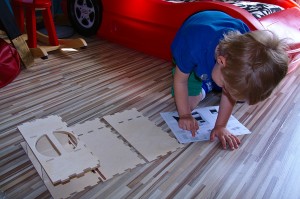
When Balrog heard that he would be allowed to carry his own minis in the case if he builds it by himself, he started immediately with great enthusiasm and seriously.

Balrog, usłyszawszy, że jeśli sam poskłada skrzynkę, będzie mógł w niej nosić także swoje figurki, zabrał się do pracy z wielkim entuzjazmem i powagą.

Hobby Zone miniature transport case review
Customs …… at work?
Celnik przy pracy?

Hobby Zone miniature transport case review
Well packed, nothing gets damaged
Dobrze zapakowane, nic się nie uszkodzi

Hobby Zone miniature transport case review
MacGyver needed immediately
MacGyver potrzebny od zaraz!

This case turned out to be less complex even during the unboxing – in addition to smaller size it was also simpler by two drawers, which it simply doesn’t include. The manual has only 6. instead of 9, pictures.
Great, so we’ll be assembling large parts only, although the case is called a Small Transport Case!

Ta skrzynka już w samym rozpakowywaniu okazała się mniej złożona – poza mniejszym rozmiarem była też prostsza o dwie szufladki, których nie posiadała. Instrukcja mieści się na 6, a nie 9 obrazkach.
Świetnie, będziemy montować same duże elementy, choć walizkę nazwano Małą Walizką Transportową!

Hobby Zone miniature transport case review
In-depth analysis of technical blueprints
Dogłębna analiza schematów technicznych

Hobby Zone miniature transport case review
Dad, we have to do this…
Tato, to musimy zrobić…

Hobby Zone miniature transport case review
… to get this.
… żeby wyszło to.

Balrog paid much attention to studying the manual

Balrog z uwagą wziął się do studiowania instrukcji

Hobby Zone miniature transport case review
LEGO blocks teach you how to read manuals
Klocki LEGO uczą czytania instrukcji

… and attached the first parts – first only dry-fitting them, then he wanted to glue them, but he lacked confidence to glue them all by himself. The official version is that he didn’t want to get dirty. Well, his choice. 😛 I think a parent can help as much as this? 😉 Anyway he was very serious and involved in fitting the elements and pressing the bonds.

… i złożył pierwsze elementy – najpierw na sucho, potem chciał już je skleić, ale do klejenia zabrakło mu odwagi. Oficjalnie: nie chciał się pobrudzić. Cóż, jego wybór. 😛 Tyle to mu rodzic może chyba pomóc? 😉 W każdym razie dopasowywanie elementów i dociskanie łączeń traktował bardzo poważnie i z zaangażowaniem.

Hobby Zone miniature transport case review
I will hold it…
Będę trzymać…

Hobby Zone miniature transport case review
… and hold it to the bitter end!
… i trzymać do skutku!

Balrog had no problems with gluing the reinforcement to the handle and attaching the additional shelf. Daddy applies the glue, and son does the assembling and gluing. It’s fine! And will it last long – we’ll see…

Balrog nie miał problemu ze sklejeniem wzmocnienia uchwytu oraz doklejeniem dodatkowej półeczki. Tata smaruje klejem, synek montuje i klei. Jest dobrze! A czy trwale – to się okaże…

Hobby Zone miniature transport case review
Dad aplied the glue, now son can glue
Tata nałożył klej, syn przyklei

Hobby Zone miniature transport case review
Brutal, manly force
Brutalna, męska siła

With attention he browsed the manual for the next things to assemble – walls. And again the drill was the same: Mahon – glue, Balrog – building.

Z wytężoną uwagą wyszukał na instrukcji kolejne elementy do zmontowania – ścianki. I znowu  przerabiamy to samo: Mahoń – klej, Balrog – montaż.

Hobby Zone miniature transport case review
Walls, dad!
Ściany, tato!

Hobby Zone miniature transport case review
And I will surely be allowed to carry my minis in it?
I na pewno będę mógł w niej nosić moje figurki?

Even adding the floor was not much of a challenge for him. After all the hours spent with jigsaw puzzles he couldn’t go wrong!

Nawet dołożenie podłogi nie było dla niego większym wyzwaniem. Przecież te wszystkie godziny spędzone nad puzzlami nie mogły pójść na próżno!

Hobby Zone miniature transport case review
Just like jigsaw puzzles…
Zupełnie jak puzzle…

We still had to attach the back.

Do przyklejenia został nam jeszcze tył.

Hobby Zone miniature transport case review
These modern tools were used for building the case
Tak nowoczesnych narzędzi używaliśmy przy budowie skrzynki

I was surprised with the speed of his work – I expected a four-years-old to get bored and start fretting soon, but such a “serious and adult” task turned out to be perfectly suited for him! And what a reward he received after completing this stage! At last Balrog could sit on his case and see if it doesn’t break under his weight. Can you see the joy that testing effect of his work gave him? And the case passed the test perfectly – but you better see by yourselves! 😀

Byłem zaskoczony szybkością pracy – myślałem, że czteroletnie dziecko znudzi się i będzie kaprysić, ale tak “poważne i dorosłe” zadanie okazało się w sam raz dopasowane do jego możliwości! A jaka nagroda czekała na zakończenie tego etapu! Wreszcie Balrog mógł usiąść na swojej skrzyneczce i sprawdzić czy wytrzyma takie obciążenie. Widzicie tę radość, jaką sprawia dziecku sprawdzanie efektów własnej pracy? A skrzyneczka egzamin oczywiście zdała wzorowo – zresztą sprawdźcie sami! 😀

Hobby Zone miniature transport case review
Final test of durability
Ostateczny test wytrzymałości

Now we only needed to glue the internal side walls – just like with the larger case. No surprise that pressing with strong man’s hands was necessary 😉

Zostało nam tylko wkleić wewnętrzne boczne ścianki – podobnie jak w dużej skrzynce. Sprawa wymagała oczywiście dociśnięcia silnymi męskimi dłońmi 😉

Hobby Zone miniature transport case review
Side walls
Boczne ścianki

Hobby Zone miniature transport case review
Strong man’s hands, aren’t they?
Silne męskie dłonie, prawda?

… and we can close it!

… i można już zamykać!

Hobby Zone miniature transport case review
Closing the vault
Zamykamy skarbiec

hobby-zone-miniature-transport-case-44
Minis are safe 🙂
Figurki są bezpieczne 🙂

To enjoy his achievement to the fullest, Balrog immediately packed some of his minis to the case and paraded triumphantly in our apartment, announcing the official end of work, and giving us opportunity to see the size of the small (in fact not that small at all, but compared to the previous one this case seemed pretty modest) case – the model on the bottom is a LotR troll, and the upper one is a Warhammer 40.000 ork. This photo depicts the size of the case (and Balrog’s pride). 😀

Aby w pełni nacieszyć się swoim dziełem, Balrog niezwłocznie zapakował część swoich figurek do skrzynki i tryumfalnie przespacerował się po mieszkaniu, obwieszczając tym samym koniec prac, a przy okazji pozwalając zobaczyć rozmiary małej  (tak naprawdę to wcale nie takiej małej, ale w porównaniu z poprzednią, ta wydawała się dość skromna) skrzyneczki – figurka na dole to LotRowy troll, a górna, to ork do Warhammera 40.000. To zdjęcie daje obraz rozmiaru skrzynki (oraz dumy Balroga). 😀

Hobby Zone miniature transport case review
Triumphant parade
Tryumfalna parada

The whole construction didn’t even take an hour – including unboxing, studying the manual, careful application of glue, pressing the elements together and victorious parade with presentation of the masterpiece he made with his hands. 😉 Bearing in mind that most hobbyists are more than 4 years old, this time can surely be reduced to half an hour, or for somebody accustomed to DIY works, maybe even 15 minutes.

Całe składanie nie zajęło nawet godziny – w tym rozpakowywanie, studiowanie instrukcji, pieczołowite smarowanie klejem, dociskanie klejonych elementów, oraz zwycięska parada połączona z prezentacją dzieła własnych rąk. 😉 Biorąc pod uwagę, że większość hobbystów ma więcej niż 4 lata, z pewnością da się ten czas obciąć do pół godziny, a jeśli ktoś jest wprawionym majstrem, to może i nawet do 15 minut.

A few final words / Parę słów na koniec

Now that the boys are no longer working and moved on to admiring the effects of their work, I can judge the outcome of their efforts. 🙂

Mahon already mentioned that the cases were well made, construction was easy (just for a 4-years-old and his slightly older dad ;-)) and according to them also well explaind in the manual.

The cases are sturdy and capacious so I can entrust my models for the time of travel to them. I usually use stuff like patafix or blutack to attach models inside transport cases, or in case of heavier models – a little modification that is drilling  a few holes in the shelves and using screws to fix the models there, especially if their bases are heavy, like the wooden ones I use. My boxes haven’t been modified like this yet, but when I am to transport a heavier model I will surely persuade my boys to modify my cases.  This will assure me that the models remain in place – they will rather snap or break than unscrew themselves from the shelves, and even then the only risk comes from these severed parts hitting others as long as I attach the models to their cases securely. A few holes should not be a problem, and the versatility and security of transporting heavier models should make up for the esthetic detriment.

Skoro chłopaki uporały się z pracą i nacieszają się dziełami własnych rąk, mogę spokojnie ocenić ich wysiłki. 🙂

Jak już Mahoń wspomniał, skrzynki były wykonane bardzo dobrze, montaż był prosty (w sam raz dla 4-latka i jego nieco starszego taty ;-)) i ich zdaniem dobrze opisany w instrukcji.

Skrzynki są solidne i pojemne, więc spokojnie mogę powierzyć im swoje figurki na czas podróży. Do mocowania zwykle stosuję masy typu patafix albo blutack, lub – w przypadku cięższych modeli – drobną modyfikację polegającą na wywierceniu kilku otworów w półkach i mocowaniu modeli za pomocą śrub, zwłaszcza jeśli mają ciężkie, drewniane podstawki. Moje skrzynki jeszcze nie zostały w ten sposób przerobione, ale na pewno przy transporcie jakiegoś cięższego modelu namówię moich chłopaków do zmodyfikowania moich skrzynek. Dzięki temu mogę być pewna, że modele się nie odczepią – już prędzej się rozkleją albo połamią, a wtedy – o ile dobrze rozmieszczę modele – jedyne ryzyko uszkodzenia wiąże się z uderzaniem odłamanych elementów modeli (lub źle przymocowanych figurek) o inne. Kilka dziurek w półce nie powinno być problemem, a jej wszechstronność i bezpieczeństwo transportu cięższych modeli zrekompensują niewielki ubytek estetyczny.

Hobby Zone miniature transport case review
Preparing for the struggle 😉
Przygotowania do zmagań 😉

If you care about keeping your transport case clean, I recommend varnishing or maybe even painting it before it gets dirty. Unfortunately unvarnished plywood is very prone to dirt, especially on the edges. Mine haven’t have too many opportunities of catching some dirt, but I saw what an unvarnished case can end up looking like! :-O

There’s another review of HobbyZone transport cases on Arbal’s blog. He described the cases there in detail, so I don’t think repeating what has already been written is of any use. Of course if there is anyone who still feels the report from my men’s heroic struggle with two plywood cases is not enough. 😉

Jeśli komuś zależy na zabezpieczeniu skrzynki przed zabrudzeniem, radzę pomalować ją lakierem lub nawet farbą zanim się pobrudzi. Niestety nielakierowana sklejka jest podatna na zabrudzenia, zwłaszcza na krawędziach. Moje jeszcze nie miały zbyt wielu okazji się pobrudzić, ale widziałam jak może skończyć nie polakierowana skrzynka! :-O

Inną, dokładną recenzję skrzynek HobbyZone zamieścił na swoim blogu Arbal. Dokładnie je tam opisał, więc nie widzę sensu powtarzać tego, co zostało już napisane. Oczywiście jeśli jest ktoś, komu nie wystarcza nasza relacja z bohaterskiej walki moich mężczyzn z dwoma sklejkowymi skrzyneczkami. 😉

Fury of the Norsemen

The day when courier coming to my office with the parcel for me is always a good day!

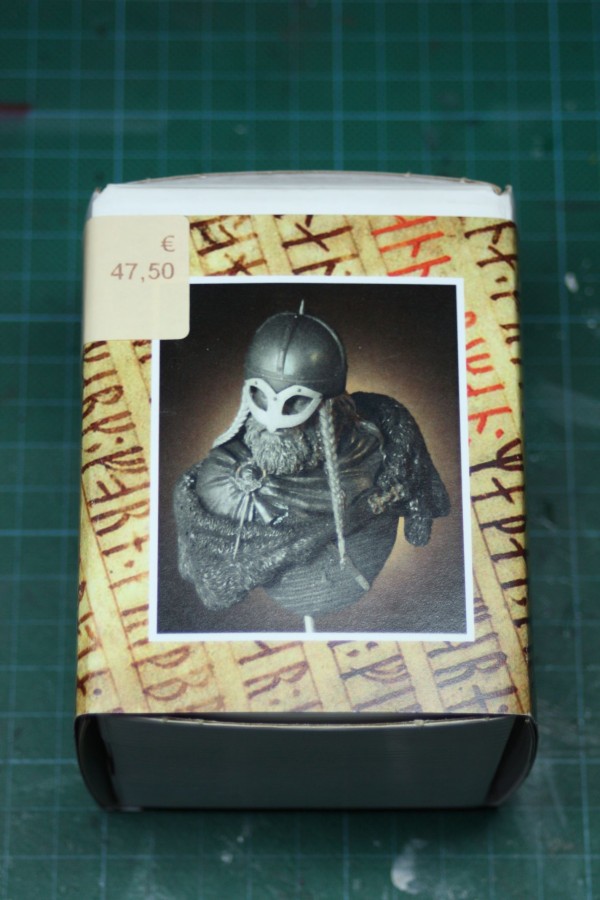
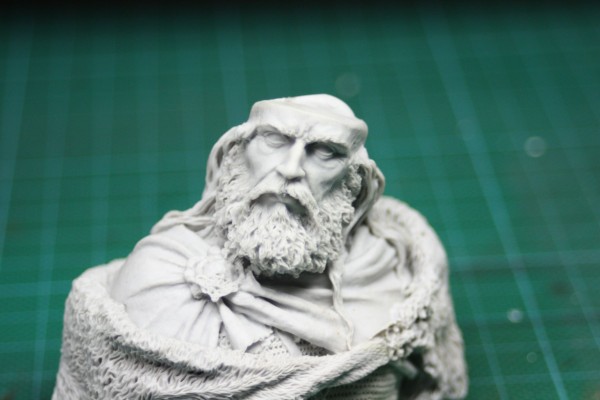
This time inside the box was long awaited Viking’s bust from Castle Miniatures. Sculpted by Yuri Serebriakov – former Seil Models sculptor – it’s one of best models in this scale I’ve seen.

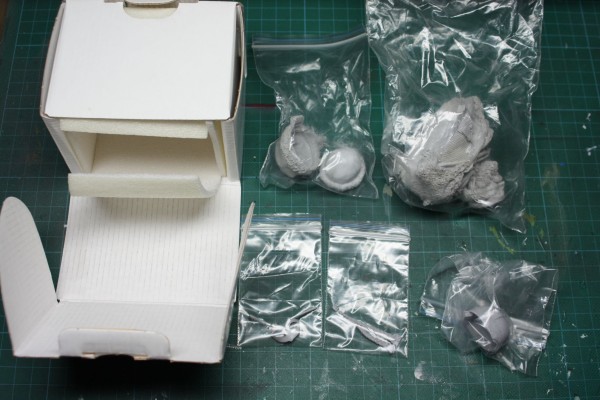
Model comes in small but thick and rigid box (box sustained pressure of 20 tomes of PWN Encyclopedia). Inside parts are protected by foam and bubble foil for addicts 😉 So if parts were not packed damaged or wrong there’s really small possibility that anything will be damaged during delivery. Model’s price is average for this kind of miniatures, but for this quality I would pay even more without hesitation.

Viking Warrior

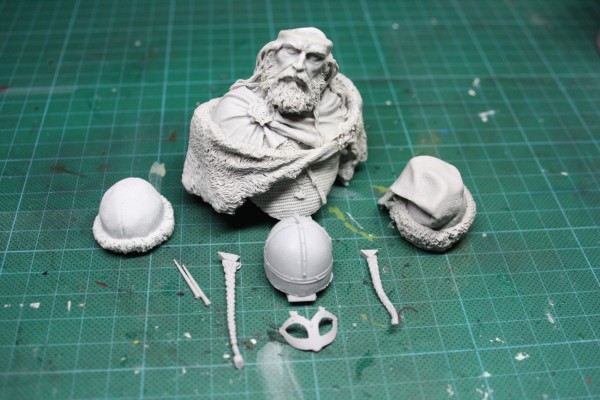
Here you can see all parts that are in the set. It’s highly customizable (for the bust…) as there are two different hats and one helmet to choose from.

Viking Warrior

Viking Warrior

The resin is of very good quality and the cast is almost perfect – no missing parts, bubbles and whole that other stuff that annoys the modeler. There are only few visible mold lines than can be removed without any problem. In fact the only thing to do is to fit the needle to the cloak’s buckle – the hole have to be carefully drilled to place the needle in the right spot.

The sculpt itself is great and very detailed. In my honest opinion Yuri Serebriakov is one of most talented sculptors these days. This model is exactly what I picture to myself when I think of viking warrior.

Viking Warrior Viking Warrior

For me it’s one of the best models in larger scale I’ve ever seen, both looking at technical part (casting, resin quality) and project and sculpt. Painting it will be a lot of fun!

Liquitex stuff

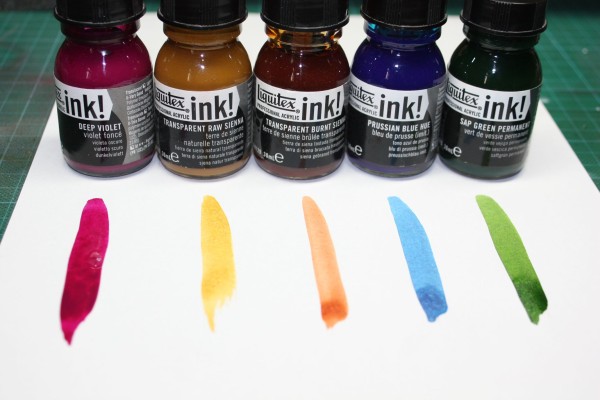
A few words about inks from Liquitex.

Few months ago, accidentally I’ve found on Youtube commercial presentation of acrylic inks from Liquitex. About two weeks later I was happy owner of few bottles of this tincture. At first I was a bit scared to use them on wider scale – their high pigmentation can be very tricky and cause massive damage on paintjob if applied careless. But treated well they’ll reward painter with great, strong colors which can be used both as filters or as main colors. Whole palette it’s about 30 colors, I use just few which I’ve found most interesting.

Kilka miesięcy temu, zupełnie przypdakowo, trafiłem na Youtube na film reklamujący tusze firmy Liquitex. Około dwóch tygodni później byłem już szczęśliwym posiadaczem kilku buteleczek tej tynktury. Początkowo trochę bałem się używać ich na szerszą skalę – ich wysoka pigmentacja może być zwodnicza i wymaga przyzwyczajenia. Niewprawnie użyte te farby mogą naprawdę nieźle nakaszanić. Lecz jeśli już się je trochę opanuje to rewanżują się doskonałymi, nasyconymi barwami, a użyć ich można zarówno jako filtrów lub jako podstawowych barw. Cała oferowana przez Liquitex paleta obejmuje około 30 barw – ja na razie nabyłem tylko tych kilka, które wydały mi się najciekawsze.

Liquitex Inks

They’re sold in 30ml glass bottles with applicator in the cap. This amount of ink lasts for a lifetime as long as you don’t want to paint the murals.

Sprzedawane są w 30ml szklanych butelkach (około 26zł/szt w zależności od sklepu). Myślę, że taka ilość wystarczy na wieki, chyba że ktoś chce tym malować murale…

Below is sample model on which I’ve used Deep Violet ink on black base with pink highlights.

Poniżej przykładowe użycie tuszu Deep Violet na czarnym, rozjaśnianym do różu podkładzie.

chaos knight wip

Overall – it’s very good product in my opinion. It gives many options of use and gives interesting effects. They’re much harder in use than old GW inks that I’m still using  (which are more washes than inks in fact) but time spent on learning pays off.

Podsumowując – jest to według mnie bardzo dobry produkt. Daje wiele opcji użycia a i efekty są bardzo ciekawe. Używa się ich niewątpliwie trudniej niż starych tuszy GW (które w rzeczywistości bardziej są washami niż inkami…). Jednak opłaca się spędzić trochę czasu żeby do nich przywyknąć.