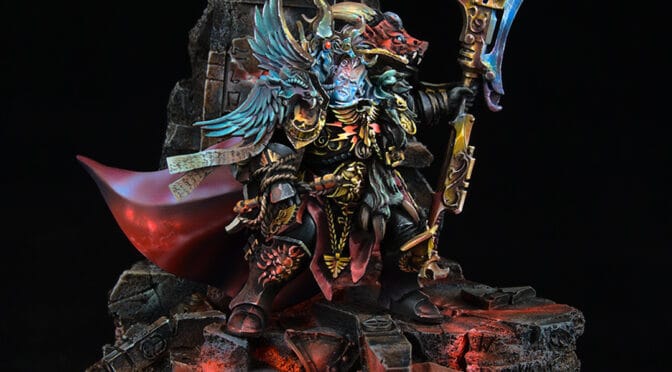
Dragon King for Kingdom Death

The Dragon King Expansion Rulebook says:

“There was once a monster that was alone in the world. Abandoned in its grief, the monster crawled deep inside its aching heart until it broke and was set aflame. Now, the power of its grief and fury pours like invisible poison from the weeping face it hides inside its hulking body.”

While it’s not a new paintjob, I still haven’t posted it here so far. So here it goes, with all the lighting effects. I had this idea in mind for my paintjob on this cool KDM Dragon King miniature.

Here are some more photos of the model, showing the Dragon King from other angles and adding a closeup view.

This model was a commissioned work, and if you would like us to paint anything for you, simply contact us and let us know what we can do for you. 🙂

Salamanders Space Marine bust

Do you remember the Space Marines busts we made? Now it’s time to post another one of them, a Salamanders Space Marine bust.

I loved those busts for how they allow to have fun painting and try different approaches. Not being limited by the restrictions usually applied to commissioned projects.

This time I decided to paint my Salamanders Space Marine bust in a more cartoony style. My inspiration was modern superhero comics with their bright colors, strong contrasts and gradients.

I had a lot of fun, playing with different light sources and testures. I didn’t even try to paint in a realistic way. Not being an expert in Warhammer 40K lore, I learned a bit about Salamanders from the Lexicanum website. It was just enough to give me some inspiration for this model.

If you want to see more photos of my Salamanders Space Marine bust, here they are

And if you would like to have this bust or to commission something cool painted by me or other members of our team, why don’t you simply contact us and tell us about your idea. We will get in touch to discuss the project with you.
In the meantime, I still have some ideas for more Space Marines busts, but it’s not easy to squeeze a hobby project into my schedule.

Constantin Valdor (in Shadowkeepers colors)

I was about to paint one Constantin Valdor for an Adeptus Custodes army, in the very usual colors. But then for very down-to-earth reasons the project had to be postponed. And unexpectedly I got a chance to paint another Valdor, but in a totally different color scheme!

My version of Constantin Valdor

This time I was asked to replace the usual golden armor with the black-and-red colors of the Shadowkeepers. And how cool it was!

After researching a bit about Shadowkeepers, I decided to use two kinds and sources of light on the model. Red light coming from below, represented the demonic enemies. Valdor being in charge of troops keeping them in check would counter them with purity of Adeptus Custodes. This is the blue light coming from inside the collar of his armor and shining onto his face. This would also match some details of his armor and the force halberd.

Both for gaming and for display

The model itself came with a removable scenic base, which I placed on a plinth. This made the model suitable for display but also usable for gaming.

I think the black background shows the light effects better. But to show how the model looks separated from its scenic base I used white background. Otherwise it would be difficult to see the outlines of both parts.

The Abaddon connection

The model was featured in Warhammer Community Hobby Roundup, which makes me very happy. Somebody pointed out that he looks much like Abaddon. And you know what? They were right! I hadn’t realized it before, but if you follow the link above you will see the comparison of both models. Totally unintentional, but funny anyway! 🙂

I enjoyed painting this model very much, and would gladly paint something just as interesting. So if you have any models you would like me to paint for you, contact us and we’ll try to arrange it! 🙂

How to make lava splashes – Tutorial

While working on my latest commission, I had to find out how to make lava for the model’s base.

Introduction

I already did several lava bases. So in order to avoid boredom I had to come up with a new idea or end up with boring and uninspired results.

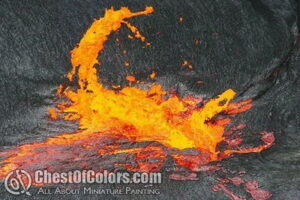
So I returned to browsing the internet for photos of lava:

Lava splashes - tutorial (1)

Lava splashes - tutorial (2)

Lava splashes - tutorial (3)

Lava splashes - tutorial (4)

Now this is something I haven’t done before! 😀

What we need to make lava

How to make lava that is boiling and splashing? We will need:

Lava splashes - tutorial (5)

  • sheet of plastic (I used a thick plastic sleeve)
  • scissors
  • source of heat (I used a candle)
  • filler putty (I used a modeling putty for plastic models)
  • Vallejo Water Effect
  • hygroscopic balls (you will find them in a new wallet or handbag, where they’re supposed to absorb moisture)
  • Maskol
  • foam
  • airbrush (you can do without it, but I used mine)
  • paintbrush
  • paints: white, black, Vallejo MC 952 Lemon Yellow, Vallejo Ink Skin Wash, Winsor & Newton Orange Ink, Vallejo MA Mahogany, Reaper Red Brick 09001, and saturated red of your choice.
  • retarder (because regular Vallejo paints tend to clog my airbrush)

So how to make lava like that?

I pulled, stretched and bent stripes of plastic over fire:

Lava splashes - tutorial (6)

How to make lava splashes - tutorial (7)

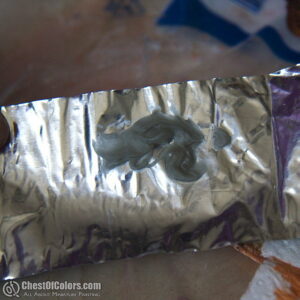
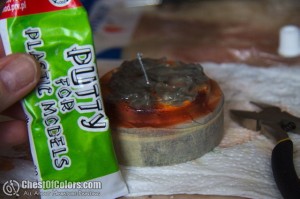
I made a test application of the lava surface on a sheet of metal. The consistence of my putty made it a suitable material to imitate lava:

Lava splashes - tutorial (8)

How to make lava splashes - tutorial (9)

I ruffled the fresh putty with a toothpick and added the splashes I formed from plastic:

Lava splashes - tutorial (10)

How to make lava splashes - tutorial (11)

Lava splashes - tutorial (12)

When the putty was dry, I finished the rest of my lava base with Vallejo Water Effect. Its thickness is similar to that of mayonaise, so it feels perfect for the task. If you want to make finer splashes of lava than mine, you can apply some water effect on a piece of thin wire:

How to make lava splashes - tutorial (13)

Lava splashes - tutorial (14)

How to make lava splashes - tutorial (15)

Painting lava

I left the base to dry overnight and in the morning I started with priming the base. Then I used my airbrush to apply several layers of paint to build up colors of lava:

Lava splashes - tutorial (16)

How to make lava splashes - tutorial (17)

Lava splashes - tutorial (18)

How to make lava splashes - tutorial (19)

Lava splashes - tutorial (20)

How to make lava splashes - tutorial (21)

Lava splashes - tutorial (22)

How to make lava splashes - tutorial (23)

How to make lava splashes - tutorial (24)

How to make lava splashes - tutorial (25)

How to make lava splashes - tutorial (26)

How to make lava splashes - tutorial (27)

I checked if it fits to the scenic base:

How to make lava splashes - tutorial (28)

How to make lava splashes - tutorial (29)

I could see I was going in the right direction. Now I only needed more contrast, so I returned to painting.

I highlighted the hottest parts once more with Vallejo MC 952 Lemon Yellow. Once more I applied Winsor&Newton Orange to increase saturation. I glazed some parts with my red. And then with the side of a paintbrush I painted cooled cracks with Reaper Red Brick 09001 and black:

How to make lava splashes - tutorial (30)

How to make lava splashes - tutorial (31)

How to make lava splashes - tutorial (32)

How to make lava splashes - tutorial (33)

Finished lava base

Finishing touches were done later, when the model for which the base was made was ready. Now you should know how to make lava splashes for your minis and see the finished thing here:

Lava splashes - tutorial (34)

I hope this tutorial was helpful to you. If you have any hints or tips, feel free to let me know about them or discuss this technique in the comments below.

— Ańa

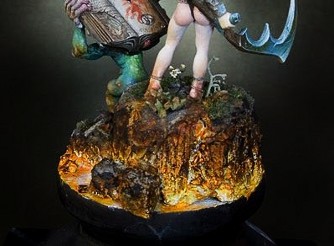
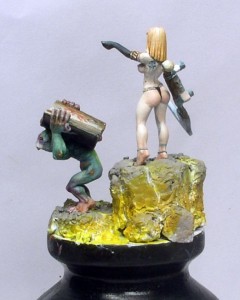
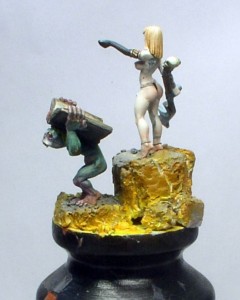
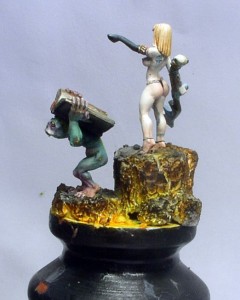
Lava tutorial – Base for Taxxis

A long long time ago…. 😉
… various lighting effects were quite trendy (and now they’re pretty oldschool, so maybe nobody cares for a lava tutorial?). Current trends in miniature painting moved away from them – which is partially caused by currently trendy color schemes. Natural colors and realistic compositions are popular now.

Why write a lava tutorial?

My ignorance made me chose this lava effect anyway, or maybe it was my contrariness? Because I still approached this subject in a different way than in the days when the whole painting community was amazed by bright and vivid colors and sharp lighting. I minimized the effect of lighting and I hope it’s enough to avoid calling this paintjob OSL 😛 After all it would make this article an OSL tutorial instead of a lava tutorial – and it’s not the purpose 😉

I don’t know if in this situation anybody is interested in a lava tutorial, but I’ll encourage you by saying painting lava can be very easy!

Photo: How to paint lava - tutorial - Taxxis queen of undead

Preparations

This lava tutorial isn’t anything unusual, so just like with most tutorials, it’s best to start with the very preparations. On grey basecoat I applied white paint to the parts where lava and glowing cracks were to be seen. I needed a few layers as the paint had to be smooth.

Photo: How to paint lava - tutorial - Taxxis queen of undead

Photo: How to paint lava - tutorial - Taxxis queen of undead

Photo: How to paint lava - tutorial - Taxxis queen of undead

Photo: How to paint lava - tutorial - Taxxis queen of undead

First colors and choice of paints

When it was dry I left white in the hottest parts, and brushed Vallejo Model Color Transparent Orange. It cannot be called drybrushing, because if you have worked with Vallejo transparent paints you know how hard it is to do. Take an old big brush, and when you load it with paint, remove the excess so that the paint doesn’t run into recesses. Transparent paints are very saturated and so without big effort I achieved first effect of glowing with just two layers.

Photo: How to paint lava - tutorial - Taxxis queen of undead

Photo: How to paint lava - tutorial - Taxxis queen of undead

Photo: How to paint lava - tutorial - Taxxis queen of undead

The heat is on!

Where the heat is less intense (which means toward the top) I applied stronger orange color. I don’t know if this stage can be omitted, so if you feel like experimenting this might be the right and not very risky moment for trying. 😉 For this stage I used Transparent Orange mixed with Transparent Red (both from Vallejo Model Color range) and applied this mix onto a smaller surface than previously with the same technique similar to drybrushing.

Photo: How to paint lava - tutorial - Taxxis queen of undead

Photo: How to paint lava - tutorial - Taxxis queen of undead

Photo: How to paint lava - tutorial - Taxxis queen of undead

Photo: How to paint lava - tutorial - Taxxis queen of undead

Photo: How to paint lava - tutorial - Taxxis queen of undead

Photo: How to paint lava - tutorial - Taxxis queen of undead

Photo: How to paint lava - tutorial - Taxxis queen of undead

Photo: How to paint lava - tutorial - Taxxis queen of undead

Cooling down…

I was happy to use the Black Ink from the P3 range, which I thinned even more, I brushed it onto the horizontal surface of the rocks and I also caught a part of the highest rock.

Photo: How to paint lava - tutorial - Taxxis queen of undead

Photo: How to paint lava - tutorial - Taxxis queen of undead

Then I took black paint and – like on the picture – drybrushed the sides in the very normal way. Once and twice, and… I don’t remember how many times, but I believe you will see when it should stop. You see – we even found use for drybrushing in our lava tutorial!

Photo: How to paint lava - tutorial - Taxxis queen of undead

Photo: How to paint lava - tutorial - Taxxis queen of undead

Photo: How to paint lava - tutorial - Taxxis queen of undead

Photo: How to paint lava - tutorial - Taxxis queen of undead

Photo: How to paint lava - tutorial - Taxxis queen of undead

Not so harsh!

To soften the contrast between blacks and hot parts I mixed Transparent Orange with Woodgrain. It’s important to keep this layer transparent, because no opaque layer would join the parts we’ve already painted.

Photo: How to paint lava - tutorial - Taxxis queen of undead

Photo: How to paint lava - tutorial - Taxxis queen of undead

If you don’t have transparent paints, then I would suggest to start the whole painting from pale and cold yellows, and then add darker and warmer shades. And when we reach this point I recommend going from yellows to dark warm reds, and only now brushing it with black paint.

Detailing

Now it’s time to improve details, as real lava is speckled, and if you feel like playing a bit more, just take white, orange, or orange with woodgrain, and splatter some of it onto the surfaces. You just need to aim well! 😉

Photo: How to paint lava - tutorial - Taxxis queen of undead

Photo: How to paint lava - tutorial - Taxxis queen of undead

Photo: How to paint lava - tutorial - Taxxis queen of undead

Finishing touches

No lava tutorial would be complete without the finishing touches… So now I brushed the upper parts of the most protruding rocks with light grey, and added some vegetation which wasn’t burnt by the heat. In normal conditions I wouldn’t expect anything to survive… but I am no expert in lavas as I live in a pretty safe region, but for this model it seemed acceptable.

Photo: How to paint lava - tutorial - Taxxis queen of undead
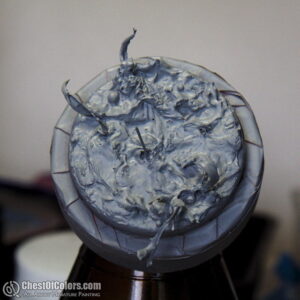
Photo: How to paint lava - tutorial - Taxxis queen of undead

The finished model can be seen in my gallery.

Tell me, please, if you found this lava tutorial helpful. There is a follow-up to it on my Painting Mum blog, which presents a slightly different approach to the subject. Can you tell me which one suits your needs better and why? Thanks!

UPDATE: If you would like to know how to make more dynamic, splashing lava, follow the link to my other tutorial: How to make lava splashes. Enjoy 🙂

— Ańa