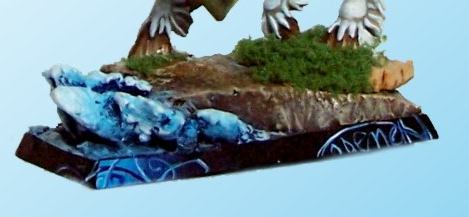
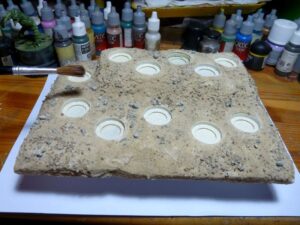
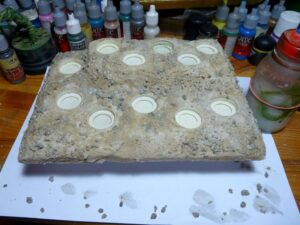
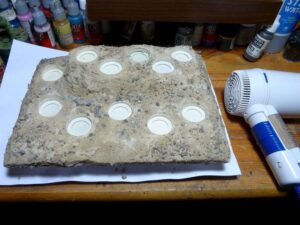
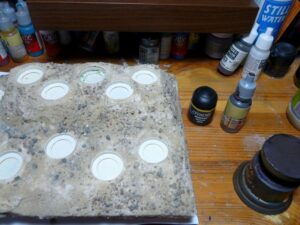
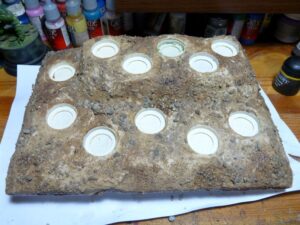
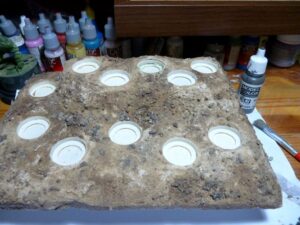
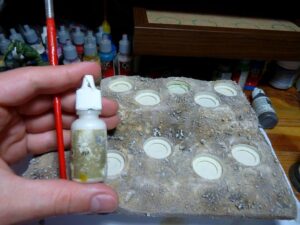
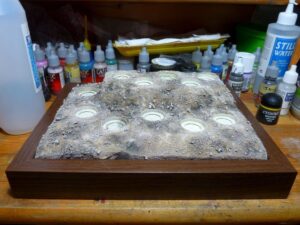
How to paint marble bases

I’ve been asked questions how to paint marble, like on the base of my Space Marines Librarian. As people seem to be interested in explanation of my way of painting marble, here it goes:

How to paint marble

I used VMC 907 “pale greyblue” as my base color.

Photo: How to paint marble bases - Tutorial

I stained the surface with dark stains of wash made from VMC 939 “Smoke”. Beginning of this stage can be seen above, and the final effect – below:

Photo: How to paint marble bases - Tutorial


While increasing the intensity of the wash I outline the streaks achieved previously by several layers of wash and make them bolder. I also create a few more streaks:

Photo: How to paint marble bases - Tutorial

Effects of this operation can be seen below, just like thickness of the base color (ie. thinned a lot) which was still used to highlight the palest parts and to emphasize the edges where colors change:

Photo: How to paint marble bases - Tutorial

I painted some veins with the base color

I used wash of VMC 938 “transparent blue” in some places, where my intuition suggested, I created spots. And then I used the same color, but thinned it less, to draw places for next veins.

With a wash of VMC 828 “Wood grain” I stained the surface just as I did before with blue.

Photo: How to paint marble bases - Tutorial

With a thin brush I painted veins – cracks, using a mix of “Smoke” and “Transparent Blue”. It was nearly black, but I didn’t use black as I didn’t want the veins to contrast too much with the rest of the surface.

I emphasized the veins with the base color and the same brush, and I added a few more veins. I also added a few spots in this color.

I was only missing a few darker accents – deeper in the sculpt. But this was done with ground old dry pastels in color of dark browns and the scenic water effect, which I am presenting below. But you will find your own ways of finishing your marble.

Done!

Photo: How to paint marble bases - Tutorial

So that’s the way I painted my slab of marble. Everybody might prefer their own ways, but maybe my method will be useful for you? 🙂

There are many kinds of marble, though. If you are interested, let me know and maybe one day I will be painting another marble base so I can take photos and show you how to deal with different marbles. Or maybe you want to share your ideas?

How to make Autumn bases

Long time ago we had an active member of our forum, whose name was Micha (better known as Jaycan). Back then he made a cool set of Autumn-themes bases for his miniatures, and (what’s even better) described the whole process. So here goes his description:

Hello!
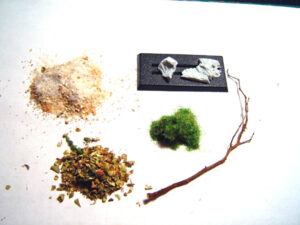
I have made some bases in Autum style. I used the following materials:

Photo: Autumn bases - Tutorial

I created some stones from FIMO and used 3 different kinds of sand:

Photo: Autumn bases - Tutorial

Then I painted the whole thing in black first.

Photo: Autumn bases - Tutorial

Then I drybrushed the sand with various browns and painted the stones with various red-browns, and finished with Bleached Bone and some metallic medium to get the effect of quartz crystals.

Photo: Autumn bases - Tutorial

The next step was the static grass…

Photo: Autumn bases - Tutorial

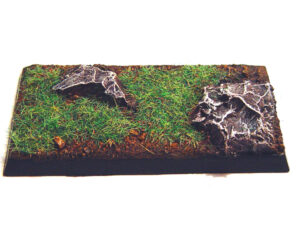
… which was later varnished and painted after drying and drybrushed with a mixture of different greens and Bleached Bone and yellow

Photo: Autumn bases - Tutorial

Photo: Autumn bases - Tutorial

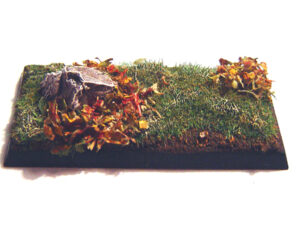
The next step was to add some leaves – painted with different brown, red and yellow colors

Photo: Autumn bases - Tutorial

The last step was to put on some wood, because if there are leaves – there must also be wood.

the finished base looks like this:

Photo: Autumn bases - Tutorial

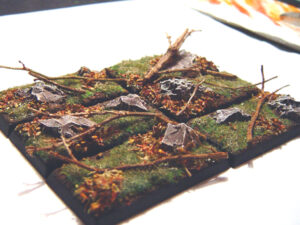
And here are some pics of six such bases:

Photo: Autumn bases - Tutorial

Photo: Autumn bases - Tutorial

I hope it’s helpful 🙂

greets

— Micha

Rocky seashore bases by Demon Color

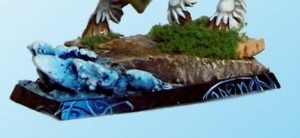
Years ago Demon_Color used to be a member of our team. At that time he described the way he created the seashore base, which he used for his mounted High Elf hero. If you want to see how to create such a base – keep reading…

Step one: Preparations

We need to acquire the following marterials:

  • the base (the most important thing ;))
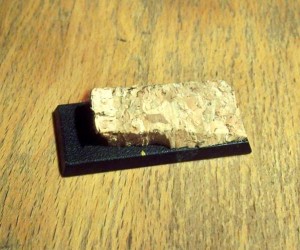
  • cork (even from a bottle of wine)
  • Poxilina (or some other fast-curing putty)
  • glue (doesn’t need to be the one I used, even white glue will do)
  • static grass (or some other kind of grass used for making dioramas)
  • modelling tools

Photo: Rocky Seashore Base - Tutorial

Step two: The rock

Now we’re taking the cork (which can come in different shapes) and model it with a modelling knife to the shape we want for our rock. We tear the edges a bit, to make the rock look even more like a rock.

Our rock can’t cover the whole base, because we want to sculpt some sea waves on it, too. I suggest to make the rock on 3/4 or 3/5 of the base.

We glue the modelled cork to the base.

Photo: Rocky Seashore Base - Tutorial

Step three: The waves

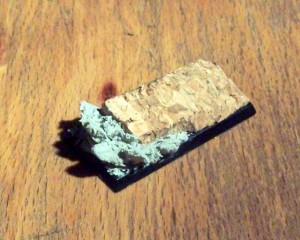
Now we get down to modelling the sea waves. We cut off a 4-5mm thick block of Poxilina, and mix it until the colors blend with each other. We attach it to the part of the base, where we wanted the waves to be, and model it with a dentist’s spatula/ carver or a modelling knife.

Our moves have to be quick and firm. We need to remember that a wave hitting ricks is something undefined. Use your imagination (but don’t exagerate, because there still has to remain some room for the mini ;)). Poxilina is cured after some 10 minutes so you have to hurry and work quickly. 🙂

Photo: Rocky Seashore Base - Tutorial

Step four: Painting

Now that we have everything modelled (and our hands washed after working with this toxic stuff) we can start painting.

I suggest using the following paints for this purpose:

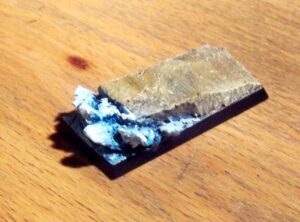
Water: GW (Midnight Blue) – (Midnight Blue + Ice Blue) – (Ice Blue) – (Ice Blue + White) – White

Rock: GW (Bestial Brown) – (Snakebite Leather) – (Vomit Brown) – (Bleached Bone) – (White)

Use drybrushing of course 🙂 But for the waved I would suggest wetbrushing, and a lot of paint. If you feel like wetbrushing the rock, you are free to do it 🙂 I would even recommend it for better effect.

Photo: Rocky Seashore Base - Tutorial

Step five: Finishing touches

So we’re finishing our work. 😀

Now we only need to attach the mini to the base and to sprinkle some grass over the rock.

And don’t paint these patterns because they’re my trademark 😉

Photo: Rocky Seashore Base - Tutorial

— DEMON COLOR

Artemis – how I painted the miniature

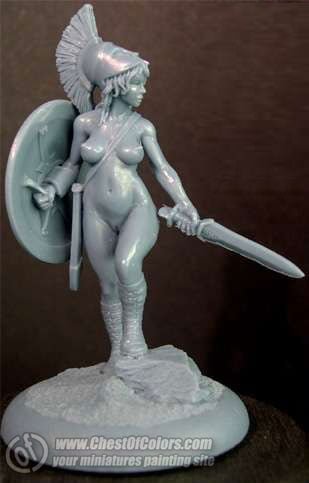
Artemis was the model which won me the Femme Fatale II contest. Painting it was a big challenge for me – because of the scale and several problems I encountered. You can read about my Artemis – how I painted the miniature and what I learned from my problems. Maybe it saves you some trouble?

Introduction

Painting of Artemis was done in the same period when I painted the girl in the eggshell – just one step earlier, but also one step after the
sexy female dwarf from Hasslefree Miniatures. I may be repeating myself, but it all was a lucky coincidence at that time, or maybe I just think it was? Anyway the curtain was removed and I saw a lot of new options.

Photo: Artemis - how I painted the miniature - Tutorial

In addition to this we received some secret knowledge ;-))) acquired during a painting workshop with Jeremie “Bragon” Bonamant by our friend from Poland: Illusionrip. In the same time our website – Chest of Colors – was updated with a tutorial (by Morsi) about painting skin, which made my knowledge (acquired from Mahon and Illusionrip more complete. I learned how to “sculpt” and model shapes with colors, and even how to choose colors suitable for certain effects.

But theory is just theory, and what about practice? The dwarf was easy to improve with glazing, so I wanted to test my abilities even more. And the best model to learn painting skin is a nude model 🙂

Photo: Artemis - how I painted the miniature - Tutorial

My perfect Artermis

Artemis was still a new release, but her potential was already noticed by many painters and in a few days new versions kept popping up. I don’t think anybody will feel surprised or will mind me saying that when I visited CoolMiniOrNot in search of inspiration, I found that my perfect Artemis was already painted. Sometimes you just see a paintjob and already knoiw that it’s the perfect version and nothing better will be done with this miniature, because this is THE right paintjob. This harmony and synthesis of the paintjob and the sculpt – looking as if it was made just for that paintjob.

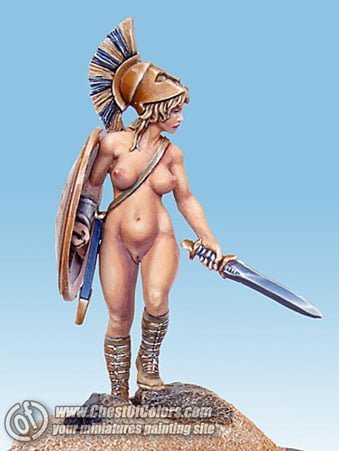
Of course you should know that I am talking about Fluffy’s (Ali McVey’s) paintjob. And not wanting to create a poor copy of her work, which would be too easy, I treated it as a challenge. The new goal was to find the new image for her, to put some new atmosphere into her. And it was a very difficult thing to do is fighting when you feel you already lost… As if it wasn’t enough that my painting quality was inferior, also the choice of the right mood and image for the miniature…. I hope I at least managed to create the opposite of Fluffy’s version – hers is full of power and strength, it is a real threat for the enemies, and the weapon in Artemis’ hand leaves no doubt. So I created a delicate, gentle version…. I wanted people to think “what this mite is doing here?” after seeing her.

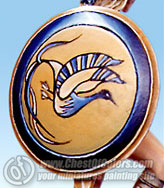
The color scheme also had to be different, so the opposite would be a blonde, and I decided to go into yellows. This also matched the sandy base. And if Fluffy’s work was in warm colors, mine would be colder. And the blue color was added to the palette only when I was looking for a pattern for the shield and I found a painting of a plate decorated with a painting, which I later used as my source of inspiration. I recreated its colors and this decided about the colors of the whole miniature.

Photo: Artemis - how I painted the miniature - Tutorial

Different method

I have to admit it was the first time I wanted to create a general vision of my project before painting. Usually I approach painting pretty spontaneously, and I assume that nothing good was created with thinking alone. So when I have an idea for a part of a miniature – I just start with it, and the rest is created as I go on with painting. This work was an exception. Maybe it was like this because I had to create a totally new idea? When I start painting I usually know what mood I want to achieve and what I want to focus on. Here I was off my usual tracks, so I had to force myself to a different vision, and direct my mind to a new direction, new imagination.

NMM

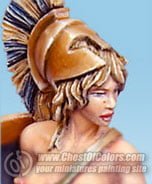
Having painted the shield I still had no courage to make an attempt of painting the skin, so I started with the helmet. On the female dwarf I tried painting gold NMM without using yellow, and I wanted to change my tried method because my imagination wanted me to take another step forward and try new things. I won’t go into details, because I am to write about Artemis, not the dwarf. The helmet was a continuation of my struggle with the new method. I often read about other people’s methods and after reading I don’t follow their descriptions step-by-step, but am working my own way – only incorporating some ideas into my method. That’s what I did with the gold NMM without using yellow. I still missed the tint of yellow in my transitions, and I felt they are bland and boring.

Photo: Artemis - how I painted the miniature - Tutorial

You may know that Vallejo “Cobra Leather” isn’t as yellow as Citadel Color “Snakebite Leather”. I noticed it and found my own way of achieving the effect: when I paint starting from white to Cobra Leather, I don’t blend the colors, but just apply glazes of Cobra Leather. If it’s too difficult for you, you can try painting the transition with any method of blending but leaving more highlighted space than necessary and then glazing a part of the highlight with Cobra Leather. This way gold is still yellowish and you don’t need any extra color for this. That’s how I painted the helmet and only now I am bold enough to paint a part of a miniature with glazing alone.

Photo: Artemis - How I painted the miniature - Tutorial

Problems with the skin

While painting the skin I noticed that paints were behaving in an odd way.
Overcoming this cost me much effort and stress, and you can still see traces of this fight when you compare the front and the back of the miniature. I started with the front, and I was unable to understand why I keep peeling the previous layers off when applying next layers of paint. 🙁 I was deperate and the effect was like the sediment on the surface of tea which is left for too long. Just as if the brush cracked the surface of previous layers of paint. And it really was what was going on, because I didn’t find out that my usual mix I used for thinning paints does more bad than good this time. I never experienced anything like that before, but I never used paints thinned so much before.

Photo: Artemis - how I painted the miniature - Tutorial

Generally I use a mix of distilled water and floor wax (the mix called “magic wash”) for thinning my paints, and it breaks the surface tension, improves the flow of paints, and makes painting easier. Somewhere halfway during my painting I realized what the problem was and I started using water alone. When you’re painting with glazes you don’t want them to create additional “layers” but to change the color of previous layers. It’s like painting with watercolors, so when you add pure water there’s nothing to crack.

Now it went faster and much neater! I didn’t have any bigger problems with placement of lights and shadows. First I checked their placement by keeping the miniature under a lamp, and then I stubbornly refused to add more contrast. Now I think that it’s this way when somebody doesn’t feel too sure about their abilities in something, that they don’t want to pay too much attention to it. And I am still learning to achieve this strong effect of a model emerging from darkness. It’s another challenge for me, and I am preparing for it.

The Base

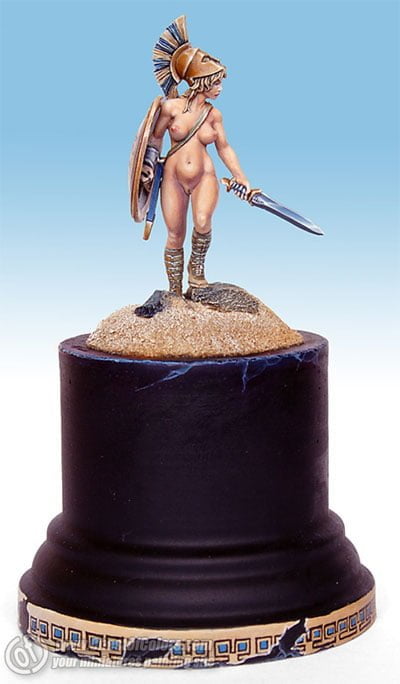
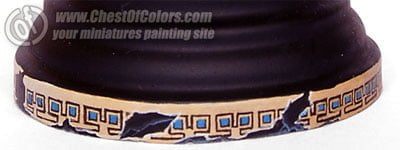
But let’s return to Artemis – I think there’s still something I should put in words, something which usually is very controversial and I would like to explain in this article. What I am talking about is the base. I heard many different opinions on this subject. I must confess I didn’t think about it too much because in my imagination it was immediately tied with the whole concept and I couldn’t imagine that Artemis and the base might not create a feeling of integrity. The shape of the column was more important to me than its size, because it just belonged to the subject. Initially I wanted to paint it in a marble pattern, but Mahon told me that the column shouldn’t attract too much attention, as this would distract from the miniature. Probably he was right, so I chose to leave the column almost totally black. I just added a partial pattern and some cracks on the surface, because I couldn’t resist painting such an inspiring block.

Photo: Artemis - how I painted the miniature - Tutorial

Photo: Artemis - how I painted the miniature - Tutorial

Final words

I hope you don’t mind not finding any suggestions as for the order in which I painted the miniature here. Especially in the case of the skin it was simply impossible, because – just as it often happens with the first and unsure steps – my actions were not fully considered and studied, but more chaotic and uncertain…

I wish you prolific painting with no fear of entering unknown regions of this hobby 😉

Making display base for a dozen or so miniatures

Hello after long break!

I didn’t plan this long delay but life has proved me during few passed months it can mess with anyone when it’s least expected.

Besides – and much more important actually – I am constantly branching out so my hobby time was replaced with browsing real estate papers – hope it’ll be worthy all the time and effort…

Who needs a display base?

Anyway – even though there’s much less time for painting I just couldn’t refuse myself playing a skirmish game once per a week or two and recently we’ve been working hard converting old Necromunda rules to make the game more exciting.


Photo: How To Make Display Base - Tutorial

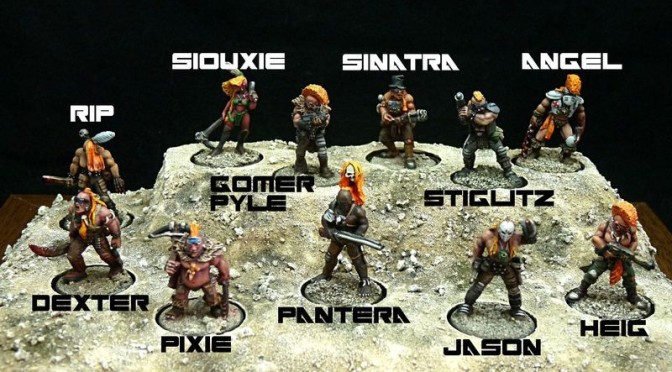
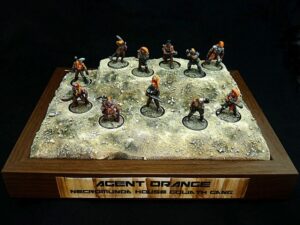
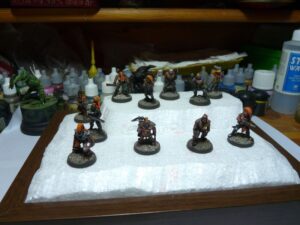
That leads to the definitely biggest hobby of achievement of last months which was finishing whole gang of Goliaths – based on EM4 minis. I like these bastardos so much I decided to give them display base so they look nice standing in my display case, waiting for next battle. It takes less than a day to finish base like I made and that’s what the article is about.
Please note – Chest of Colors is very friendly community so the original text had to be slightly adjusted to be nice as well but if you want to read FUUK-friendly version – just visit my blog at Plinth Country.

What will you need?

Apart from ordinary hobby supplies try to get some plaster (or any other filler: the cheaper – the better), photo frame or display plinth of some
sort and if you plan to take some wip-photos – wife, girlfriend or brother will be useful as well.

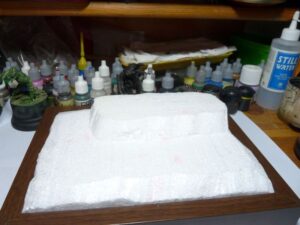
So I started by choosing photoframe – it’s pretty cheap, you can buy it in store like IKEA and it’s perfect for the job. First or all I removed glass – you can throw it away. I was also trying to mark spots for base sockets which turned out totally useless bit later.


Photo: How To Make Display Base - Tutorial

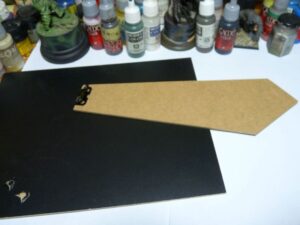
First of all I broke wooden frame support off the frame back.


Photo: How To Make Display Base - Tutorial

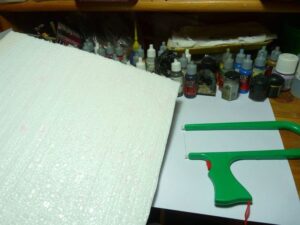
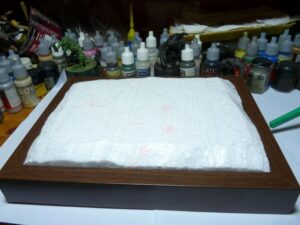
Another step was cutting the styrofoam sheet to fit the frame – wallpaper knife used. To get more precise cut I used hot wire thingy. I inserted the sheet into photoframe – as you can see it fits pretty well so we can proceed.


Photo: How To Make Display Base - Tutorial

The bottom was glued to the frame. I used solid amount of polymer glue to be sure it won’t fall off or whatever. If you don’t trust the glue only – hit the base with some paperclip pins.


Photo: How To Make Display Base - Tutorial

Creating the terrain

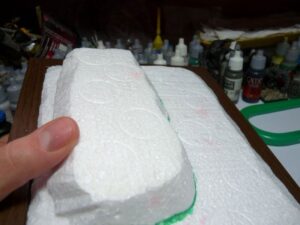
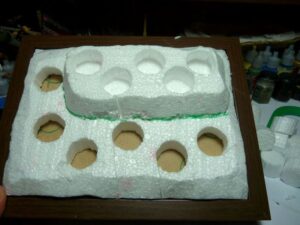
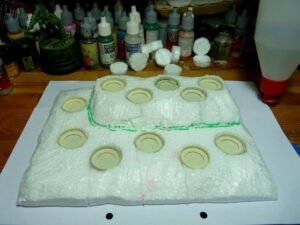
For better minis presentation I decided to add small elevation in the back of the display area. I plan to place 5 gangers on it and rest of the gang – on lower level.


How To Make Display Base - Tutorial


How To Make Display Base - Tutorial

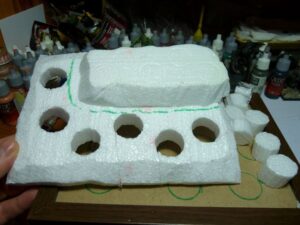
Time to mark final destination of the miniatures on the display base. To do it I simple pressed bases onto the styro – it will be helpful while cutting holes for the sockets.


How To Make Display Base - Tutorial


How To Make Display Base - Tutorial

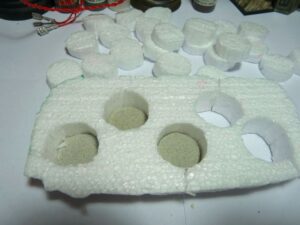
Cutting is easy – hot wire deals with styro with ease. All you have to remember about at this stage is cutting holes slightly bigger than bases.

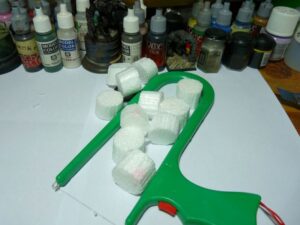
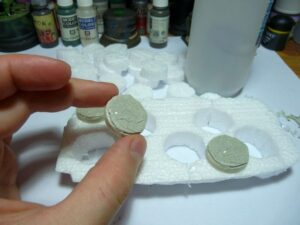
Also don’t throw away cylinders left after cutting the thing – these will be useful a bit later.


Photo: How To Make Display Base - Tutorial

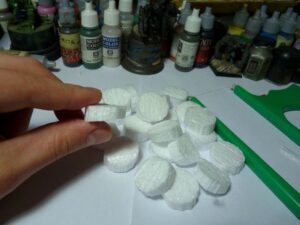
It’s time to prepare styro-plugs for the work ahead. I simply cut them in 2 slim parts – don’t have to be very precise at this step, these parts will be just a filler.


How To Make Display Base - Tutorial


How To Make Display Base - Tutorial

Making sockets for miniatures

The plan is to fill holes in the base with sockets and prepared styrofoam for better bond.


Photo: How To Make Display Base - Tutorial

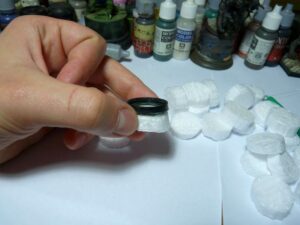
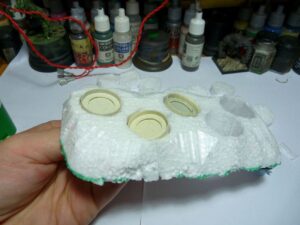
The socket was made of citadel paint pot lid: if you use these paints it’s good idea to collect the lids – inner part is just PERFECT for 25mm round bases*. I still have some pots from Citadel range but because I mostly use Vallejo brand I made a single socket and recasted it for
the whole Necromunda gang.


Photo: How To Make Display Base - Tutorial

The procedure is simple:
Put the styrofoam on the back and place sockes in the holes (I told ya to make the holes slightly bigger, didn’t I? 😉 ).


Photo: How To Make Display Base - Tutorial

Hit the sockets with some glue – once again polymer (it’s really fine but it requires some time to try) and then cover it with
slim styro plugs.


How To Make Display Base - Tutorial


How To Make Display Base - Tutorial

Texturing the surface

Now we’ll fill the gaps and give the base better surface to glue the sand bit later.

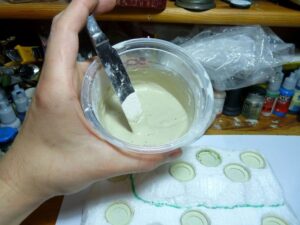
I took some plaster and mixed it with water until if got consistency of yoghurt (more less)


Photo: How To Make Display Base - Tutorial

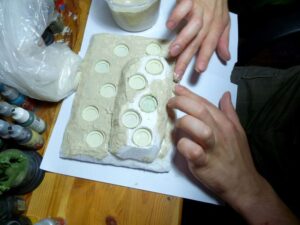
At first I was trying to apply it on the base with knife or some spatula but after 5 seconds I realised fingers are much better for this job.
Remember I wrote there will be wife / gf / bro required? That’s it!!! That’s the stage!!!! I couldn’t play with plaster and take pictures
without making the camera really dirty (and probably – ruined if the wet plaster hit the lens)


Photo: How To Make Display Base - Tutorial

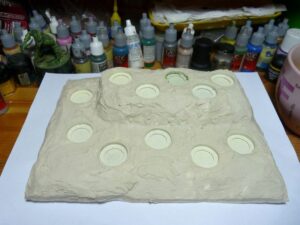
The dirty job is dome – give it some time to dry. I applied pretty thin layer so after having a coffee (right side of the pic) and taking dog for a walk (~30 mins alltogether) I could continue the work.


Photo: How To Make Display Base - Tutorial

Bases of all Agent Orange members are really simple: small gravel + sand painted with washes and then drybrushed. I think
simplicity is ALWAYS the key especially in case of gaming models. Therefore making group base was no problem at all.
I prepared some fine sand and some gravel.


Photo: How To Make Display Base - Tutorial

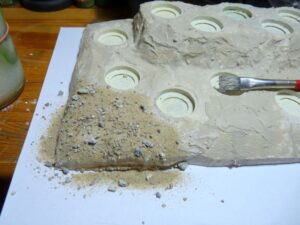
Repeat the procedure on whole base just remember – work on small area at once because diluted glue can sink into plaster if you give it some time.

When you got it done – leave the base to dry completely. And I mean it – be sure it’s totally dry before the next step which is removing excess of sand with large, soft brush.


Photo: How To Make Display Base - Tutorial

Now we have to make sure sand and gravel won’t fall off during painting

Great way to ensure that is painting whole base with heavily diluted pva glue – some gravel will fall off now but not when you will be drybrushing the base. After pva dried I painted base once again – you can never be sure enough… 😉


Photo: How To Make Display Base - Tutorial

Once again it’s time for waiting game before some paint can be slapped. Of course thank to the modern cosmic technology we can
shorten waiting.


How To Make Display Base - Tutorial


How To Make Display Base - Tutorial

Painting the display base

I tried to paint the thing more less the same as bases of all gangers. So first I mixed devlan mud wash, a bit of smoke and lots of water. Diluted paint dries up a while but it is easier to control: you can add another layer whenever you think the base should be darker.


Photo: How To Make Display Base - Tutorial

After that I added some deeper shadows using dark olive – once again heavily diluted. I chose this color because I also used it to
paint bases rims of my gangers – this trick should unify models with the big base.


Photo: How To Make Display Base - Tutorial

Wait patiently until the wash dries – the next step is drybrushing:
I started with bleached bone and then applied highlights – skull white. Both colors were used to paint bases of the gangers.


Photo: How To Make Display Base - Tutorial

The base is ok but I want it dirty – I powdered some chalk (dark olive color) and applied it on the base. Chalk was sealed with
matt spray but turpentine also works fine for this (I wrote about it in Gorkamorka Ork base text). Besides it’s MUCH cheaper than ready to use dry
pigments.


Photo: How To Make Display Base - Tutorial

The last thing was painting the sockets. My first color choice was black but all in all I decided to use olive. I mixed some matt
varnish with paint to protect the paint – minis will be put on the base after every game.


Photo: How To Make Display Base - Tutorial

Done!

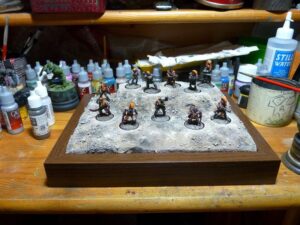
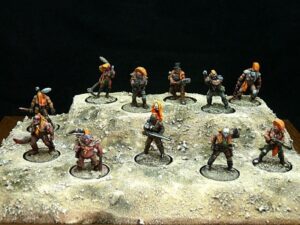
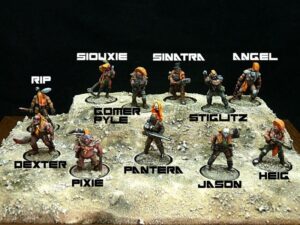
And here are pictures of the final thing taken in the photo tent: I know black background isn’t the best idea but black t-
shirt was the only think big enough to use as background – base is pretty large after all…


Photo: How To Make Display Base - Tutorial
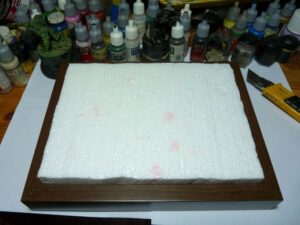

Photo: How To Make Display Base - Tutorial

Once again I hope you found my article useful and once again I hope to update the site shortly.
Cheers!
Demi

* Please note: using pot lid as base socket wasn’t my idea – I spotted it on Jakob Rune Nielsen’s** page
** Who is actually one of my fav painters in the miniatures hobby