How to sculpt crab legs and pincers

Another little tutorial for my Tyranids, this time we will concentrate on How to sculpt crab legs and pincers that can be very valuable for different projects, from crustaceans to insect segmented legs or just a nasty chaos mutation.

Step 1: Things I need

  • Modeling putty (green stuff)
  • Water
  • Hobby knife (cutter)
  • Pin vice
  • Clay shaper brush
  • Sculpting tool
  • Paper clips
  • Toothpick
  • Flat surface

Photo: How to sculpt crab legs and pincers - Tutorial

Step 2: Structure

Photo: How to sculpt crab legs and pincers - Tutorial

For starting with a strong internal structure I opened a paper clip and bended it to the desired shape.

Mixed a bit of green stuff and apply it directly on to the wire, with no precautions concerning smooth or clean green stuff surface, since it is just a skeleton sketch of the final crab leg.

Step 3: Smooth shapes

After green stuff is cured its time to start building the final shape, so I mix a bit of the paste and apply it to the structure. It’s better to work on one side of the structure and let it dry before going for the other half, so we start with the left side of the crab leg.

Photo: How to sculpt crab legs and pincers - Tutorial

Use the clay shaper brush dipped in water and start smoothing the edges of the green stuff, take your time here and use always lots of water.

Photo: How to sculpt crab legs and pincers - Tutorial

So, when left side is sculpted and smoothed let it dry and only then, go for the right side of the crab leg. You can sculpt the shape you wish just avoid it to be to uniform since it’s a crab leg irregular shapes work best. You should now have something like this.

Photo: How to sculpt crab legs and pincers - Tutorial

Step 4: Spikes and final contour

Photo: How to sculpt crab legs and pincers - Tutorial

And the fun begins, while the stress of waiting for curing times is growing on you we can use one of those endless curing breaks to sculpt some little spikes for our crab legs, do some random sizes and shapes. And for those that say crabs don’t have spikes on legs I say: Who cares it looks great. 😉

I hope everyone knows how to sculpt spikes but for the more hesitant sculptors here is how I do them. Do one little ball of green stuff and put it on a flat surface, then dip fingers on water and start pressing green stuff against surface with vertical movements, just let it dry. Piece of cake.

Now, with all stuff cured, choose one cool spike and mix a ball of green stuff, to use its sticky properties, for “gluing” the spike to the leg.

Photo: How to sculpt crab legs and pincers - Tutorial

For better blending the spike to the crab leg lay a layer of green stuff over the junction

Photo: How to sculpt crab legs and pincers - Tutorial

Its time for the final claw spike and this time we will use the paper clip extremity for a stronger merge. First with a cutter do a cut on another spike and then use a pin vice to do a small hole in it. Mix a bit of green stuff and squeeze the spike against it passing the hole on to the paper clip. This should make a stronger bond, but before you finish you need to smooth the paste with clay shaper dipped in water.
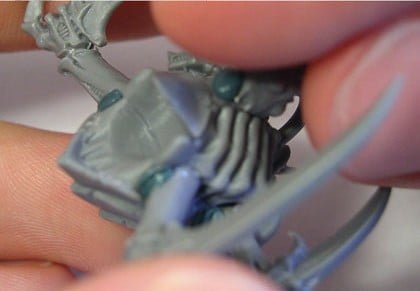
Photo: How to sculpt crab legs and pincers - Tutorial

Step 5: Texture

With all shapes finished its time for texturing those legs. I started by putting some spikes on the legs, since you already sculpted several spikes just cut them to the desired size and use green stuff for gluing them to the leg. In this process I use mainly sculpting tool and toothpick dipped in water to sculpt the junction of spike to leg. You could also use pins but since the spikes are small there’s no need for that.

Photo: How to sculpt crab legs and pincers - Tutorial

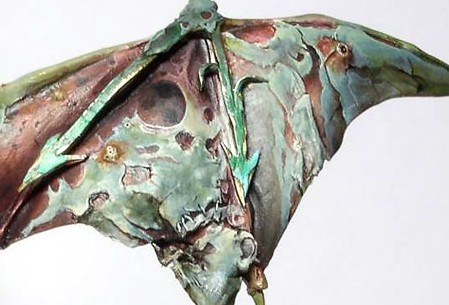
Finally I will try to do those micro organisms and corals that usually we see on crustaceans. Simply cut several random sized small balls of green stuff and again with the help of a toothpick and sculpting tool stick them randomly on the crab leg, also try to shape the balls on the leg with interesting forms.

Photo: How to sculpt crab legs and pincers - Tutorial

Conclusion

Photo: How to sculpt crab legs and pincers - Tutorial

Well that’s it, you now can sculpt crab legs for your projects, if you noticed you can do different shapes on legs or even more segmented ones, funny thing I noticed is that the smaller legs look like scorpions tails’ hope you enjoyed it.

— Pedro Navarro

How I painted wings for a Demon Prince of Nurgle

It must have been in 2008 that I painted two commissioned Chaos Demon Princes of Nurgle in that pre-heresy color scheme (white armor with green decorations). At the time everybody used winged Demon Princes for Warhammer 40.000, so these had to have wings, too. So I used wings from Heresy Miniatures B’hakoth model, converted them and painted in a disgusting Nugle way. But this only started the series of questions how I painted these rotting leathery wings. To avoid responding to every question separately, I created this tutorial showing how to paint wings for a Nurgle Demon Prince.

Photo: How to paint Demon Prince of Nurgle wings - Tutorial

Here’s the first wing. It’s more or less finished, and at this point I decided to take pictures of the process of painting the other wing.

Photo: How to paint Demon Prince of Nurgle wings - Tutorial

Generally I don’t try to analyze or organize thoughts clouding in my head in any logical way… (otherwise I might decide that if I don’t know where to start, I should not start at all ;-))

I prefer to go all ahead instinctively… to keep my thoughts busy (especially to keep my left hemisphere busy, so that it doesn’t disturb the right one :-P) and to start painting… and to hope the rest will be fine somehow.

What I did first was outlining the shape of the “skin” which remained on the wing.

I think it wasn’t a bad choice because in case anything had been wrong, I still could correct it easily, because this light blue color would be easier to cover than red.

Photo: How to paint Demon Prince of Nurgle wings - Tutorial

The blue color is probably a mix of P3 Coal Black + P3 Menoth White Highlight / Vallejo MC Ivory 918 (you can use any of the two alternatives).

The remaining surface was painted with Vallejo MC Woodgrain (transparent) 70828.

Photo: How to paint Demon Prince of Nurgle wings - Tutorial

The next photo shows the wing during application of highlights to the skin:

Photo: How to paint Demon Prince of Nurgle wings - Tutorial

Hmm, I didn’t finish it and I started shading the border between “skin” and “under-skin”.

You can see how unsystematic I was (that proves that the wing was created by Chaos ;-)).

I also added a stich on the “skin”.

Photo: How to paint Demon Prince of Nurgle wings - Tutorial

I returned to highlighting the “skin” and modified my concept for colors.

Even the previous photos shows that I added darker decolorations of a green shade (it’s a glaze of P3 Coal Black + Vallejo Smoke Game Ink). The same color as the skin on the final color of the demon’s arms.

I also added some light blue by highlighting P3 Coal Black with white (P3 Morrow White).

Photo: How to paint Demon Prince of Nurgle wings - Tutorial

That’s more or less what my painting of the demon prince’s wings was like.

Total chaos can sometimes make painting even more enjoyable, and sometimes can only make it more difficult.

This time it was ideologically necessary. 😉

And that’s what the wings looked like in the end (I only painted some chipped paint on the green arrows later.):

Photo: How to paint Demon Prince of Nurgle wings - Tutorial

If you still have any questions or suggestions – feel free to share them in a comment. I’ll try to check them and leave answers.

Enjoy your painting and share your results!

— Ańa

How to paint marble bases

I’ve been asked questions how to paint marble, like on the base of my Space Marines Librarian. As people seem to be interested in explanation of my way of painting marble, here it goes:

How to paint marble

I used VMC 907 “pale greyblue” as my base color.

Photo: How to paint marble bases - Tutorial

I stained the surface with dark stains of wash made from VMC 939 “Smoke”. Beginning of this stage can be seen above, and the final effect – below:

Photo: How to paint marble bases - Tutorial


While increasing the intensity of the wash I outline the streaks achieved previously by several layers of wash and make them bolder. I also create a few more streaks:

Photo: How to paint marble bases - Tutorial

Effects of this operation can be seen below, just like thickness of the base color (ie. thinned a lot) which was still used to highlight the palest parts and to emphasize the edges where colors change:

Photo: How to paint marble bases - Tutorial

I painted some veins with the base color

I used wash of VMC 938 “transparent blue” in some places, where my intuition suggested, I created spots. And then I used the same color, but thinned it less, to draw places for next veins.

With a wash of VMC 828 “Wood grain” I stained the surface just as I did before with blue.

Photo: How to paint marble bases - Tutorial

With a thin brush I painted veins – cracks, using a mix of “Smoke” and “Transparent Blue”. It was nearly black, but I didn’t use black as I didn’t want the veins to contrast too much with the rest of the surface.

I emphasized the veins with the base color and the same brush, and I added a few more veins. I also added a few spots in this color.

I was only missing a few darker accents – deeper in the sculpt. But this was done with ground old dry pastels in color of dark browns and the scenic water effect, which I am presenting below. But you will find your own ways of finishing your marble.

Done!

Photo: How to paint marble bases - Tutorial

So that’s the way I painted my slab of marble. Everybody might prefer their own ways, but maybe my method will be useful for you? 🙂

There are many kinds of marble, though. If you are interested, let me know and maybe one day I will be painting another marble base so I can take photos and show you how to deal with different marbles. Or maybe you want to share your ideas?

How to paint OSL effect on a jump pack

This is a little tutorial on how to paint OSL to give a little color to your assault packs, giving them a brighter and yet a very real effect making them unique in a table without spending lots of time, since the end result can be achieved in more or less than 15 minutes to a full 5 man crew.

Why go with OSL?

I’m painting an assault squad form my Imperial Fist Army and decided to give it an extra touch to the jump packs, usually we give them the burnt effect some battle damage and we are happy, but what about give them something more?

So I remember just how fantastic is the effect of a welding torch when in use, something like this:

Photo: How to paint OSL on jump pack - Tutorial

Painting OSL

Then I decided my jump packs should look like this but in standby mode, I didn’t want to sculpt the flame.

After I painted the jump packs and gave them a dirty look with black and Smoke (VGC) they looked a bit boring

Photo: How to paint OSL on jump pack - Tutorial

Next all the recesses were painted with Necron Abyss (GW foundation) leaving the rest of the reactor untouched. This was made painting always three levels: top ring, middle ring and bottom of the reactor (fig.2)

Photo: How to paint OSL on jump pack - Tutorial

The result is almost unnoticeable but in the end will give you the blue shine needed to stand out from the black.
Now begins the highlighting of the reactor by brushing just the lines that define the several rings of the reactor with a mix of Necron Abyss (GW foundation) + Magical blue (VGC) and the bottom of the reactor, leaving always the darkest parts untouched.

Photo: How to paint OSL on jump pack - Tutorial

Now we start to see results.
The highlights continue with Magical blue (VGC) but now we start to decrease the area painted leaving some of the previous color showing.

Photo: How to paint OSL on jump pack - Tutorial

At this time there is no need to be overcautious when painting since this will make the effect more real.

In the next step were used magical blue (VGC) + Space wolves grey (GW) again your stroke is getting smaller.

Photo: How to paint OSL on jump pack - Tutorial

Now we start painting with a little more detail, using Space wolves grey(GW) the brush strokes were done in a kind of checkered pattern, the top level of the reactor paint was applied in the edges, the middle level the color was painted in a cross pattern and a dot was made in the middle of the lower level.

Photo: How to paint OSL on jump pack - Tutorial

Now it starts to look like a welding torch, finally the pop-up factor was used with plain white doing small dots in the edges of the top and middle level, in the bottom dots were painted randomly to give the final look.

Photo: How to paint OSL on jump pack - Tutorial

Possible improvements

I know that the gaps should have been filed, and with them filled the final result would be much better, but this was a speed painting and the crew was already assembled.

Now with a little more time and care the end result should be fantastic. As I finished the assault crew I started to think how cool it should look given some purples to the blues, if someone tries this let me know how it looked.

Hope this was useful, have fun.
— Pandadosmares

Your miniatures have stories to tell.
Let us help them speak.

Get in touch today and let’s give them the colors they deserve.

How to make a biovore

Our former member, Zolwik, posted this step-by-step tutorial showing how to make a biovore in a pretty different way. I think his idea is pretty interesting for somebody who want to have a special and non-typical hivefleet 🙂
Enjoy!

This is a tutorial how to make some interesting non-standard Tyranids from bits that you can find in plastic Tyranid kits and some greenstuff. Conversions are very easy and fast to do, as they are generally thought to be useful mostly for players, who want nice looking army in short time.
I’m not good at writing so I’ve taken a few photos at every stage.

This time it will be how to make a biovore.

What we need

    Parts needed for a plastic biovore:

  • warrior body
  • set of warrior scything talons
  • set of hormagaunt scything talons
  • one ripper
  • left arm from warrior barbed strangler
  • chitinous armour plate from gaunt weapon sprue
  • green stuff

Photo: How to make a biovore - Tutorial

Carving and glueing

The first thing to do is preparing the warrior’s body. Cut off the shoulder armour plates to make some space for front legs.

Photo: How to make a biovore - Tutorial

Remember to round the edges with knife.

Photo: How to make a biovore - Tutorial

Cut off the rear part of the neck to achieve a flat surface- this will be the place for the ripper’s head.

Photo: How to make a biovore - Tutorial

Cut the ripper in half and match the head to the body.

Photo: How to make a biovore - Tutorial

Remove the plastic triangle that is standing out in lower part of warrior’s body and glue there chitinous armour plate from a gaunt

Photo: How to make a biovore - Tutorial

Take the barbed strangler arm and cut off the bag with spore mines.

Photo: How to make a biovore - Tutorial

Prepare the chest by flattening it with a knife and place the spore mines bag there.

Photo: How to make a biovore - Tutorial

Now it’s time for the legs. Take a scything talon and cut it apart as in the picture. Make the end of it round and make sure that it fits the holes in the main body.

Photo: How to make a biovore - Tutorial

Standard scything talons aren’t identical so you have to adjust angles or legs won’t fit on standard biovore base.

Photo: How to make a biovore - Tutorial

If you have done all the previous things you should now glue legs into place. The best method to do it, is gluing all legs at once. You should find a good pose and look out not to place them very wide because they wouldn’t fit onto base.

Green stuff time!

The next step is to hide the leg-body connections. The fastest way to do it is placing there some greenstuff. Make a small roller and place it directly on the connection. Then push some small channels with a sharp knife. This will give you a nice looking pattern.

Photo: How to make a biovore - Tutorial

Fill in any gaps near the bag with green stuff. To achieve smooth surface stroke it with wet finger several times.

Photo: How to make a biovore - Tutorial

The final stage is making his rear part 😉 Load lots of green stuff into the hole and push the pattern similar to that from legs.

Photo: How to make a biovore - Tutorial

Photo: How to make a biovore - Tutorial

Make the central channel a bit wider than the rest by pushing it with bigger knife or sculpting tool.

Photo: How to make a biovore - Tutorial

Done!

And that’s all. Biovore is ready for a battle err… I mean painting 🙂

Photo: How to make a biovore - Tutorial

And do you create your own variants of Tyranid creatures? Or do you go with the standard ones? Or maybe you have interesting ideas of conversions which could be made with Tyranid models? Why don’t you share them with us here?