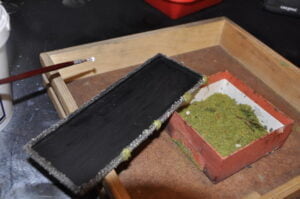
So here’s a simple tutorial on how to make movement trays. It’s the most basic way to make a tray for both normal and magnetic bases for minis, but it can add a lot to the visual impact the miniatures make.
What we need to make a movement tray
- Here’s what we shall need:
- a plate of thin steel (less than a milimiter will do but as long as you can cut it with scissors it’s fine)
- a few pieces of balsa wood
- some sand
- super glue / PVC glue(any gloue for wood will do)
- paints and some static grass
How to make movement trays
Cutting the movement tray
First: Let’s cut us a base for our tray! You must decide what kind of a tray you need. For example 3 ranks of 10 Games Workshop normal infantry is 10x20mm of width and 3×20 in depth. This will be the space inside the tray so it’s better to make it a little bit bigger.
For the mentioned example: 10x20mm is 200mm width and 60 mm depth. I usually add 15 to 20mm for to both length and width so that there will be more space in the tray and the unit will not be pushed tightly together. This is important for some units of minis can’t be placed in base to base for a number of reasons.
Also there must be some extra space for the side bars. Once you’ve decided how big must the base be, draw it on the piece of steel and cut it with scissors.
Making sides for our movement tray
Now we have our base for the tray. Cut the balsa wood so that you will have pairs of side bars. You might want to make 4 sides or 3 and leave the back of the tray open. I usually make 4 so the unit will not fall out while being moved. Glue them to the steel with the super glue. Hold it while the glue dries and make sure the side bars go well with the edges of the steel plate.
Adding texture
So here we have something that looks like a movement tray. Let’s make it presentable. Take the PVC glue and put it on the outer sides of the sidebars leaving the interior side and the underside (obviously) of the tray clean of glue. Once you applied the glue to one side of the tray throw some sand onto the tray’s side. The glue will catch the sand. Try to remove any sand that sticks to the bottom or the internal part of the tray. Try to do one side at a time.
Let the tray dry off again and one more time CHECK IF THERE IS NO EXCESS SAND INSIDE THE TRAY! CLEAN IT WITH A KNIFE (or some other tool) while the glue is still wet.
Painting the movement tray
Once the tray is dry paint it black with a base coat of black spray and now drybrush the sides of the tray with the colours of choice (for a typical summer tray I use Scorched Earth, Bestial Brown and Bleached Bone of the Games Workshop Citadel paints.)
Now that this is done take the PVC glue again and make a few dots of it along the sides and throw some static grass on the dots of PVC.
Done!
And voila! The movement tray is ready! Making it probably takes less time than it takes to read this text. 😀
Here’s an example what a unit of miniatures can look on such a movement tray. The tray looks OK, don’t you think?
— Rzymek


