How to make lava splashes – Tutorial

While working on my latest commission, I had to find out how to make lava for the model’s base.

Introduction

I already did several lava bases. So in order to avoid boredom I had to come up with a new idea or end up with boring and uninspired results.

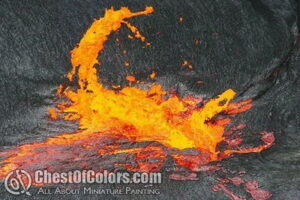
So I returned to browsing the internet for photos of lava:

Lava splashes - tutorial (1)

Lava splashes - tutorial (2)

Lava splashes - tutorial (3)

Lava splashes - tutorial (4)

Now this is something I haven’t done before! 😀

What we need to make lava

How to make lava that is boiling and splashing? We will need:

Lava splashes - tutorial (5)

  • sheet of plastic (I used a thick plastic sleeve)
  • scissors
  • source of heat (I used a candle)
  • filler putty (I used a modeling putty for plastic models)
  • Vallejo Water Effect
  • hygroscopic balls (you will find them in a new wallet or handbag, where they’re supposed to absorb moisture)
  • Maskol
  • foam
  • airbrush (you can do without it, but I used mine)
  • paintbrush
  • paints: white, black, Vallejo MC 952 Lemon Yellow, Vallejo Ink Skin Wash, Winsor & Newton Orange Ink, Vallejo MA Mahogany, Reaper Red Brick 09001, and saturated red of your choice.
  • retarder (because regular Vallejo paints tend to clog my airbrush)

So how to make lava like that?

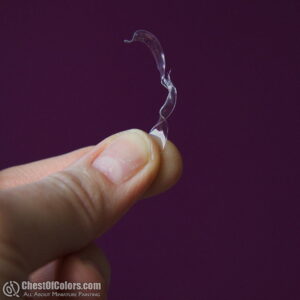
I pulled, stretched and bent stripes of plastic over fire:

Lava splashes - tutorial (6)

How to make lava splashes - tutorial (7)

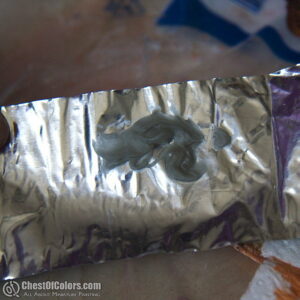
I made a test application of the lava surface on a sheet of metal. The consistence of my putty made it a suitable material to imitate lava:

Lava splashes - tutorial (8)

How to make lava splashes - tutorial (9)

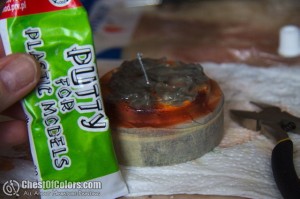
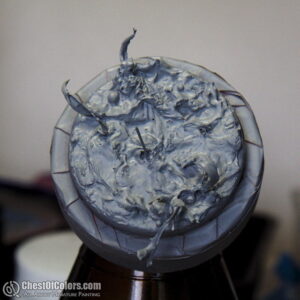
I ruffled the fresh putty with a toothpick and added the splashes I formed from plastic:

Lava splashes - tutorial (10)

How to make lava splashes - tutorial (11)

Lava splashes - tutorial (12)

When the putty was dry, I finished the rest of my lava base with Vallejo Water Effect. Its thickness is similar to that of mayonaise, so it feels perfect for the task. If you want to make finer splashes of lava than mine, you can apply some water effect on a piece of thin wire:

How to make lava splashes - tutorial (13)

Lava splashes - tutorial (14)

How to make lava splashes - tutorial (15)

Painting lava

I left the base to dry overnight and in the morning I started with priming the base. Then I used my airbrush to apply several layers of paint to build up colors of lava:

Lava splashes - tutorial (16)

How to make lava splashes - tutorial (17)

Lava splashes - tutorial (18)

How to make lava splashes - tutorial (19)

Lava splashes - tutorial (20)

How to make lava splashes - tutorial (21)

Lava splashes - tutorial (22)

How to make lava splashes - tutorial (23)

How to make lava splashes - tutorial (24)

How to make lava splashes - tutorial (25)

How to make lava splashes - tutorial (26)

How to make lava splashes - tutorial (27)

I checked if it fits to the scenic base:

How to make lava splashes - tutorial (28)

How to make lava splashes - tutorial (29)

I could see I was going in the right direction. Now I only needed more contrast, so I returned to painting.

I highlighted the hottest parts once more with Vallejo MC 952 Lemon Yellow. Once more I applied Winsor&Newton Orange to increase saturation. I glazed some parts with my red. And then with the side of a paintbrush I painted cooled cracks with Reaper Red Brick 09001 and black:

How to make lava splashes - tutorial (30)

How to make lava splashes - tutorial (31)

How to make lava splashes - tutorial (32)

How to make lava splashes - tutorial (33)

Finished lava base

Finishing touches were done later, when the model for which the base was made was ready. Now you should know how to make lava splashes for your minis and see the finished thing here:

Lava splashes - tutorial (34)

I hope this tutorial was helpful to you. If you have any hints or tips, feel free to let me know about them or discuss this technique in the comments below.

— Ańa

ForgeCraft Games bases – Review

While I was working on the insignia for my Salamanders army (you may wish to check the article on how I made it), it was obvious to me that I was going to need some nice bases to go with. I decided to get some pre-cast bases, and after browsing quite a lot of brands that were proposing some nice models in their range, the range of ForgeCraft Games bases included exactly what I was looking for: some bases with a little bit of rock, and a little bit of lave. I choose the “Fire and Brimstone”, it was perfectly fitting the fluff of the Salamanders and their original world: Nocturne.

What you get for your money

This shop proposes a few models in their catalog, and for each product, they offer you the possibility to get either a complete set of a size or a selection of some models from the same size.

I chose one complete set of each size (25mm, 40mm and 60mm). Each set costs respectively 16.50 USD11.75 USD and 8.15 USD. They contain 25, 8 and 2 resin bases.

So basically for 36.40 USD (that’s around 26€), you’re getting a nice amount of bases (35 bases of different sizes). Shipping cost isn’t that expensive. For one complete set of each size, I paid 9.60 USD (that’s around 7€).

Photo: ForgeCraft Games bases - Review
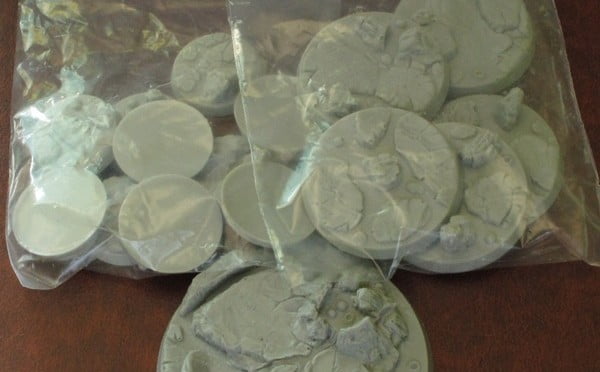
Bases are packed simple bag swith a stapled label on the bag
Photo: ForgeCraft Games bases - Review
Different sizes next to each other
Photo: ForgeCraft Games bases - Review
Fire and Brimstone 25mm base
Photo: ForgeCraft Games bases - Review
Fire and Brimstone 40mm bases

And if you’re lucky like I was, you’ll get 10 x 40mm instead of 8, like it’s said on the bag which gives you two more designs:

Photo: ForgeCraft Games bases - Review
Fire and Brimstone 40mm bases
Photo: ForgeCraft Games bases - Review
Fire and Brimstone 60mm bases

As you may notice, the bases got a single design for each of the bases of the different sizes, so there are little chances you have the same model on the same squad (unless you’re going for a squad of more than 25 guys). There are enough flat surfaces on each one of them, so that you won’t need to have your figures stepping in lava to attach minis to bases. Also, like the ones that Nameless presented in his review, designs are not overly complicated, which should save time required to paint them.

Casting quality

Here’s an example of a good cast.

Photo: ForgeCraft Games bases - Review
Good cast

Contrary to the ones Nameless presented in his review of Dark Art Miniatures bases, there weren’t many casting issues.Only a few had small mold residues and a few weren’t completely flat. You can see it on this picture:

Photo: ForgeCraft Games bases - Review
Casting issues

Summary

ForgeCraft Games are clearly providing a good quality of bases that’ll for sure fit most themes of your armies. They’re of the proper diameters, they got different yet simple designs and are still not that expensive for the quality and quantity you’re getting.

The little casting issues aren’t clearly something that should stop you buying those bases, overall, the quality is really good, and considering the amount of casting issues I had on the whole set (I order enough to have 100 x 25mm bases), I think I can live with like 5-6 bases that have mold residues or aren’t completely flat. A little bit of cleaning or polishing and you’re good to go.

When I ordered, I had an issue while I was placing my order so I contacted the shop. They’re based in Irvine California, so I had to wait the next day to get an answer, though they were pretty fast answering and from the few emails that were exchanged, I can tell that they’re really nice people who like what they’re doing and who want to provide their customer the best products.

Inmy opinion, ForgeCraft Games aren’t perhaps providing the largest catalogue like other companies, but they do provide a nice customer service (which is pretty hard to get these days) and really good products with nice casting quality considering the price ratio. I do hope they continue like this while proposing some more models to their catalogue.

— Hellspawn

How to make movement trays for your units – Tutorial

So here’s a simple tutorial on how to make movement trays. It’s the most basic way to make a tray for both normal and magnetic bases for minis, but it can add a lot to the visual impact the miniatures make.

What we need to make a movement tray

    Here’s what we shall need:

  • a plate of thin steel (less than a milimiter will do but as long as you can cut it with scissors it’s fine)
  • a few pieces of balsa wood
  • some sand
  • super glue / PVC glue(any gloue for wood will do)
  • paints and some static grass

How to make movement trays

Cutting the movement tray

First: Let’s cut us a base for our tray! You must decide what kind of a tray you need. For example 3 ranks of 10 Games Workshop normal infantry is 10x20mm of width and 3×20 in depth. This will be the space inside the tray so it’s better to make it a little bit bigger.

For the mentioned example: 10x20mm is 200mm width and 60 mm depth. I usually add 15 to 20mm for to both length and width so that there will be more space in the tray and the unit will not be pushed tightly together. This is important for some units of minis can’t be placed in base to base for a number of reasons.

Also there must be some extra space for the side bars. Once you’ve decided how big must the base be, draw it on the piece of steel and cut it with scissors.

Photo: How to make movement trays - tutorial

Photo: How to make movement trays - tutorial

Making sides for our movement tray

Now we have our base for the tray. Cut the balsa wood so that you will have pairs of side bars. You might want to make 4 sides or 3 and leave the back of the tray open. I usually make 4 so the unit will not fall out while being moved. Glue them to the steel with the super glue. Hold it while the glue dries and make sure the side bars go well with the edges of the steel plate.

Photo: How to make movement trays - tutorial

Photo: How to make movement trays - tutorial

Adding texture

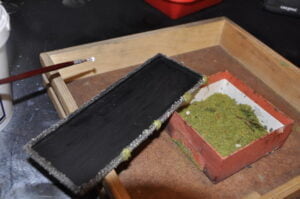
So here we have something that looks like a movement tray. Let’s make it presentable. Take the PVC glue and put it on the outer sides of the sidebars leaving the interior side and the underside (obviously) of the tray clean of glue. Once you applied the glue to one side of the tray throw some sand onto the tray’s side. The glue will catch the sand. Try to remove any sand that sticks to the bottom or the internal part of the tray. Try to do one side at a time.

Photo: How to make movement trays - tutorial

Let the tray dry off again and one more time CHECK IF THERE IS NO EXCESS SAND INSIDE THE TRAY! CLEAN IT WITH A KNIFE (or some other tool) while the glue is still wet.

Painting the movement tray

Once the tray is dry paint it black with a base coat of black spray and now drybrush the sides of the tray with the colours of choice (for a typical summer tray I use Scorched Earth, Bestial Brown and Bleached Bone of the Games Workshop Citadel paints.)

Photo: How to make movement trays - tutorial

Photo: How to make movement trays - tutorial

Now that this is done take the PVC glue again and make a few dots of it along the sides and throw some static grass on the dots of PVC.

Photo: How to make movement trays - tutorial

Photo: How to make movement trays - tutorial

Done!

And voila! The movement tray is ready! Making it probably takes less time than it takes to read this text. 😀

Here’s an example what a unit of miniatures can look on such a movement tray. The tray looks OK, don’t you think?

Photo: How to make movement trays - tutorial

— Rzymek

Dark Art Miniatures bases – Review

Manufacturer

Product

I had decided to get some pre-cast bases for my 40K army. Dark Art Miniatures range included exactly what I’d been looking for – big discounted sets of bases with different diameters. I bought two of them – rocky and lava bases.

What you get for your money

Each set costs 9.80 GBP and contains 26 resin bases: 20 x 25mm bases, 5 x 40mm bases, 1 x 60mm base. You get a whole lot for what you pay!

Photo: Dark Art Miniatures bases - Review
Bases are packed in zip-lock bags
Photo: Dark Art Miniatures bases - Review
Lava 60mm base
Photo: Dark Art Miniatures bases - Review
Lava 40mm bases
Photo: Dark Art Miniatures bases - Review
Lava 25mm bases
Photo: Dark Art Miniatures bases - Review
Rocky 60mm base
Photo: Dark Art Miniatures bases - Review
Rocky 40mm bases
Photo: Dark Art Miniatures bases - Review
Rocky 25mm bases

As you can see, bases have different designs. There are enough flat surfaces on every one of them, so there should be no problems with placing and attaching minis to bases. Also, designs are not overly complicated which should save time required to paint them.

Casting quality

Here’s an example of a good cast.

Photo: Dark Art Miniatures bases - Review

Unfortunately, majority of bases has some casting issues – small air bubbles mainly. You can see it on this photo:

Photo: Dark Art Miniatures bases - Review

Summary

Dark Art Miniatures bases are clearly provided for 40K gamers and they meet almost all gamers’ requirements – proper diameters, different yet simple and well-thought designs, discounted sets.

However, casting quality might discourage some clients from buying these (or returning for more). Personally, I don’t really mind small imperfections, but I’m sure some of customers would disagree with me and demanded better casts (can’t really blame them!).

In my opinion, this is a good product with a good quality to price ratio. I do hope though that Dark Art Miniatures are able to improve casting quality.

Simple bases in 5 steps

We keep being asked if we’re ever going to publish any tutorials for beginners in the miniature painting hobby. Sure, why not!


To get started with these articles, let’s follow these five easy steps to make nice but simple bases for your gaming miniatures.

Let me show you a simple and quick method for making bases.

What do we need to make our simple bases?

  • sand,
  • static grass,
  • white glue,
  • superglue,
  • bases,
  • cork,
  • paints: Bestial Brown, Vomit Brown (Citadel) and Lupin Grey (HMG Paints) or Space Wolves Grey (Citadel)

Photo: How to make simple bases in 5 steps - Tutorial

Step 1

Glue a piece of cork to your base using superglue.

Photo: How to make simple bases in 5 steps - Tutorial

Step 2

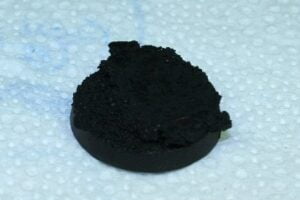
Glue some sand to your base using white glue to cover free space on the base.

Photo: How to make simple bases in 5 steps - Tutorial

Step 3

Paint the whole base black.

Photo: How to make simple bases in 5 steps - Tutorial

Step 4

Cork: paint with Bestial Brown and then drybrush with Vomit Brown.
Sand: drybrush with Lupin Grey.

Photo: How to make simple bases in 5 steps - Tutorial

Step 5

Use superglue to glue a mini to your base and white glue to add static grass.

Photo: How to make simple bases in 5 steps - Tutorial

Your base is ready! 🙂

You see, it wasn’t all that difficult.

Now if you would like more tutorials for beginners, just write what you would like to read about. What subjects would be the most interesting for you. We will do our best to follow your suggestions.