Making of ... a tree
Posted: 12 Apr 2010, o 20:37
Heres how to make real nice trees. I did this first to create a base for a swordplay scenario which will be finished soon (I hope) and wanted to share it with you.
Okay, here is what you need:
- florist wire
- acrylic putty cream (the stuff I used is made by Creartec)
- a bag of Javis "Countyside" scenics foliage or equivalent
- glue
- acrylic paint
- a base (any shape. I used a thin wood panel, glued a stone on it as a rock)
- a gripper (pincer)
- a modelling tool
First of all you need to prepare the base the tree will later be placed on. I chose a 10x5cm woodboard, glued a stone on it and gave it a basic coat of color.
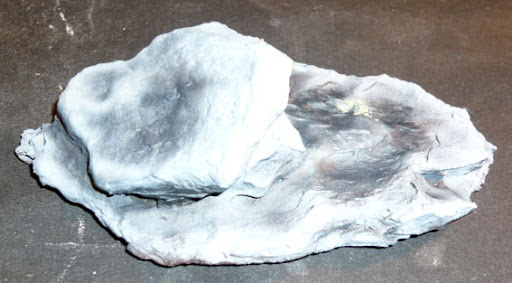 Click to see full-sized image
Now a few pieces of the florist wire need to be clipped off the roll. The amount depends on how thick the trunk of your tree is supposed to become and how many branches and roots you want it to have.
Length also depends on the size of tree your aiming at, in this case the pieces were about 30cm long.
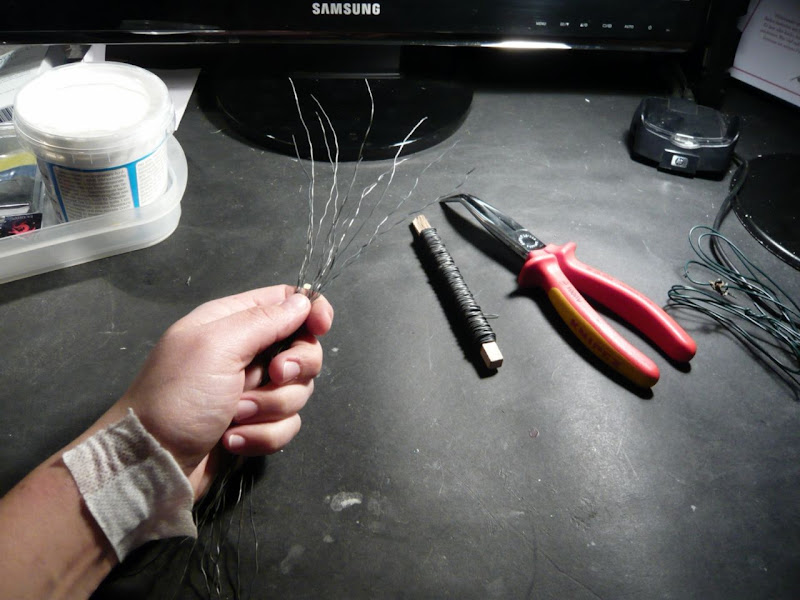 Click to see full-sized image
Now you twist the florist wire using the grippers to get the inside of the trunk, leaving out about a third of the full length at the top and about a quarter at the bottom for the branches and roots.
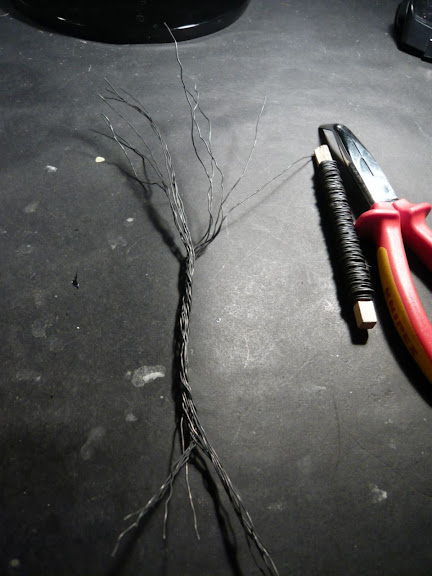 Click to see full-sized image
In the next steo ypu form the inside of the roots twisting together a few wire ends at a time leaving the ends untwisted to resemble the tapering ends of the roots.
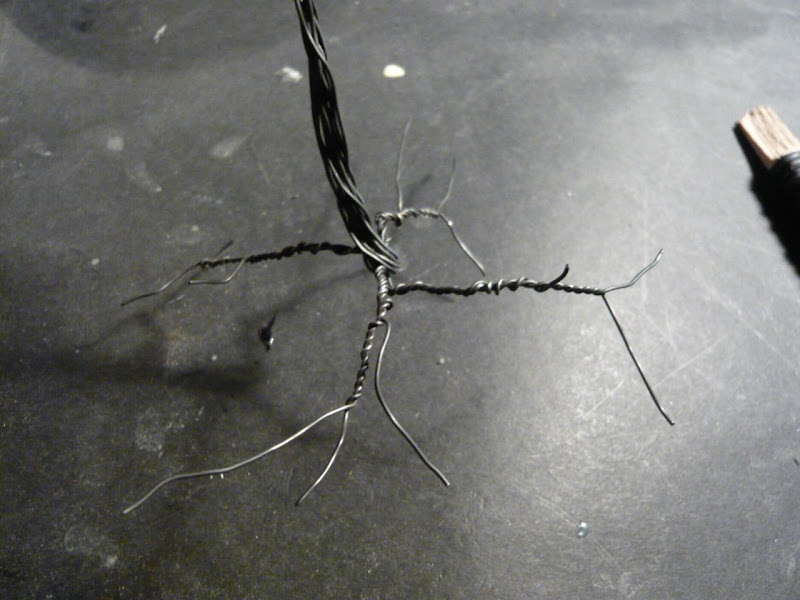 Click to see full-sized image
Now its the right moment to make sure the roots will later fit to the base, so make some adjustments here now.
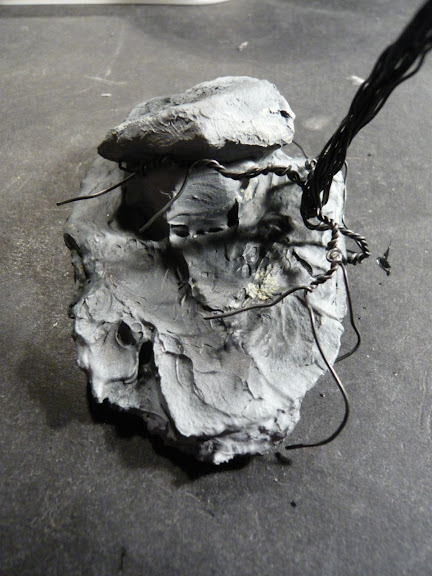 Click to see full-sized image
After finishing the roots, you do the same twisting on the top ends of your wires to form the branches. You can also add single pieces of wire here and there to get a thicker crown.
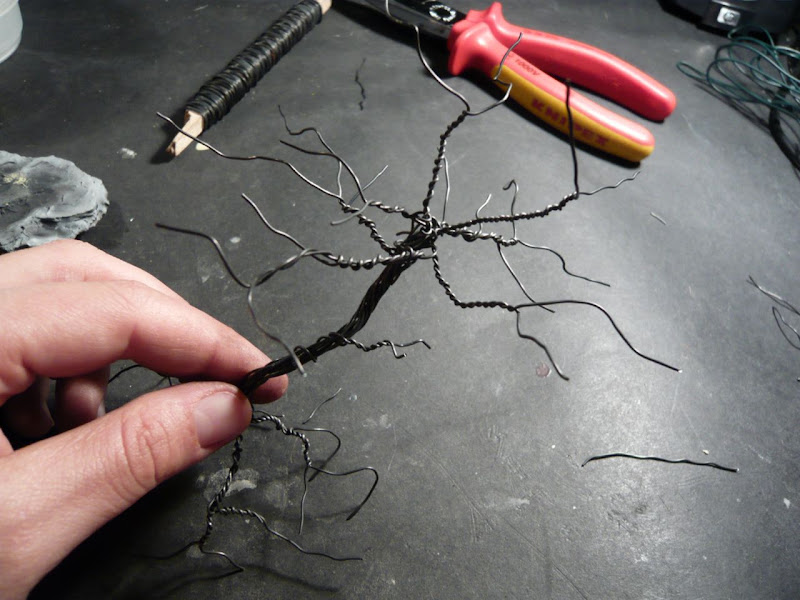 Click to see full-sized image
Now you should have something that looks almost lika tree!
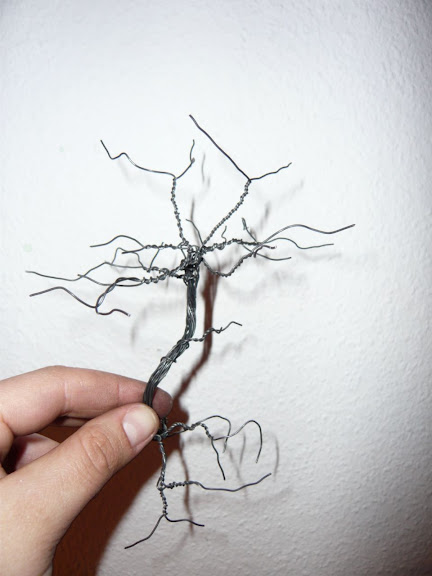 Click to see full-sized image
Now place it on the base permanently by gluing it on or sticking lose ends of the rootwires into it.
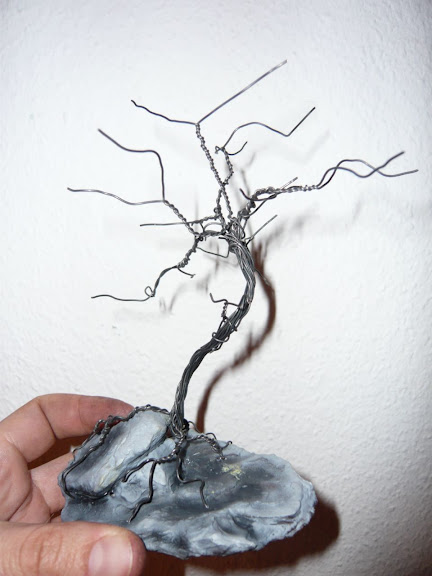 Click to see full-sized image
Now my favorite step begins!
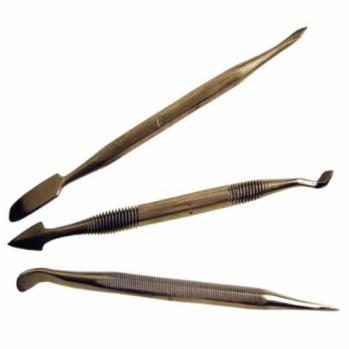
Get your model putty and the modeling tool out ... (I like the flat one, first from top on the left side for this)
 Click to see full-sized image
 Click to see full-sized image
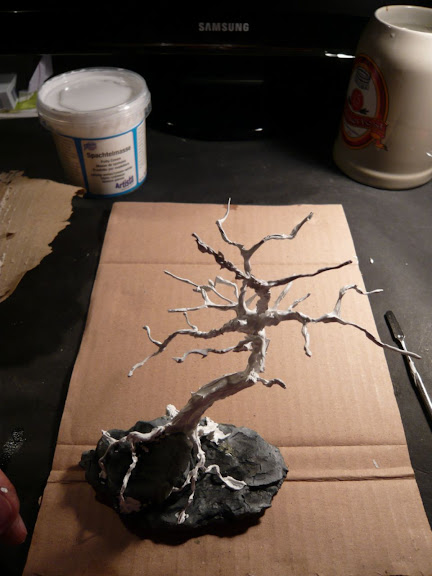
Now you have to spread the putty all over your trestle. Roots and branches should be thickest the closest to the trunk they are.
Spread the putty on the trunk from the bottom to the top in small sliding moves. Do the same on roots and branches going from the points closest to the trunk to the outside. Like this you will get the look of a thick gnarly bark.
You can also form small lines of resembling more roots directly on the base.
 Click to see full-sized image
Now you need to let the whole thing dry out.
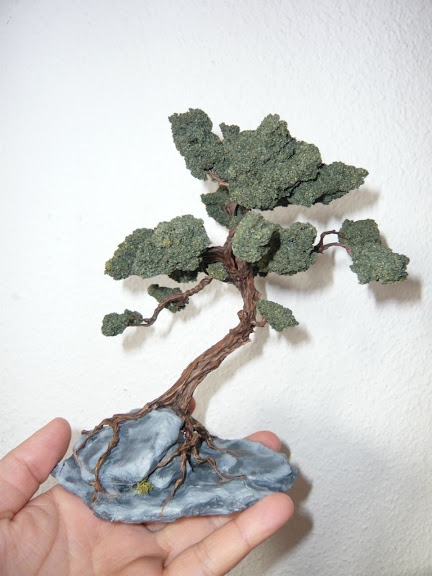
Then you can paint it. Final step will be gluing the foliage onto the ends of the branches.
 Click to see full-sized image
Finished.
Okay, here is what you need:
- florist wire
- acrylic putty cream (the stuff I used is made by Creartec)
- a bag of Javis "Countyside" scenics foliage or equivalent
- glue
- acrylic paint
- a base (any shape. I used a thin wood panel, glued a stone on it as a rock)
- a gripper (pincer)
- a modelling tool
First of all you need to prepare the base the tree will later be placed on. I chose a 10x5cm woodboard, glued a stone on it and gave it a basic coat of color.
Click to see full-sized imageNow a few pieces of the florist wire need to be clipped off the roll. The amount depends on how thick the trunk of your tree is supposed to become and how many branches and roots you want it to have.
Length also depends on the size of tree your aiming at, in this case the pieces were about 30cm long.
Click to see full-sized imageNow you twist the florist wire using the grippers to get the inside of the trunk, leaving out about a third of the full length at the top and about a quarter at the bottom for the branches and roots.
Click to see full-sized imageIn the next steo ypu form the inside of the roots twisting together a few wire ends at a time leaving the ends untwisted to resemble the tapering ends of the roots.
Click to see full-sized imageNow its the right moment to make sure the roots will later fit to the base, so make some adjustments here now.
Click to see full-sized imageAfter finishing the roots, you do the same twisting on the top ends of your wires to form the branches. You can also add single pieces of wire here and there to get a thicker crown.
Click to see full-sized imageNow you should have something that looks almost lika tree!
Click to see full-sized imageNow place it on the base permanently by gluing it on or sticking lose ends of the rootwires into it.
Click to see full-sized imageNow my favorite step begins!
Get your model putty and the modeling tool out ... (I like the flat one, first from top on the left side for this)
Click to see full-sized imageClick to see full-sized imageNow you have to spread the putty all over your trestle. Roots and branches should be thickest the closest to the trunk they are.
Spread the putty on the trunk from the bottom to the top in small sliding moves. Do the same on roots and branches going from the points closest to the trunk to the outside. Like this you will get the look of a thick gnarly bark.
You can also form small lines of resembling more roots directly on the base.
Click to see full-sized imageNow you need to let the whole thing dry out.
Then you can paint it. Final step will be gluing the foliage onto the ends of the branches.
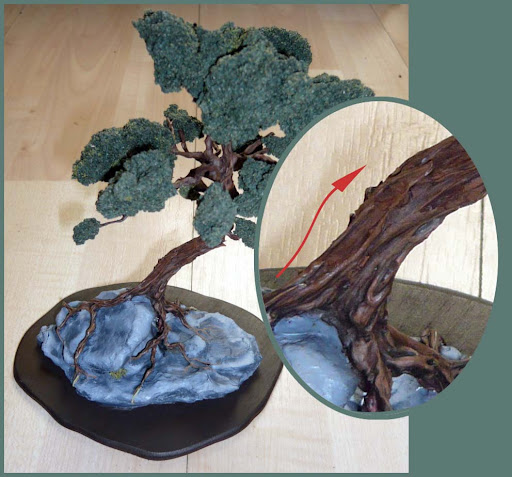
Click to see full-sized imageFinished.


 Click to see full-sized image